
 Custom Search
|
| boat plans |
| canoe/kayak |
| electrical |
| epoxy/supplies |
| fasteners |
| gear |
| gift certificates |
| hardware |
| hatches/deckplates |
| media |
| paint/varnish |
| rope/line |
| rowing/sculling |
| sailmaking |
| sails |
| tools |


| join |
| home |
| indexes |
| classifieds |
| calendar |
| archives |
| about |
| links |
| Join Duckworks Get free newsletter CLICK HERE |
|
|
| Mike's Maritime Meanderings |
by Mike Machnicki
- London - England Going Off Plan – Part Two |

Part One - Part TwoLast part of this article I told you all of my fine theories. Well, let’s see how these ideas shaped up in practice. The first job was to raise the ‘boatshed’ roof 2’ to accommodate the extra height in the fore part of the boat. For the wheelhouse a further lift of about 5’ will be needed.
As always you need a place to start, and this was my starting point…
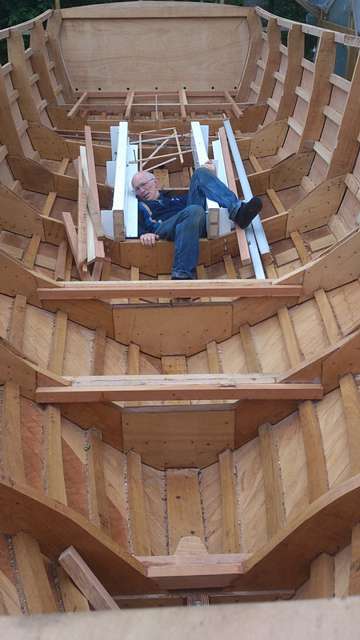
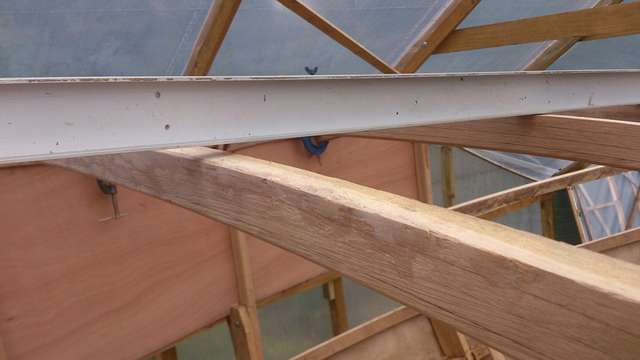
Having got the fore cabin floor joists sorted I then turned to the roof line. It was still a bit too high, so I tried to jiggle it into place, taking an inch off here and there and adjusting the angles until I was happy with the size. As standing room was not required at the front I sloped it forwards slightly. When finished the boat will definitely look more Landrover than Lamborghini due to the high fore-cabin, but I do want sufficient headroom and floor space so something has to give. This can always be moderated and disguised, to some extent, with colour and window placement. I usually create my own solutions and then consult the experts, sometimes we agree, sometimes not! In this case I bolted the 2” x 1.5” frame extensions using stainless steel bolts. As white oak can be quite aggressive with ferrous metals I decided to drill at 12mm to take the nylon shoulder washers used on the trailer and also wrapped the shaft of the bolt with a spiral of sticky tape, a Nyloc nut and two stainless steel penny washers complete each fastening, two bolts per piece of wood. It took a bit of adjusting before finally gluing it all together with some small scrap pieces of fibre glass as spacers to hold the glue, and to tie the joint. The laminated roof beams I made in a previous article were glued in place with cheeks either side to strengthen and hold the joint while it dried. The next part was to cut the outer edge of the joints, where the roof and sides meet to take a small fillet of wood, to provide a wider gluing surface, neater finish and hold the edges of the plywood together with a few screws. This job required three pairs of hands, but as only one was available a knee, an elbow some cramps a couple of Spanish Windlasses and a lot of cussing were also employed to hold the wood in place. As I want a strong roof for several people to stand on, extra roof beams are deployed midway between the frames - except for one spacing, which is 2” less to accommodate the plywood roof join at 4’. When joining wood together in this way, the initial structure can seem quite flimsy, though not so much in this case, but it soon stiffens up when other pieces are added at right angles and a surface of plywood is added.
As always the theory trips off the tongue fully formed with neither a crease nor a wrinkle. The practice on the other hand always comes with warts, carbuncles and many other imperfections. This structure was built in stages, so even though the framework was exact as soon as I applied the side cheeks it was under tension due to the plywood trying to straighten, causing the end beams to be stretched and the centre beam to be compressed. Never mind I can plane some off the ones standing proud and pack this one a bit. It doesn’t help having the cabin deck sloping forwards as there is also a small triangular gap at the rear edge of each beam which will need to be planed out and maybe some filler applied. Due to a slight lack of accuracy, on my part, in laying up the hull, the fore cabin came with a slight warp. A further over-zealous twist of a Spanish windlass also gave the structure a slight kink at the rear. Fortunately these defects are not noticed by the casual observer, I could rectify them but am quite happy to overlook them. Apart from these minor blemishes the whole structure is very satisfactory and pleasing to the eye at this point. My only concern is that it is starting to look rather tall – think low bridges and windage.
Having got this far I turned my attention to the next job, only there seemed to be several of them vying for attention:
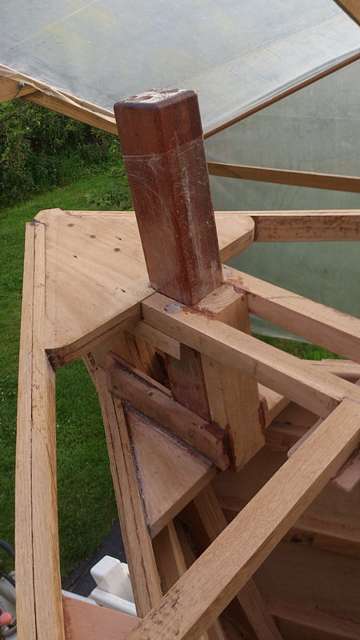
Number 1 was out as it was convenient to use the lower side rail as a step for the moment, when climbing into the boat, also I need to seal the backs of the frames with epoxy while there is still easy access. Number 2 was out as I would prefer to overlap them on number 1 and was planning to use the offcuts from this job. This left number 3. Although I haven’t fully designed the fore deck yet it will need a Samson post. Having a Samson post on the fore deck will give the boat that tough and jaunty air that says ‘don’t mess with me, utility comes first here!’ Apart from looking good it is an extremely useful item to have on a boat. I didn’t have one on my catamaran, and was constantly anxious about the strength of the deck cleats and the stress I was putting on them. The first job was to do some research and find this excellent article our very own Duckworks website. It all sounds a good idea, particularly the chain snubber. But how do I fit it to my boat? It has to go pretty far forwards to prevent the length being too long and it interfering with foot room for the bunks. It would be good to make it with oak, but I don’t want to spend a lot of money on the metal fittings which would preferably be bronze, so it will be made from kerouing (apitong) which compares with teak for strength but stiffer and more resistant to shock loads (ideal for a Samson post) it is also resistant to crushing loads and won’t rot stainless steel fittings and screws. If my winch post is anything to go by it will also weigh quite a bit. I recon 3½“ square should be about the right size. Now how about some design of the fore deck:
Not easy! My approach was to sit on the newly made cabin roof and ponder for an hour. Eventually some vague notions began to take form and I envisioned sitting here relaxing with a glass of wine as the boat slowly motored in crystal clear waters on a warm balmy evening (totally ridiculous, of course, as we don’t get days like that in Britain, or water), so I would need a seat and that can be used to house chain, rode, scrubbing brush, bucket – all the essential anchoring components. The seat would not be full width to allow for stowage of fenders either side on the pulpit side rails. Leading mooring warps forwards would pose no problem, but leading them aft would require a fairlead each side by the cabin corners, so that is where extra deck plates would be needed. I definitely don’t want smelly chain in my nice clean bilges and can’t afford the extra weight of all chain, so 30’ of chain and the rest rode. Its amazing how one decision leads to the next and pretty soon the whole thing is designed. If only putting it into practice was that easy! The fore deck worked out well and integrated nicely with the cabin front. First step was to laminate the Samson post, I decided to go with the kerouing for a number of reasons, one being that it is not so brittle as oak and copes well with shock loads, though at 3½” square, you should be able to hang the boat on it whatever wood you choose - provided the foredeck will take the strain. As it is removable it can always be replaced when the time comes. My first thought was to attach it to the stem at about 4’ length, on reflection however it turned out better to brace the post on the upper breasthook and seat it on the lower one, giving a length of 2’ and hence an extra 4” foot room for the bunk. It is so important when you are the designer, to ponder all the options and plan ahead so the result fits together well and works elegantly. Speaking of elegant, the post supporting structure was not one of my finest creations. In fact it was all held together with glue and stainless steel bolts and packed with offcuts. I think it will be strong enough under all loads, but it just looks clumsy.
The next part of the design was the wheel house, given that I had already completed the fore cabin, this structure is just the same but higher and with a wider side deck on the starboard side. Of course I will need to take into account the forward raked windows, doors and visor.
Having left a gap here in writing this article for 6 weeks I am now writing in retrospect and can say that this part didn’t turn out how I planned. The intention was to have a single enclosed space with a wide side deck on the starboard side, but the height of the fore cabin necessitated a raised bridge, leaving very little for the aft seating area by the time the 15” side deck was taken out. Having a trawl round the internet I spotted a Legacy 32 for sale and the pictures showed just what I could do with the bridge, which let’s face it, will be a much used space. As I have a side door on the starboard side the extra wide deck was no longer needed aft of this point, so out came the jig saw and off went the side deck – it’s never too late for a change of mind when only a couple of pieces of wood have been glued.
Now what about trying to moor on the port side single handed in a current - say on a river. Not so easy with only one side door on the other side. Also the boat would look better from the port side if it had a door to define the bridge. I decided that the space was more valuable inside and so only allowed enough width to place a bollard and sliding door.
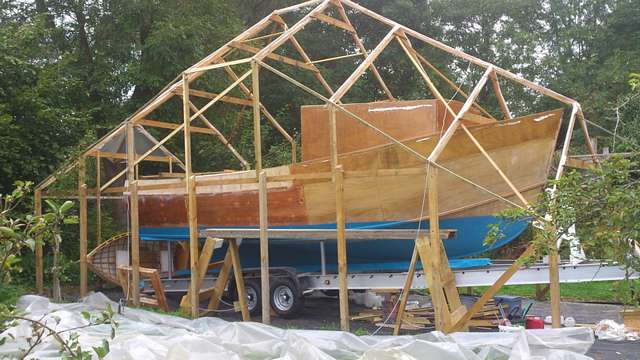
Now the boat is starting to look more like the Southwest Retro Marine Trawler 25 – I may or may not put in a dummy funnel to gain headroom when stepping down from the bridge.
What I ended up with so far! Sorry about the picture, it’s difficult to get a long shot with this poly tunnel over the boat. Not quite what I had planned when setting out, as the design has evolved since then, partly due to inspiration and partly due to necessity. Overall I am very happy with it. It just needs a coat of fibreglass to make it watertight for the winter. As the covering has been taken off the boatshed so many times for upgrades I have some snags which leak and as the shed is now so tall and the polythene getting old a big storm may damage it so a watertight boat would be desirable. Also it may be a good idea to keep the shed over winter for extra protection and so that I can paint the exterior undercover next year. So if you have read this far I recon you are probably looking for information/inspiration, so let’s see what advice I can give for those of you in similar circumstances:
***** Click HERE for a list of articles by Mike Machnicki |


|

