Part One - Part Two - Part Three - Part Four
Fiddley Bits
I have always thought that boat designers are at just about the top of the food chain. I’m just amazed that anybody can visualize a curved, tapered, bent, and shaped piece of wood, maybe the size of a car hood or something like that, and then represent it with a drawing. That in and of itself is pretty remarkable. But, these guys and gals manage to visualize and draw whole collections of these sorts of pieces; and then they magically clump together and become a boat. Sure. Somebody has to do the cutting and shaping and bending and the like, too. But, between ‘em that pretty much sums up the top of the food chain, for this kid.
Me? Can’t draw. And, I can’t seem to follow directions either. Just ask SWMBO, she’ll probably have more to say on that than I’m prepared to admit to. Anyhow. I’ve been attempting to both do the designing and the building on a home brew sort-of-tugboat, sort-of-traditional work boat, sort of. Call it a mongrel, maybe. But, for me, anyway; the various pieces spring directly from imagination to in-place without a whole lot of formality. And, when I’m putting up fence posts or cutting fire wood that’s more or less OK. In the case of this particular boat project, things got a bit fiddley today. Oh, to have a Real Designer, and a Real Boatbuilder in the shop would have saved me a lot of trouble. Heck. I would have plied them with coffee, and sea stories. But, boatbuilders and boat designers are in the hen’s teeth category around where I live these days. So, I’ve been on my own. The dog won’t even come out to the shop on days like today.
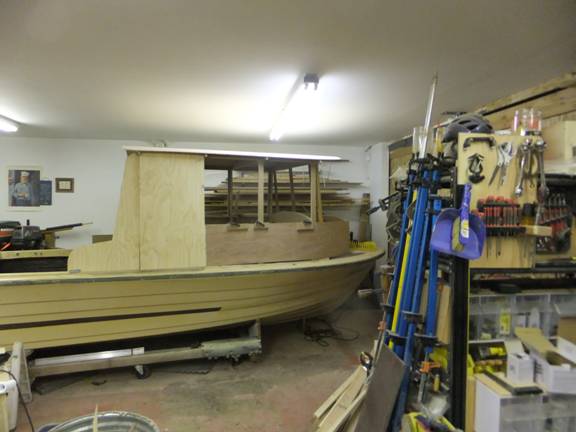
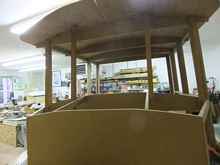
I think this was day 8 or maybe even 9 on this project. And, remarkably, what is propped up on the building cart is starting to look a whole lot like what I visualized a week or so, ago. It sort of makes me giggle when I think about how I had fretted and stewed about getting a 3-panel windshield support structure, a trunk cabin’s sides and decks to the proper camber and slope, and even getting a strengthening series of gussets into the coach roof/support beam interface. Just about everything just sort of went together.
The cabin sides slope in at a pretty constant 3 degrees. This was arrived at with the standard compromise method used in flea market bargaining. I was going to use 5 degrees, as that number was pretty easy to remember. But, when I laid it out with scrap lumber on the floor, the cabin seemed to get pretty narrow pretty fast. Now, about half of that would seem about right. But, if you are going to try to cut a whole schlock of corners and ends and other joints with a half-degree accuracy, you’d probably go use somebody else’s tools - besides mine, that is. Know what I mean? So, with a great deal of deliberation, I used 3 degrees as a sort of standard. Of course, with a twisted, sagged, and otherwise deformed 45-year old hull, it’s an even question where to put the protractor. I decided to use the floor as “level.” I think it used to slope down toward the stern. With all this weight I’ve added all over the place, it’s now anybody’s guess which way the floor is going to slope. And, what’s more, it doesn’t even seem to be in the same plane over much of the run either fore and aft or athwart ships. But, since I “scientifically” stood on that floor and propped a mocked up roof up high enough until I could walk under it without removing my ball cap; the floor became DATUM.
I could brag and carry on about how I carefully fitted everything in today. But, truth be told, most of the fitting was done free hand on the band saw, and finished off with a 30 grit disc in my angle grinder. I can think in isometric projection, even if I can’t draw it.
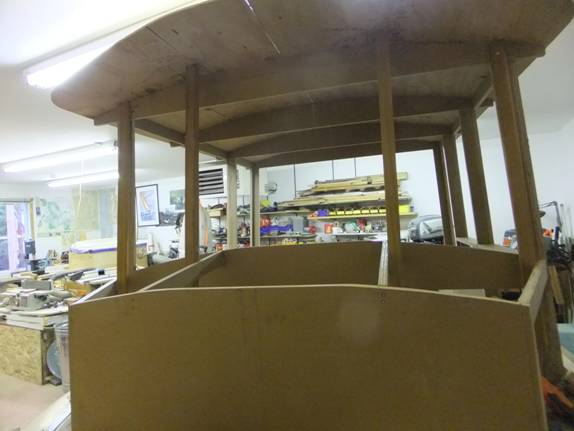
Here’s what she looks like tonight. A couple of these panels are only propped up for the camera and will most likely not even be what goes on tomorrow. The below the waist line area is just a membrane and gluing surface that will get hand-cut and shaped cedar staves. Maybe day after tomorrow.
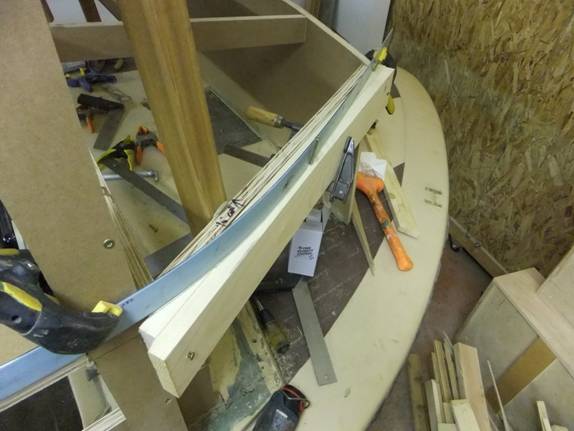
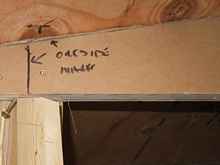
Before the cabin sides went on, I had to create “falsies” to give the trunk cabin sides a slope and curve that looks more or less OK. Yes. I almost gave in to the temptation to leave the trunk with flat sides. Next challenge is to come up with a cambered top that melds with the sides.

|
 |
 |
 |
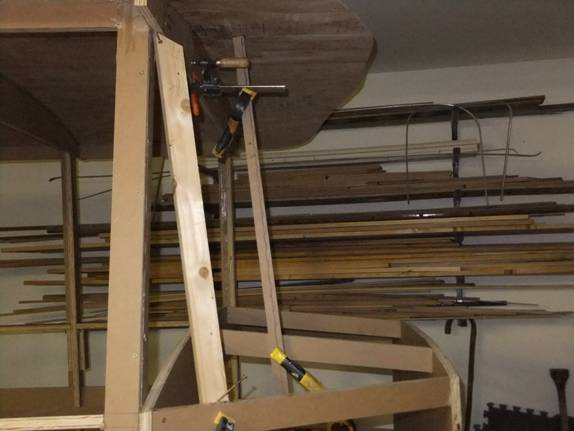
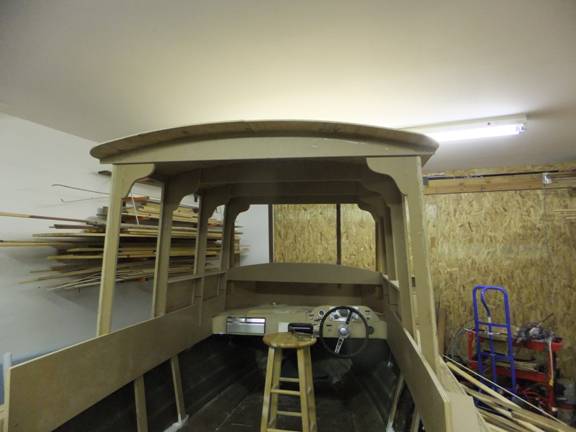
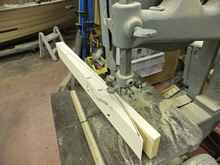
A way bigger challenge was to settle on what the windshield should look like. What resulted was a 3 piece concoction that slopes back at 6 degrees (from the floor plane), and the outboard panels slope in parallel to the forward corners of the cabin when you put your belly button on the foreward-most protuberance of the bow. See? I told you I envy people who really know how this stuff is supposed to be done. Anyhow, I think the windshield panels that I expect to build with arched tops and hardwood rail and stile frames will go nicely with this frame. It also has to accommodate a forward hatch. This hatch will probably resemble a sailboat’s drop board cabin entrance scheme. Nor usual for an at-the-bow location. But, hey. I can’t quite think of everything before it’s too late.
 |
 |
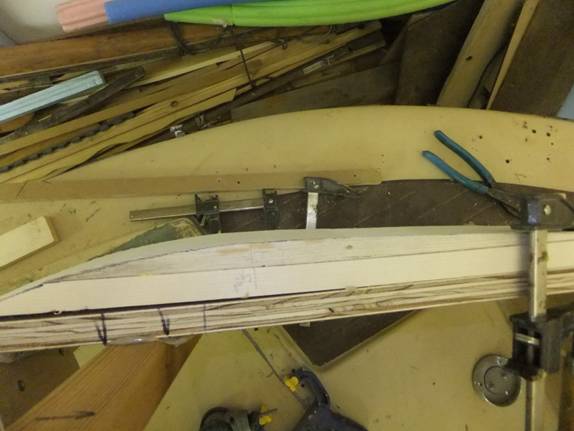
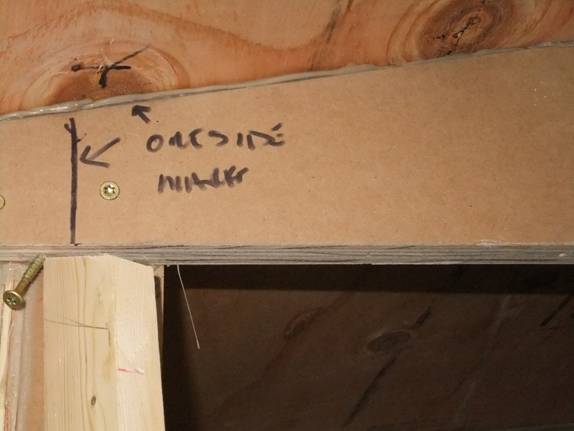
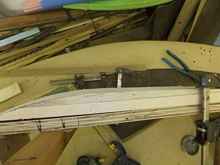
And, then, the night shift went out and made the last of today’s fiddley bits. A whole bunch of matching gussets. As soon as Sam, the engineering genius, comes home from visiting his grandkids in Arizona, I’ll get him out here to help me decide just how thin the transverse beams can be. Then, I’ll cut some sort of matching arcs into the bottom surfaces. Should make things look a whole lot more nautical. And, somebody taller than I am just might want to walk under ‘em. Movin’ on … Fiddley bit by fiddley bit.
|