Way back at the end of March I commented in a Duckworks Yahoo Group thread about using dowels to hold things together. Chuck asked me if I'd expand on my comment a bit and perhaps include some pictures. I was busy moving house at the time, then life and boating season crept upon me. This past weekend (July 23-24) I finally managed to get my act together. Here are the fruits of my labor.
The basics of the original comment was that when doweling, one should drive a bunch of dowels at a whole bunch of different angles. If they're all parallel to each other, the wood they're holding together can slide right along the dowels and come apart. When driven at different angles, the dowels will lock the pieces together in such a way that they can't come apart without breaking the dowels. Often no glue is necessary for the joint to remain strong and tight.
To demonstrate I'm using a pair of sawhorses I built. The main cross piece of the horses is made in an I-beam configuration with a 2x4 for the web and 1x4's for the flanges. I just screwed the lower flange to the web using a bunch of drywall screws. I didn't want to just screw on the upper flange though as I didn't want any metal up there where I might hit it with a saw blade or chisel. I suppose I could have glued it on, but instead, dowels are perfect for holding it in place and the wood dowels won't damage tools. I'll demostrate how I doweled them on in a moment, but first more about the saw horses.
The I-beam works out nicely for attaching the legs (also 1x4) so that they are splayed outwards for strength and stability. Simply place the top end of each leg against the underside of the top flange and attach well to the web and lower flange. I used long construction screws, but have wondered if carriage bolts with wing nuts would make stable, collapsible horses. I cut the top ends of the legs at a slight angle so that the legs would splay outward in both directions (left/right and fore/aft). Another piece of 1x4 braces the legs at either end lower down to the ground to keep them from spreading.
 |
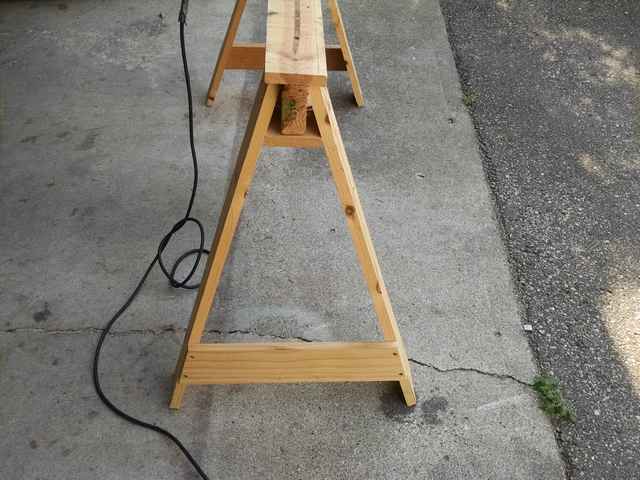
End view of the sawhorses' I-beam construction. |
 |
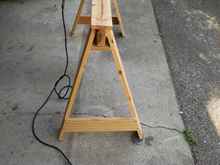
Side view of the sawhorses' construction. In addition to the added strength and stability of the splayed legs, they also allow the horses to stack nicely for storage. |
The I-beam construction provides a lip on both sides of the horses' tops which can be used for clamping. As the lip is only 3/4 inch thick, smaller clamps can be used instead of ones that would need to reach the full height of the I-beam. The wide tops of the horses offer stability to the workpiece that a narrow top does not.
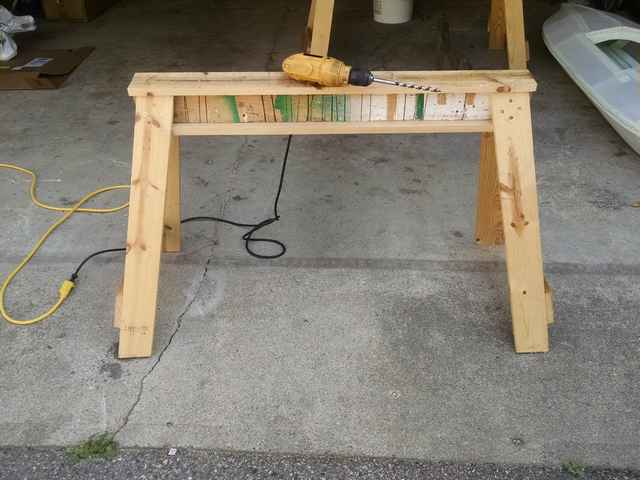
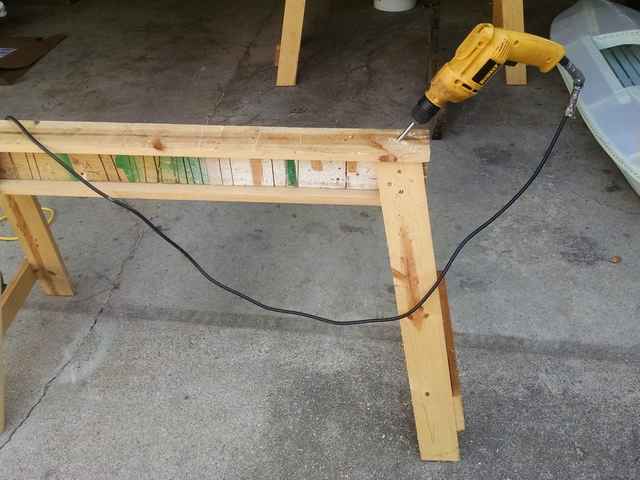
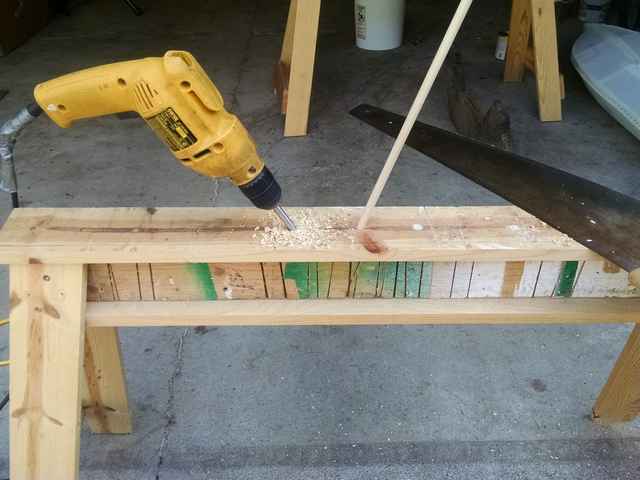
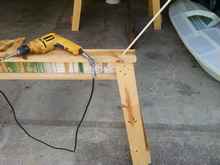
Now on to the doweling! I chose to use 3/8 inch dowels for attaching the top because... I don't know, that just seemed like a good size. I also happened to have a long 3/8 inch auger bit (seen in photo 2) which would work well for drilling the holes. I started at one end of the horse and drilled in at an angle:
 |
Drilling a dowel hole at an angle. |
You can see that I was nowhere near perpendicular with the drill. I went about 4-5 inches deep to ensure the dowels would be well seated in the 2x4 web. Next I inserted a dowel into that first hole, tapping it in with a hammer to ensure it was seated.
 |
Dowel seated in hole. |
I used a hand saw to trim off the dowel fairly flush with the top of the horse, then gave the dowel a few more whacks with the hammer to recess it just a bit - don't want a bump on the top of the horse. I wasn't too cautious about not marring the top of the horse with the saw. If you want a pretty surface, protect it somehow while you saw. One good way of doing that is to cut a hole in a thin sheet of rigid plastic. Slip the plastic over the dowel, cut, marring the plastic, remove the plastic, and sand flush. They also make special saws with no set to the teeth on one side which are designed for flush cutting, but they'll wander toward the side with the set teeth as you cut.
I then moved on to drilling the next hole at a different angle. It is important to drive the dowels as you drill rather than drilling all the holes and then attempting to drive the dowels. The pieces might move slightly and then the holes wouldn't line up. Or, you may cross holes partially and once a dowel is driven in one, the next will be obstructed resulting in a shallow dowel. After repeating a few times, it occured to me that I should take a picture showing the different angles:
 |
One dowel seated at one angle, next dowel drilled at a completely different angle. |
By looking at that photo you can hopefully see how the 1x4 flange cannot lift off of the 2x4 web. To do so, it would need to break the dowels. Well, it can't lift much anyway. I used a 3/8 drill and 3/8 dowels. Dowels are often slightly undersized, so they didn't fit too tightly in the holes. Some I was able to shove all the way into the hole with little effort. If possible, it might be wise to use a drill which is 1/64 or so smaller than the dowel size, then whack the dowels in good with a hammer.
 |
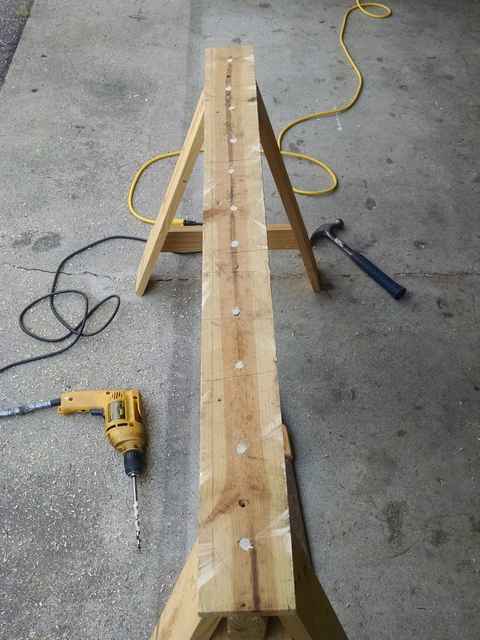
Top flange doweled onto the sawhorse. |
You might notice in the last photo that my dowels are all in a pretty straight line and really only angled in one direction (fore and aft). It would be better to give them two dimensional angles, some going in angled left to right, some right to left in this end view. However, given the relatively thin 2x4 web, I really couldn't do much. As such, the tops may rock side to side slightly and are probably more likely to break off with side to side forces than end to end forces. Perhaps I'll pick up some 1/4 inch dowels and add more with side to side angles.
One last thought, doweling the end of a piece of wood (perhaps a spar, or tiller, or...) can be an excellent way to prevent splitting. The dowel acts much like a knot would. Anyone who has ever tried to split knotty wood knows how hard that can be.
So there you have it, doweling 101. Not only can it be very strong, but unlike my demostration above, it can be pretty too. Choose dowels of a different, contrasting species to spice things up a bit.
P. S. If you ever need to unfasten a doweled piece, drill out the dowels. It's not easy, but it can be done more easily if you drill them out with a larger bit. Or, if you didn't glue them, you might be able to pre-drill into the dowel, then drive a screw and pull on the screw to extract the dowel.
|