The Unsinkable Foam Kayak Anyone Can Build, 16 Pounds and Eight Feet of Fun
Step 7:
Rebar I like to think of this as the rebar stage. If you watch concrete structures being poured, you will notice a grid of metal bars being put in place inside the forms, concrete has little strength in tension, and massive amounts in compression. The metal rebar in the concrete gives it strength in tension.
As I said before, foam is strong in compression, but weak in tension. Pull on a foam joint and the top layer of the foam will just tear away. Roughing the foam up with the werner 250 adds more depth to the glue bond, but even this is really more to resist peeling, it does very little to give the foam more strength in tension.
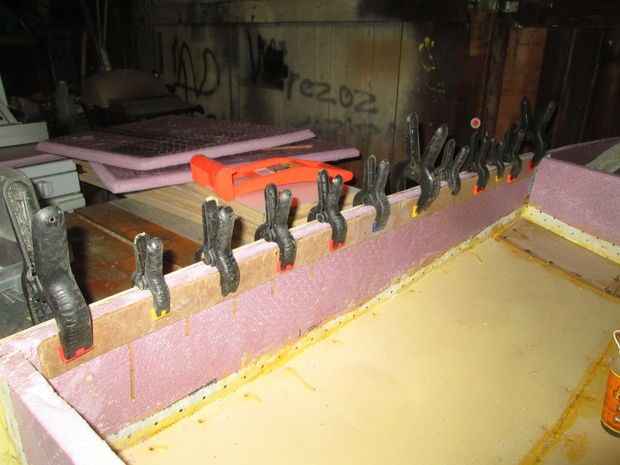
Now we add the rebar, in this case, a fabric skin. The skin will take the tension, especially at the GS joints which are the weakest link in the hull. I actually broke one joint just moving the boat around, some GG brushed into the joint sealed it all back together.
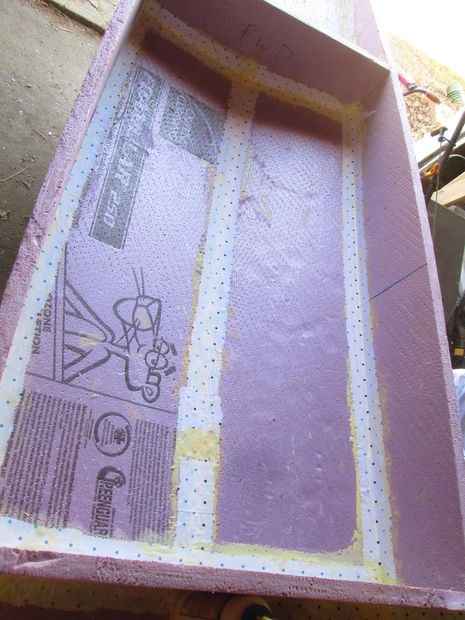
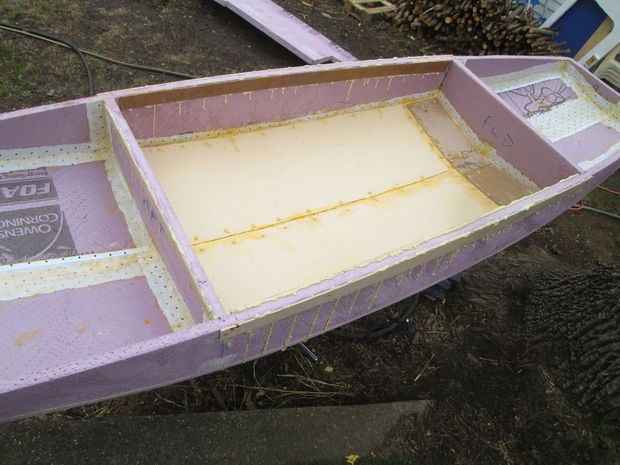
I reinforced the inside seams of the boat with 4 inch wide "tapes" of fabric, glued on with TitebondII (TBII). Since inside the ends won't be exposed to the sun, they were left with bare foam other than the tapes.
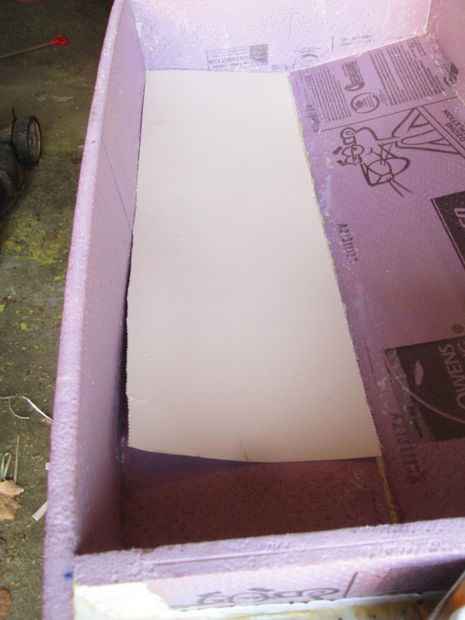
The cockpit will see the main stress of the hull, it needs to support the paddler, and will see the most stress from the feet of the paddler as they get in and out. The teardrop site "experts" suggested using "chipboard", large sheets of lightweight cardboard, like you have on the back of a pad of paper. I couldn't find this in any stores near me. I finally used cardboard from the back of pads of paper (we use many forms at work, I just saved the backs from the forms). As you know cardboard is not waterproof, but with the addition of the "MIX" 1/3 mineral spirits mixed with 2/3 oil based polyurethane floor sealer, the cardboard becomes waterproof. You can make a cardboard bucket that will hold water and not fall apart if you treat it with the "MIX". I perforated the cardboard panels with the werner 250, glued them to the floor with TBII. Once the TBII cured I treated the cardboard with the MIX, making it waterproof. Some scuffing of the cardboard surface to give the TBII some tooth, and a layer of fabric covers it all. As long as you don't jump on the floor on the land, it will be strong enough.
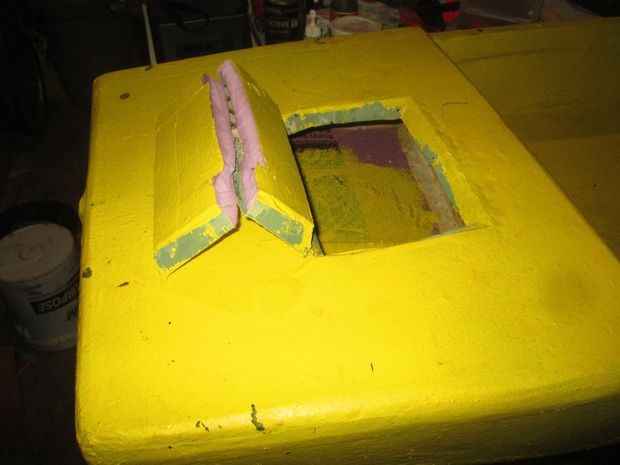
The ends of the boat will become air boxes, mostly used to keep the boat on the surface of the water is it is swamped. This is over kill in a boat made of foam, the empty hull itself has enough buoyancy to keep the boat up. I ended up making the end boxes into storage compartments with large hatches.
Step 8:
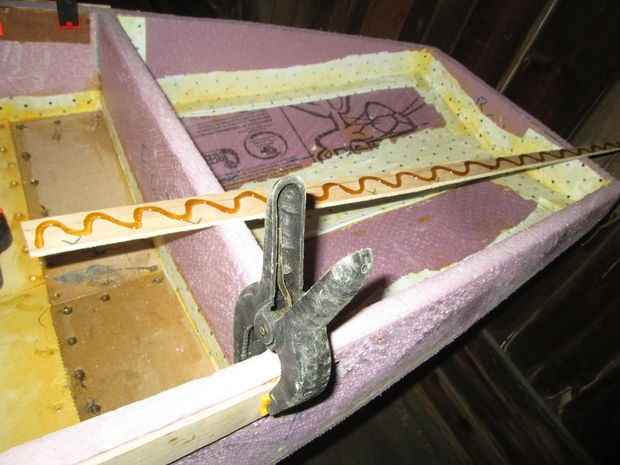
Rails - since the sides of the cockpit are just 1" foam, I knew it wouldn't stand up to much force. I tied to the roof of the car the load put on the rails by carrier bars and straps would dent the foam badly, a paddler leaning on the rail could split the side of the boat. To fight this I added plywood rails to the top of each side of the cockpit. Glued on with GG, the rails stiffened the sides of the boat up perfectly. I used left over scraps of plywood from another project, you could also use 5 gallon bucket stir sticks, or cheap wooden yard or meter sticks. My local Home Depot gives the stir sticks free at the paint counter.
Step 9:
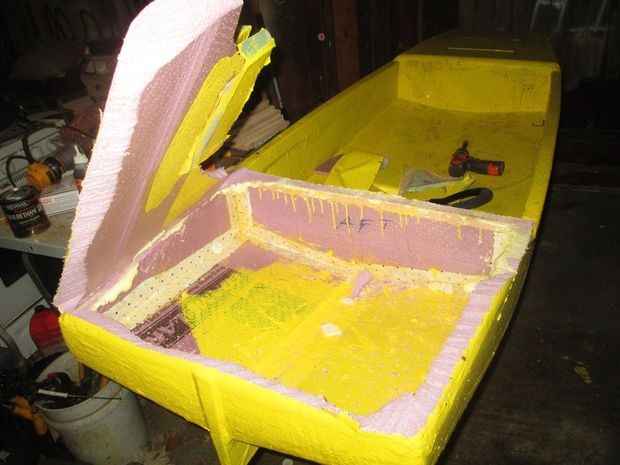
Decks - One of the great design features of the mouseboat is the sealed air boxes, these give a great safety margin, even full of water the boat will not sink. Since this boat is made of foam, it is already unsinkable. The decks give the hull the strength it needs, and give a secure place for storage.
You will see I tried a different deck and hatch design to start with. My first idea was decks of 1" foam with simple hatches cut in them. The hatches had beveled edges to hold them up, and a fabric hinge.
The first day we tried it, my dad put his elbow through a hatch, cracking it in half. Since he wanted the boat, he also wanted a tougher deck.
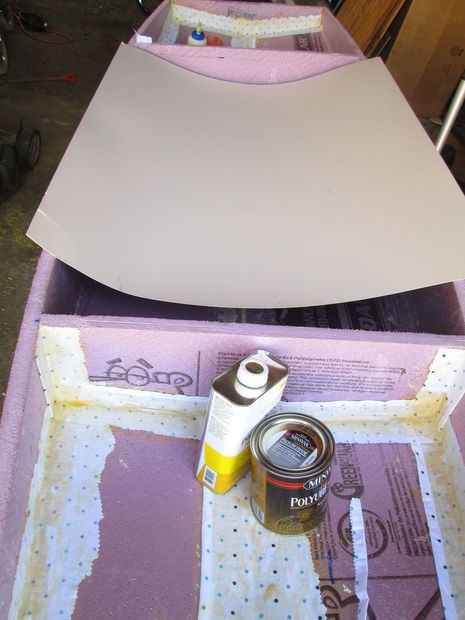
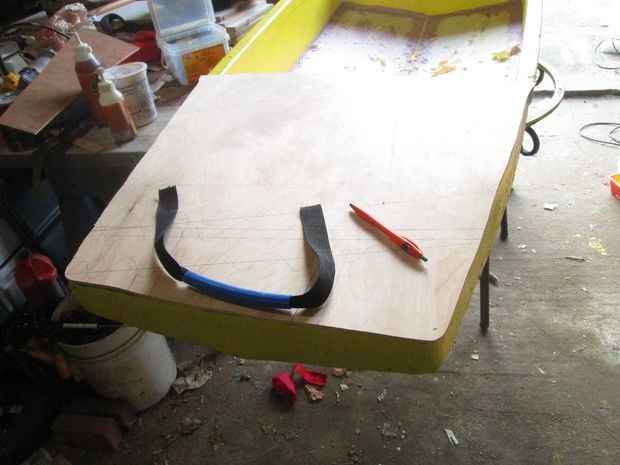
I tried plywood decks, but they proved to be heavy. I went back to foam decks, I added triangular blocks of foam, glued to the sides with the wide end of the triangle up to support the deck, then glued the decks on with GS. I added my simple boat handles to each end. I melted a series of holes in each end of the strap, then sandwiched the inner ends between the bottom of the deck, and a foam deck supporting block. The handles are strong enough to hang the boat from, and keep the boat secure on the car roof at highway speeds.
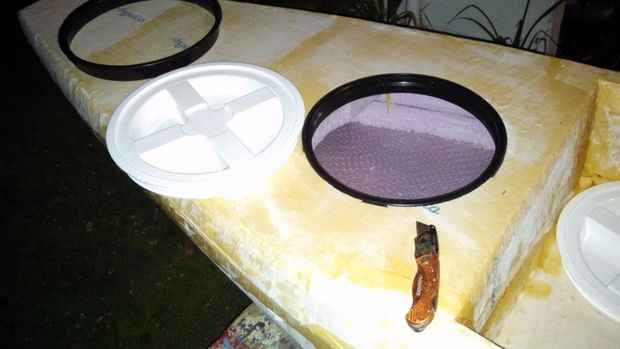
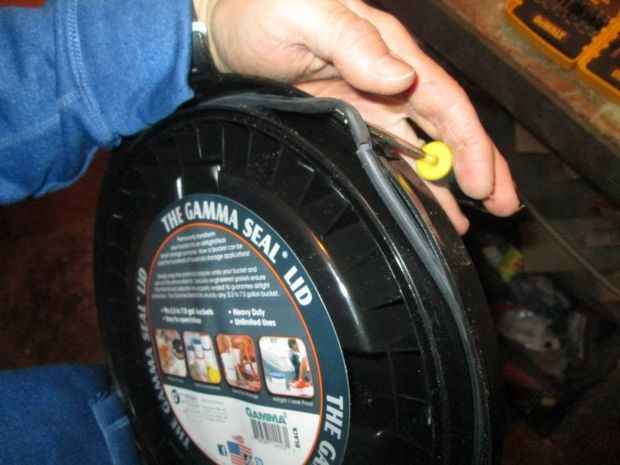
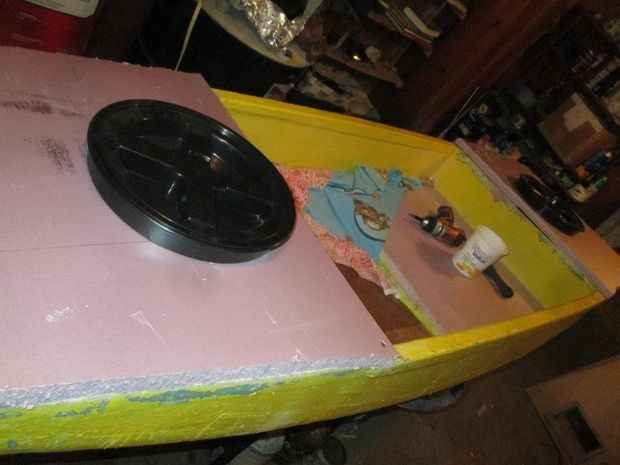
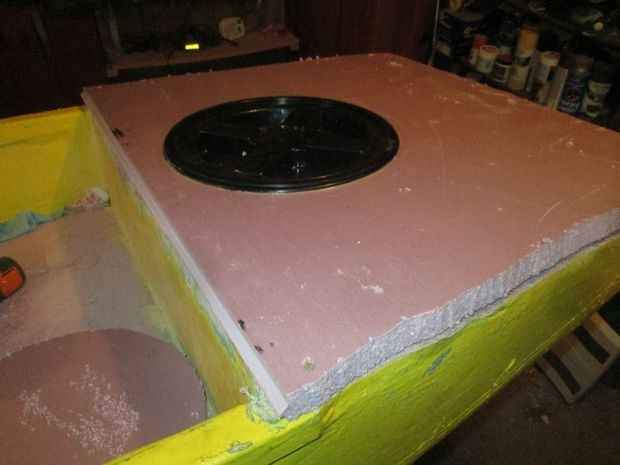
I added gama seal deck hatches. The gama seal lid is a water and air tight, screw off lid found made by the gama seal company. Around here they are found in the paint department of Home Depot, you can order them in 7 colors on line. They are designed to snap onto the top of a standard 5 gallon bucket, making it air and water tight with an easy to remove lid.
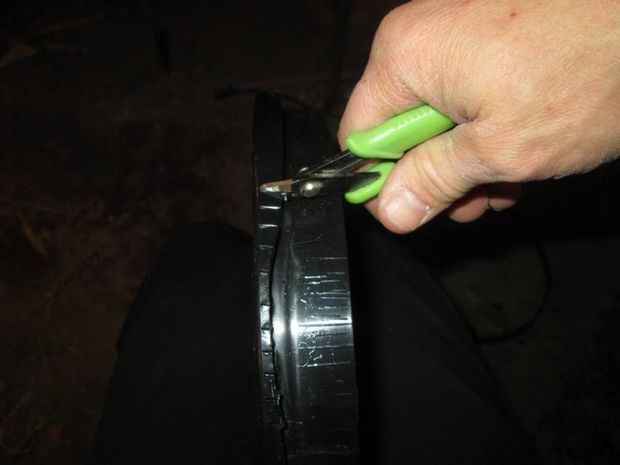
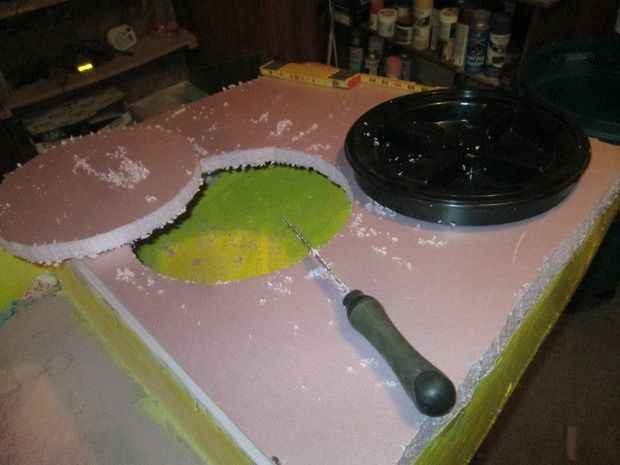
By cutting away the outer lip of the snap on ring, removing the O ring, and then trimming the edge flush with the bottom of the groove, I made the bucket lids into deck hatches.
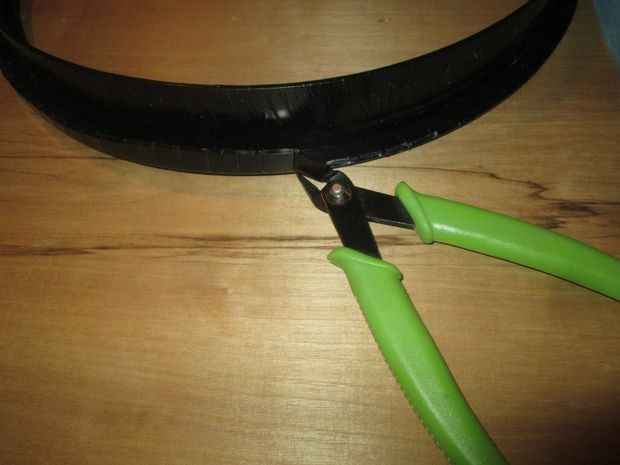
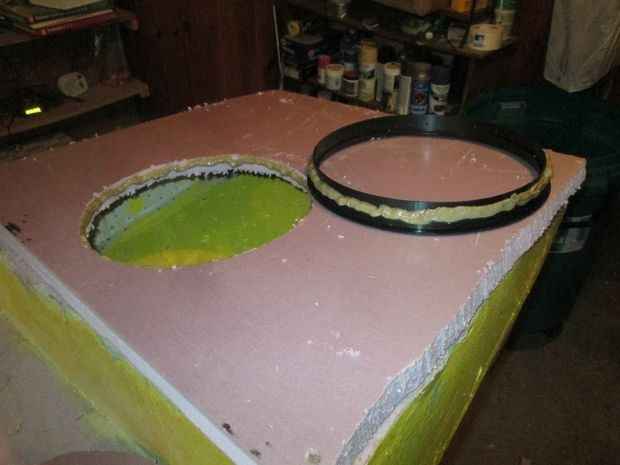
Use the ring to mark the foam, cut the foam to a circle, then trim it to ensure a fairly snug fit.
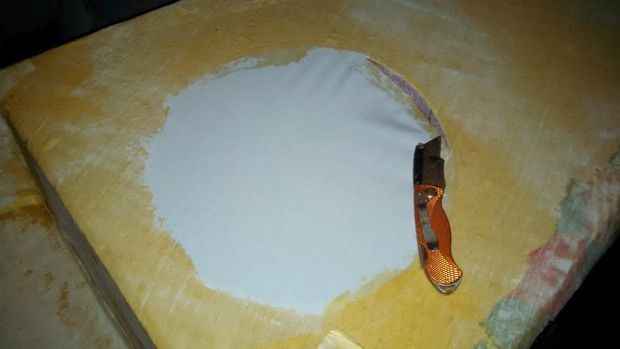
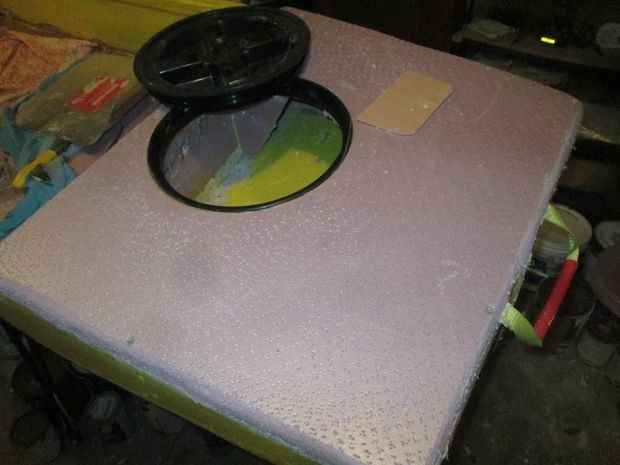
DO NOT GLUE THE RING IN NOW!!! I did and now will have to figure out how to get the fabric edge tight to the ring.
www.facebook.com/Rowerwet/
|