
 Custom Search
|
| boat plans |
| canoe/kayak |
| electrical |
| epoxy/supplies |
| fasteners |
| gear |
| gift certificates |
| hardware |
| hatches/deckplates |
| media |
| paint/varnish |
| rope/line |
| rowing/sculling |
| sailmaking |
| sails |
| tools |
| join |
| home |
| indexes |
| classifieds |
| calendar |
| archives |
| about |
| links |
| Join Duckworks Get free newsletter CLICK HERE |
|
|
| Seafoam Kayak - Part Five |
by Josh Withe
- Merrimack River Valley, New England - USA |
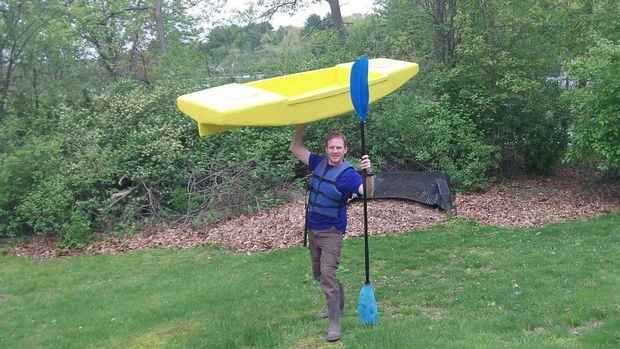
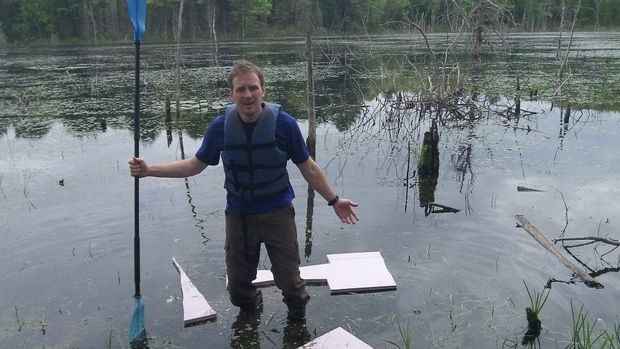
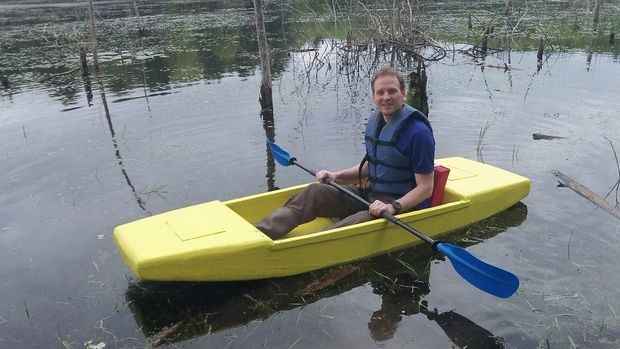
Part One - Part Two - Part Three - Part Four - Part FiveThe Unsinkable Foam Kayak Anyone Can Build, 16 Pounds and Eight Feet of FunStep 12:Keeping it straight since the mouse is a short wide boat, paddling will tend to make it wander from side to side as you go, or just spin around in circles. A skeg is the answer, a short fin running from about the deepest part of the hull back to the stern. On my flat bottomed mice, the bottom tends to oil-can (bulge in at the center). I fixed this by gluing a strake from bow to stern. The strake is just a square rod of wood 1/2" by 1/2", this made the bottom much stronger, and helped the boat track straight. The strake flowed back into the skeg and both work together for tracking. I had tested the curve on one of the waste pieces of foam, it was close enough, with a bit of fitting it would work. However, foam is not strong in bending, a skeg sees side loads most of the time, even with a fabric skin, the foam would fail from paddling or hitting rocks or trees. This became another point for some wood reinforcement, try bending a 1" wide strip of plywood sideways on the skinny side not the flat one, with two strips reinforcing the edges the wood and foam work together in their strongest way, the foam keeps the wood flat, and the wood keeps the foam from bending. GG made a nice permanent bond. Step 13:SPLASH! After applying fabric to the inside of the cockpit, I then painted the whole boat with exterior house paint, in my favorite color. My parents have a small pond behind their house, we were all getting together for the weekend there anyway, so I launched Seafoam, and we all enjoyed the rest of the mice on the pond. Being a joker, I also brought foam scraps left over from building. after the picture of the boat on one hand (15 lbs!) I had my daughter take another picture of me standing in the lake with the off cuts floating around me. I told the foamies on TnTTT.com, I'd named the boat "titanic", was it the name!? some of them believed me and couldn't figure out what went wrong. Meanwhile, I launched Seafoam, got a picture in the boat, then took her out for a spin. On the water the weight isn't noticed, the V bottom is a bit faster though. After a bit of chasing the kids in their mice, and exploring the stump and rock infested edges of the pond, I began to trust the strength of the hull. I went looking for stuff to run up on, then forced the hull over what ever it was, instead of backing off, or tipping the hull to float off. Then I went back to the shore and checked out the damage. No tears in the fabric, no scratches in the paint, just some long shallow trenches in the foam surface. The foamies all know small dents like hail damage, or grooves from tree branches are easy to remove from a foamie trailer, just put a thin towel over the damage, and using a steam iron, iron the divots out. TBII and foam are both activated by heat, they swell up, and are put into shape by the iron. My dad tried the boat out, of course we raced, I had one of my flat bottomed mice, and could just barely pull ahead of him paddling flat out. He has had a couple heart operations, has a few more pounds on me, and isn't a regular paddler like I am. The V bottom is just faster! That evening I checked back in with the foamies, one of them had finally questioned if that was really parts of the boat floating around. I had a good laugh and shared the pictures of Seafoam afloat.
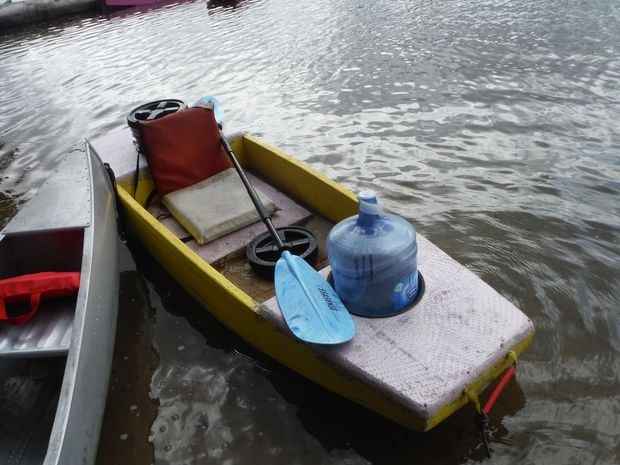
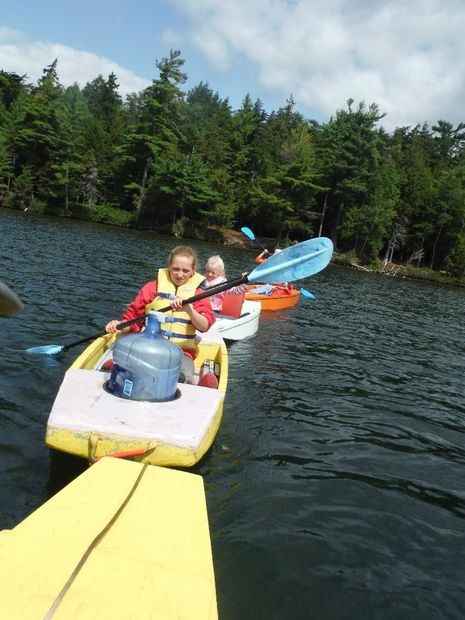
Step 14:Now that you want to build one Get the plans, since Gavin Atkin is such a nice guy, giving the plans away free, and also giving tons of advice on line for free (though not on foamies) do him a favor, he published a book and that is the only money he gets from the whole deal. Buy a copy and in it you will find plans for a bunch more boats to fire the imagination and get you started. (you can't build just one boat!) I've already gotten pictures of other foam kayaks, including a mouseboat, in the comments on my Sawfish foam kayak I'ble, from a builder far away. As far as tweaks to make the mouse better, I ended up adding a rib of foam 1" deep and 1" wide the full length of the center seam. This has helped the boat track much better, it runs back and runs down the top of the skeg. Such a short boat just needs more to help it go straight. This past summer Seafoam has been on many trips, including a camping trip in the Adirondacks, where the only access is by boat. The deck hatches come in very handy for this. We each have a bucket or two with our clothes in them, when it is time to launch we just unscrew the deck hatch, stuff as much smaller loose gear into the cargo tank as possible, then drop a bucket in the ring in the deck. We also carried our 5 gallon drinking water jug in a ring the same way. The Gama seal lids are carried in the cockpit for the trip out and back. As you can see, I still haven't finished putting the fabric inside the cockpit or on the new decks. I will get around to it someday, but I have other projects going on, and this boat does just fine without the skin on the decks. |

To comment on Duckworks articles, please visit one of the following:
|


 |