|
1. Building Report
2. Sailing Report
Part I - Building
 Basic
Concept Basic
Concept
The conception of the P5 is a light car-toppable proa for 1 to 2 sailors.
Both hulls are multichine designed for plywood/epoxy (stitch&glue)
building. The total weight should be 70-75 kg. The basic idea of the boat
is borrowed from Gary Dierkings strip planked
TARAWA.
Cutting Plans
The main hull has three parts: lee plank, luff plank up and luff plank
down. Every plank could made from mirrored halfs from 4mm plywood. Next
step is to glue a stringer (20x20mm) along the upper edge of the lee plank
(may be a second one into the middle) and of the upper luff plank for
fitting the decks later. Annother stringer should fixed at the below edge
of the upper luff plank. For more stablity use a keel batten (20x20 mm) as
backbone. Then the traditionary holes through the below edges of the lee
plank, keel batten and below luff plank.
Please
Note: All cutting plans and instructions are only proposals!
Building Pictures
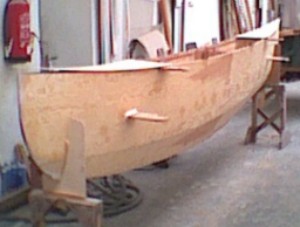
Hull
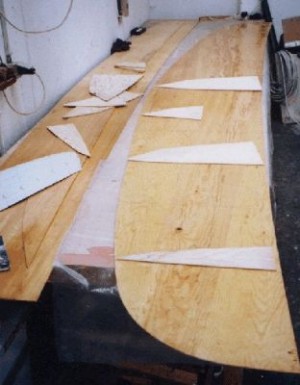
Cut out planks with bulkheads
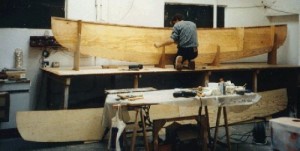
Main hull set into the support???. It's useful to build the support very
strong,
because the multi chine hull is unstable before gluing.
First the put the lee plank into the support, then the keel and the lower
luff plank. Next, stitch all together with copper wire. If all is
perfectly arranged glue it together with epoxy putty/glue. After the glue
has dried strengthen the keel section and the connection of the luff
planks with stripes of 200 gr fiberglass.
If the hull is stable, you can insert the cockpit floor and the beam
fittings. Pay attention to the paddle fittings. They should be match the
length/diameter of the paddle you use.
See details
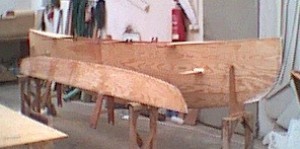
Finally, fit the small decks and the wood poles for the webbing between
the beam fittings. Now all woodwork has finished and you can start sanding
the surface ...
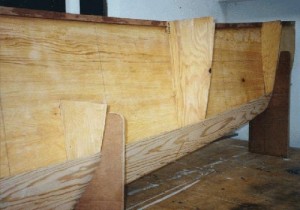
The ama is built just like the main hull (aka). It's simpler because the
hull is symmetrical and it straightens itself after putting the bulkheads
in.
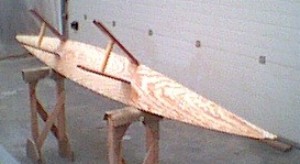
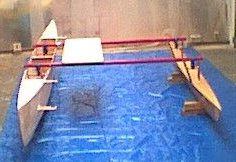
Ama ready for sanding and coating. Here you can clearly see the
arrangement of the poles between the beam fittings.
See details
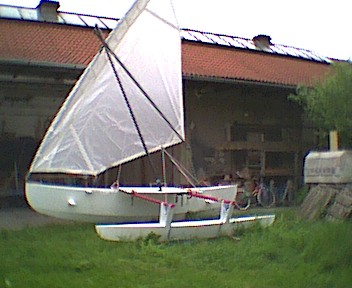
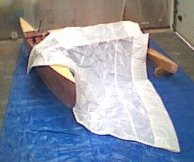
For the first time both hulls are fitted with the
surf mast beams and with the 'test' sail made of polytarp.
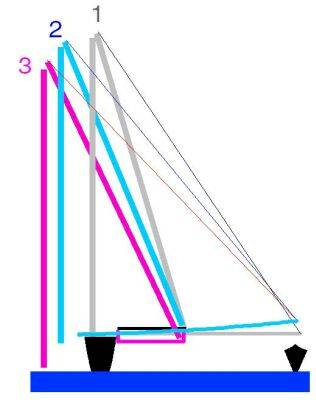
Rig
The rig functions like a seesaw. By changing the bow after shunting
you pull down the yard with the sail to the new bow.
A good example is this rig at the
homepage of
Gary Dierking or in the Gibbons-Special at
multihull.de. This
Gibbons/Dierking rig has a simpler handling in opposite to the Crab Claw
sail. Also you should do easier maneuvers at the overcrowded lakes here
(Remark: This I thought before I tried it in reality. See 'sailing
experiences' below).
Fittings and running lines 1
Fittings and running lines 2
Sail
The Gibbons/Dierking rig has the advantage (like the Crab Claw) of needing
no shaped camber, so you can cut it yourself. I used a white standard
polytarp like you can get here in homeworker shops, double glued tape like
you use for carpet and to protect the overlapping parts, a special repair
adhesive tape.
Cut of the sail out of a minimal
tarp
Cut of the sail measurement (for first test)
Detail Views
Drawing - Hull Arrangement
Drawing - Beam fittings, Webbing
Drawing - Construction - Paddle fittings
Drawing - Yard connection
(now out of date, because no bamboo was used.
Used windsurfer masts are cheaper in Germany)
Disclaimer:
The plans of the P5 are free for building a boat for private use.
Commercial replication is not allowed. For rightness of all plans and
advices are no guaranty is given. Most parts in this descripton have only
a character of proposal and must be verified by the builder himself. Be
creative and courageously - and you can sail a P5 like me!
Part II -
Sailing
The Difference between Theory and Reality
The boat was finished to the extent that we did not know what else
could be done. From here, only experience would show us what was
missing: and this is exactly what happened.
Before the sailing story, some hints for building:
- Use 1-2 stringers for every hull side, otherwise the 4 mm plywood
makes visible cambers between the frames. The sleight additional weight
more will be justified by a better view and naturally, more stability.
- The windsurfer masts we used for beams an mast were not stable
enough. They will not break, but they are too limber for this
application. The whole structure of the boat would be too flexible,
which would have a bad influence on the rig and sail shape. A stiffener
of carbon roving makes it somewhat better, but for a future boat I would
use alloy pipes with a diameter of 50 mm and 3 mm thickness.
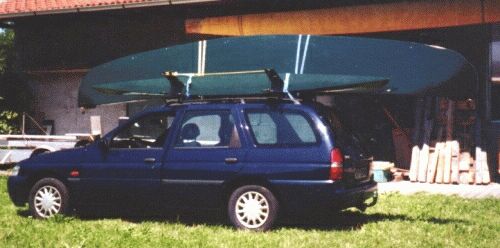
At last we were ready for launching. Transporting on top of the car
is absolutely easy. The beams rest on the side to side braces of the car
top carrier. In ten minutes the boat was ready to go on the car's
roof....
....and in a half hour, the boat was assembled and ready for sail.
The First Trip
It was a beautiful day, except that the wind was gusting to force 5.
Nevertheless, this was the day! As soon as we assembled the boat, we
were on the water - a little prematurely - but we would finally sail.
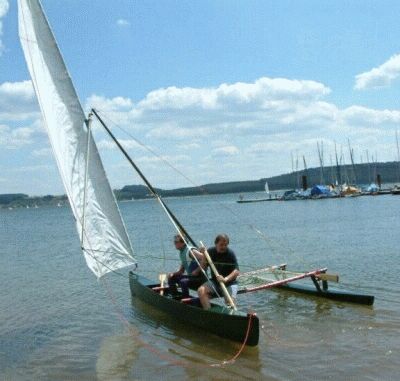
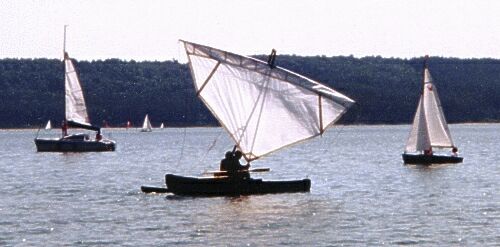
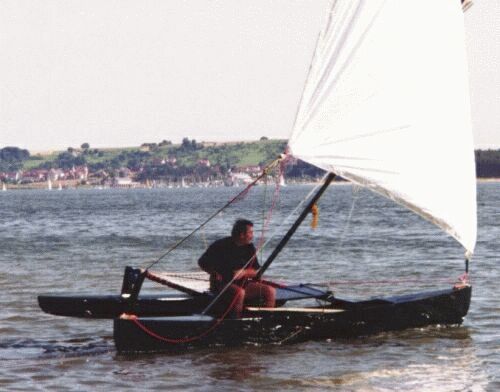
(The first contact with its element. Here you see
the large leeward bend of the mast made among others by the curve of the
beams)
For us, however, fate had prepared something else. Because of the
tendency of the boat to luff, we made a big curve directly into the
foot bridges of the nearby marina. We stayed ashore until all the lines
were sorted. Fearlessly we pointed the bow toward the middle of the
lake, and ran, close hauled, into the 'open sea'. In fact pretty
successfully, as we sailed very fast, although the two of us were 2/3 of
the total displacement.
Steering, by moving our bodies along our sitting plank to change the
center of displacement, was very hard because of the gusty wind and the
boat's tendency to luff. The steering paddle seems to have no effect. The
result was that we sometimes got a gust from the 'wrong' side and the rig
came down to the wrong side too. But because it was held by rubber ropes,
nothing was damaged. The wind had, in the meantime, reached permanent
force 4 and we had no chance to set up the rig again. The paddling home I
don't need to describe ... we we used the time to talk about the 'Why'.
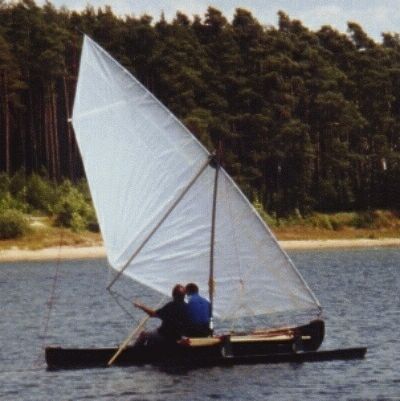
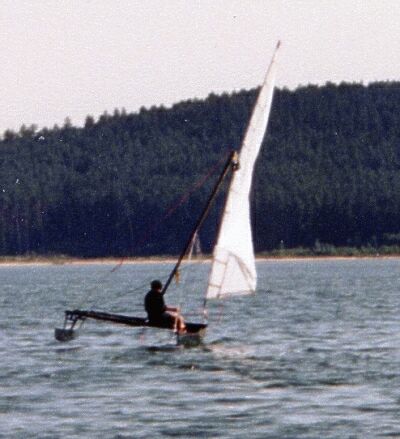
(The yard is bend to much astern. But in principle
the 50 $ sail looks good)
The Experiences And The Redesign
Basically, it was a positive experience. The boat floats almost
exactly at the theoretical CWL and carries two sailors who weigh about 150
kg (with a boat weight of nearly 75 kg). The asymmetric multichine hull
allows it to sail close hauled with acceptable leeway. The hulls/beam
connection with a simple webbing proved strong enough. Also the polytarp
sail was effective enough to give a good speed.
The following figures show something about the
'accidental research'
The figure above shows how the curve of the beams
and the sitting plank, where the mast stands, cause the mast to bend.
Additionally, stretching of the shroud exacerbated this effect.
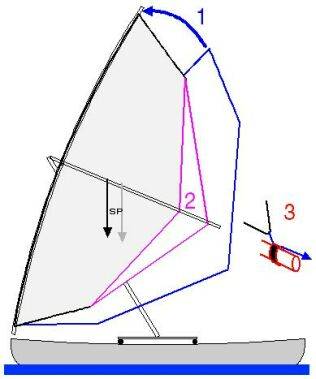
Moving the CE by shortening the sail and
controlling the clew at the boom should optimize the sail shape.
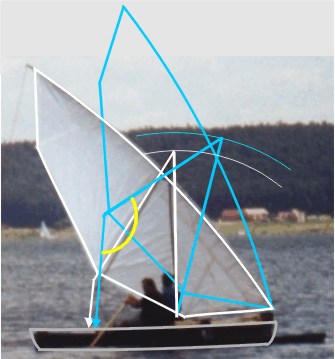
Problem after the mast extension. The Schot angle
becomes smaller and the sail is more strongly distorted.
Additional
trim possibilities
Following changes were made before the next test sail:
- Stiffening the beams and the mast via carbon rovings
- Stiffening the sitting plank
- Lengthening the mast by 50 cm to bring the CE nearer to the bow
by arranging the yard more vertically
- Clew control at the boom
- Doubling of the rubber ropes to make the rig stiffer
- Shortening all lines to their necessary minimum for simpler
handling and to prevent catching oneself ;-)
Second Test
It was a beautiful summer day at the Brombach reservoir for the second
sailing test. The wind offered a 2-3 force breeze - great conditions!
After an hour of sailing we came back to our starting point. In that time
we had an eventfull trip. We tested the steering by moving the center of
gravity and controlling the sail trim. It functioned well. Moving to the
bow causes the boat to fall off, and moving astern means heading up. But
all must be done alertly and with a lot of feeling. The boat accelerates
rapidly - you must immediate close in the sail - and in the same time move
back with your body(s). The P5 is no boat for 'coffee sailors' (which in
German means 'cushy'), you are continually occupied. If you are sailing
with two aboard, permanent cooperation is needed:
Go to front, go back, pull here, etc.' ,
especially during shunting maneuver.
After the first test run I risked a single-handed trip. Alone, you
are much more tranquil because you quickly get the right feeling for the
boat and move automatically in the right direction. Also the speed
increases naturally with less weight aboard and so I could sail the first
meters with a flying ama.
Of course, this Bavarian lake is not the original home of a proa.
Constant turning and gusty winds are not useful conditions for sailing
such a boat. As quickly as it accelerates, it stops - and if in the
meantime the wind turns - you get it from the wrong side. The only potion
is to turn the boat with you paddle. BTW, as an Atlantic proa the P5 runs
surprisingly fast ;-).
At last, a word about the steering paddle. On a close reach you
don't need it, it hinders more than it helps. By moving the center of
gravity you can steer until you are on a beam reach. Downwind, you must
use the paddle.
Here you can clearly see that the lower part of
the sail has too much 'belly'.
Summary:
The P5 is a basically well-tried boat. It's a fun machine for
sailors who need an alternative to 'boring' beach catamarans. With a
better sail shape and maybe better sail cloth, I believe the P5 should
sail as fast as a comparable beach catamaran like a Hobie 14. And if not,
I promise you will sail it with at least twice the joy.
Next year we will change the rig to a Crab Claw Sail to compare the
rig types. We will inform you.
Othmar Karschulin/Phil Young
www.multihull.de |

