After building my Swifty
12 from a kit I decided to build a boat from
plans. I chose the Mill Creek 13 from Chesapeake Light Craft
due to its classic looks and size. Since the boat will be
for my daughter, Kari, she had a lot of input into the boat
selection as well.
Their website describes it :
"The Mill Creek 13 echoes the look and feel of 1920's "double
paddle" canoes. Combining the stability and comfortable
seating of a canoe with the light weight and decked-in security
of a kayak, the Mill Creek 13 is perfect for photography, fly
fishing, birding, or just relaxed paddling. Like all the Mill
Creeks, the 13 is surprisingly fast thanks to her efficient
5-panel multichine hull and feather-light 40lb weight. The cockpit
is 54" long, so entry and egress are easy for everyone."
Length: 13"
Beam: 29.5"
Weight: 40 lbs (finished boat is very close to this figure)
The Mill Creek plans come with
several sheets of detailed drawings. Key parts are shown full
size. The instruction - building guide book is over 200 pages
long and worth the price of the plans even if you never build
the boat. It is full of great how-to ideas and information.
The Builders Forum on the CLC
website is the best place to get your questions answered. I
did run into a few conflicts or head scratching steps in the
manual that were cleared up by a post to the forum. It is a
good idea to consult the CLC Shop Tips as well as the forum
to check anything that is not clear. The Shop Tips had some
good ideas that I printed out and inserted into the manual where
I would need the tip.
By cutting out my own kit of
parts I figure I saved about $300 over the factory kit. It took
less than 15 hours to mark and cut all the parts. Lofting and
scarfing the hull pieces were a first for me. I researched the
process online and had no real trouble other than nerves. Next
time I would finish the scarf cuts on the 4mm plywood pieces
with a sander to prevent slight tearing of the grain at the
feather edge of the cuts. The finished scarfs look really good
anyway.
There is so much fear of lofting
that I feel I need to mention that marking the hull piece blanks
by using the table of offsets and then a batten to draw the
lines was actually very easy. I enjoyed the process. This is
one of the areas in the CLC manual that is well done.
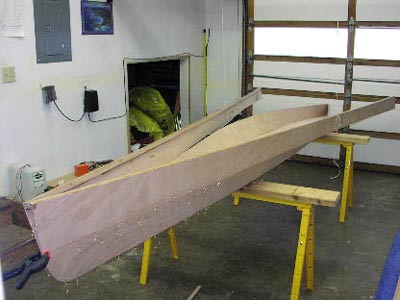
I scarfed the hull piece blanks
first so I could loft the planks full size. Then you transfer
the end shape to each plank using a pattern from the plans.
The patterns did not fit the lofted plank shapes exactly so
I split the difference and it worked fine but it appears that
the patterns are a bit off since I have heard from other builders
that had the same problem.
Probably the biggest question
I had in the whole stitching process was where to start stitching
the bottom panel (at the bow) to the lower hull panels. The
mark on the plans is confusing. I was off by about an inch when
I got to the stern of the boat. Easily fixed with a hand plane
to make the bottom panel one inch shorter. Now that I have done
it I can see what they want you to do. The best way to check
the placement is to wire the planks together at the bow and
stern then check the fit to the bottom panel. Turns out they
show this in a diagram but there is no text in the manual that
refers to it.
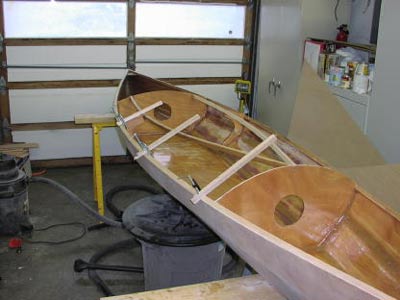
I learned from the CLC forum
it is not unusual for the two bulkheads to not fit the stitched
hull very well at the positions marked on the plans. I would
wait to cut my bulkheads from cardboard patterns made from the
stitched up hull the next time since mine did not fit when cut
to the pattern on the plans.
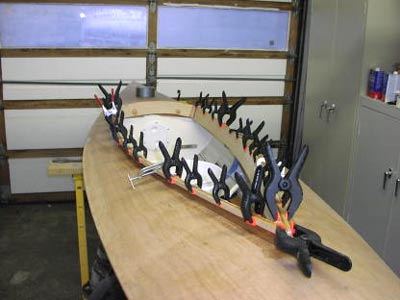
The boat goes together very quickly. I took about 80 hours total
to build the boat and another 20 to paint and varnish the exterior
(the interior was finished before the deck went on). I work
slow but I enjoy every minute.
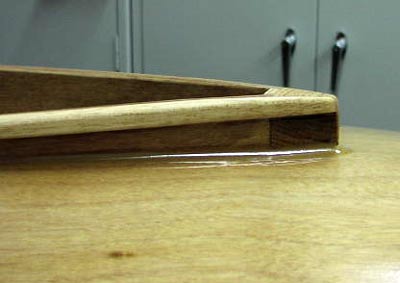
The two details I love are the
little oak nose block (at the front of the cockpit coaming)
and the bigger than spec'd coaming rim pieces. I tapered the
rim pieces and the graceful sweep turned out nicely. My daughter
vetoed the rubrails called out in the plans. She said it spoiled
the lines of the boat. I agree.
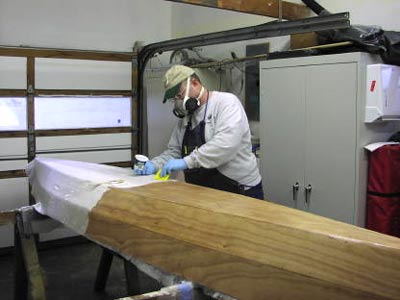
The boat turned out great. The
amount of epoxy work required for a stitch and glue boat however
makes me want to try a plywood on frame boat for the next project.
Maybe a traditional rowing skiff. I don't have one of those
yet. Stitch and glue is very easy and fast however and the results
are great.
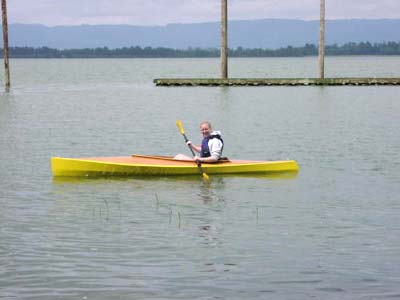
My daughter just loves her Mill
Creek. It is much faster than her Mom's Perception "plastic"
kayak but a bit harder to turn than Mom's boat since it is 2
feet longer. She is still learning to do turns by leaning. It
just glides forever in calm water. The boat is a dream to paddle.
My daughters first time was in about 12 - 14 mph of wind on
a large lake. There was considerable wind chop and waves. She
paddled right out of the calm dock area into the rough water.
The Mill Creek took it in stride. She did get tired of waiting
for Mom to catch up in her slower "plastic" boat.
The initial stability takes a
bit of getting used to. The secondary stability is outstanding.
You can roll the boat over until the sheer is in the water and
feel rock solid. Since I am a bit big for the boat (6'1"
and heavy) I would opt for the bigger model if I built one for
my own use. I have only paddled the boat twice and honestly
prefer my Swifty 12 with its 5'3" beam!
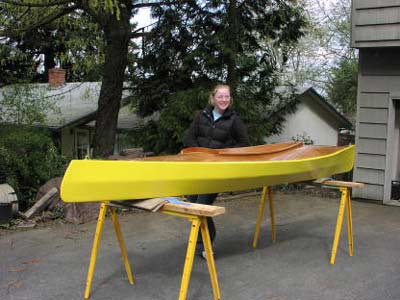
I built the boat for my daughter
Kari as her high school graduation present. At her graduation
party she had it out on the deck with balloons tied to the bow
and stern padeyes! She even posed for pictures next to her boat.
She is off at college now and the boat is sitting in the shop
waiting for some paint touch up this winter. Years from now
she will have the boat at her own house and hopefully think
of her old dad, the boatbuilder, when she takes her own kids
kayaking. She was the only one at her school who got a boat
for graduation. There were lots of jealous kids!
A full building log with pictures
is available at:
My
Website
Other links:
Chesapeake
Light Craft Website
System
3 Epoxy Website
My
Website about Building the Swifty 12

|