|
|
 |
|
|
One-Sheet
Baby Canoe Part 3 |
|
| By Gaetan
Jette - Sherbrooke, Canada |
Part
1 - Part 2 -
Part 3 - Part
4
Construction
Continues
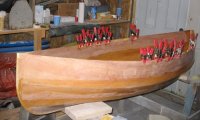
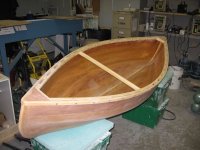
Last time, the hull took shape and
work on the paddles progressed. But the boat building
still has a long way to go.
 |
Time to complete
the inside fillets where the frame once was.
A second layer of tape is then applied on each
side of the keel, overlapping the first layer.
|
 |
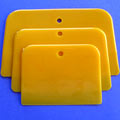
That new tape
along the keel and the chine fillets are then
faired with thickened epoxy. |
 |
There were a
few air bubbles in the stem inside fillets.
I drilled a small hole at the top and bottom
of each bubble. I then poured clear epoxy with
a dropper through the top hole, till the cavity
was filled. Not as strong as thickened epoxy,
but better than a void. |
 |
I cut a 2x6 into
half-inch thick slices for use as gunwales.
The process left me with thinner slices, some
a quarter-inch thick, some less. I used the
1/4-inch thick slices to laminate the curved
seat braces. |
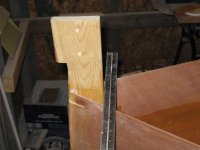 |
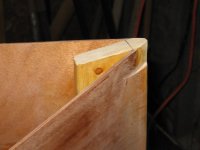
Time to let go
of that "Viking" look: a ruler is used to mark
where the stems will be cut. (Nothing wrong
with Viking ships: it's just not what I am building
this time.) |
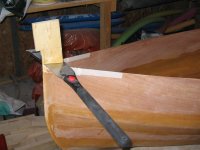 |
With masking
tape protecting the top plank, a hand saw is
used to cut the stem. |
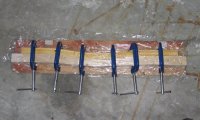
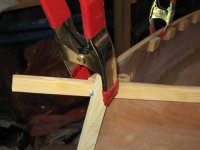
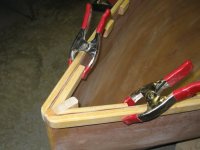
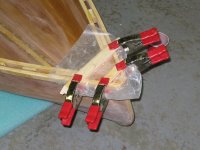
 A man never has too many clamps: I had to install
the inwale spacers in several stages. Spring clamps
are not the ideal choice for this. My epoxy batch
was perhaps a little too thick for gluing: the
wood blocks had a tendency to slip under the limited
pressure of those clamps. I had to use two clamps
on each piece. Even then the pressure was not
perfectly even from block to block. This caused
uneven thickness once the epoxy cured.
A man never has too many clamps: I had to install
the inwale spacers in several stages. Spring clamps
are not the ideal choice for this. My epoxy batch
was perhaps a little too thick for gluing: the
wood blocks had a tendency to slip under the limited
pressure of those clamps. I had to use two clamps
on each piece. Even then the pressure was not
perfectly even from block to block. This caused
uneven thickness once the epoxy cured. |
 |
 |
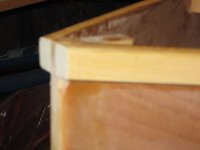
The
top of the stem has to be trimmed, except for
the tip. The breasthook will rest on the trimmed,
inside portion of the stem. A cleat, extending
beyond the stem, allows to do most of the trimming
with a router. The cut is finished off with
a chisel. |
 |
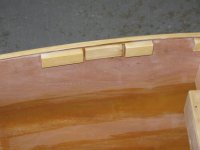
All regular inwale
spacers are now in place. |
 |
The end of summer
is here and everybody is asking when
the boat is going to be finished. |
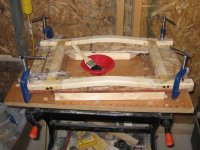 |
The seat frame
is assembled by using dowel pins. It is best
to use a Forstner drill bit for the dowel holes:
a regular twist drill bit will chip the perimeter
of the hole a lot. I learned that the hard way.
|
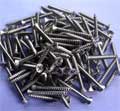
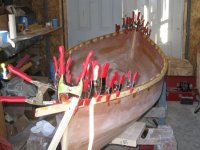
 The gunwale is installed in place, starting from
the middle. That's what worked best on an earlier
model of the boat. A dry fit is done first: spring
clamps hold the gunwale while the screws are driven
in place. This leaves you with screw holes that
make for a speedier assembly the second time,
once the epoxy has been spread. Screws are coated
with beeswax so they can be removed once the epoxy
has cured.
The gunwale is installed in place, starting from
the middle. That's what worked best on an earlier
model of the boat. A dry fit is done first: spring
clamps hold the gunwale while the screws are driven
in place. This leaves you with screw holes that
make for a speedier assembly the second time,
once the epoxy has been spread. Screws are coated
with beeswax so they can be removed once the epoxy
has cured. |
 |
Screws could
only be used where there were inwale spacers
(they were driven right in the middle of those
spacers). Clamps had to be used in the breasthook
area. |
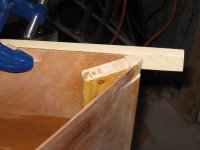
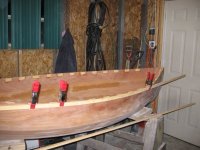
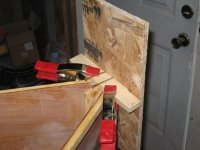
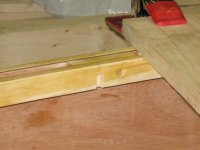
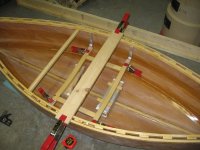
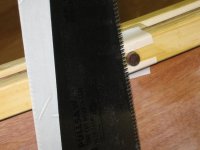
 To avoid a hull bent to one side, both gunwales
have to be installed at the same time, before
epoxy has set. In order to fit the second gunwale,
the first gunwale has to be cut: anywhere in between
the 2 lines shown here will do. The left line
is the path that the second gunwale will follow.
The right line, perpendicular to the boat length,
is the shortest the gunwale can be cut.
To avoid a hull bent to one side, both gunwales
have to be installed at the same time, before
epoxy has set. In order to fit the second gunwale,
the first gunwale has to be cut: anywhere in between
the 2 lines shown here will do. The left line
is the path that the second gunwale will follow.
The right line, perpendicular to the boat length,
is the shortest the gunwale can be cut. |
 |
A screw in the
second gunwale helps to retain a cleat in place,
giving the spring clamp something to hold on.
|
 |
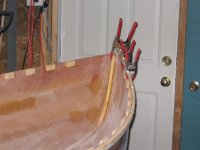
With no screws
in the breasthook area, there is a risk that
the gunwales will slip while the glue cures.
It did so on the bow. If I were to do it again,
I would add one more screw, with a temporary
wood block on the inside. |
 |
An improvised
jig is used to trim the tip of the gunwales
with a router. |
 |
 |
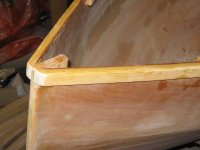
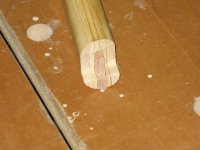
The
tip of the gunwales is trimmed flush with the
stem. |
 |
 |
A
round pattern is traced on top of the gunwale
tips (a bottle cap of suitable size). The tip
is then rounded freehand with a sanding block.
|
Weather was now too cold for epoxy work in my brother's
shed. Time to move back at my workplace. Do I have an
accommodating boss or what?
 |
 |
The
breasthook is dry fitted and the cleats underneath
are scribed for their final cut. |
 |
The final inwale
spacers, cut at the proper angle, are glued
in place. The angle in question is a vertical
cut: a short flat spot on the bow stem allowed
me to level the boat. Then I could mark those
cuts using a small square with a built-in level.
|
 The inwale spacers are one-half inch thick. The
seat brackets are one-quarter inch thick, so a
shim is needed where the seat brackets will be
bolted. I glued quarter-inch thick blocks for
that purpose. This proved tricky to work around
when finishing . A quarter-inch thick rubber washer
would have worked just as well without getting
in the way while applying finish and sanding.
The inwale spacers are one-half inch thick. The
seat brackets are one-quarter inch thick, so a
shim is needed where the seat brackets will be
bolted. I glued quarter-inch thick blocks for
that purpose. This proved tricky to work around
when finishing . A quarter-inch thick rubber washer
would have worked just as well without getting
in the way while applying finish and sanding.
|
 |
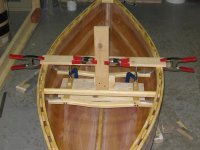
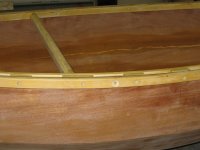
The center of
the boat has to be braced to its final beam
when dry fitting the breasthook. |
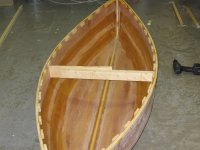 |
The previous
bracing would have got in the way when fitting
the inwales, so a different approach is used
next. |
 |
The temporary
outwales used when doing the epoxy fillets are
recycled and used as inwales. As a bonus, they
are almost bent in shape. |
 |
The inwales are
dry fitted and marked for the final cut. |
 |
Epoxy is applied
and the inwales are screwed in place. |
 |
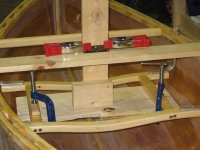
A notch is cut
for the center cross brace. This brace is placed
just behind the seat. The inwale spacer behind
it is 3 inches long. All the other inwale spacers
are 2 inches long. |
 The center cross brace is made up of several laminations,
1-1/2 inch wide, then rounded with a router using
a half-inch rounding bit. This produces a very
comfortable grip. The longer bottom section will
sit against the bottom of the inwale. A loose-tongue
joint is used for assembly. Two layers of plywood,
taken from the plywood sheet waste area, form
the tongue. The groove in the cross brace is routed
with a quarter-inch bit. Since the tongue and
groove don't go all the way to the top, they won't
be visible (unless you are very curious!).
The center cross brace is made up of several laminations,
1-1/2 inch wide, then rounded with a router using
a half-inch rounding bit. This produces a very
comfortable grip. The longer bottom section will
sit against the bottom of the inwale. A loose-tongue
joint is used for assembly. Two layers of plywood,
taken from the plywood sheet waste area, form
the tongue. The groove in the cross brace is routed
with a quarter-inch bit. Since the tongue and
groove don't go all the way to the top, they won't
be visible (unless you are very curious!). |
 |
 |
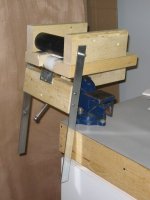
The
seat brackets that will support the seat frame
are made from one-inch wide, one quarter-inch
thick aluminum bar. They are bent using a home-brew
bending jig. The bar is bent around the 2-inch
pipe, which is held in place with a few screws.
Two flat bars act as levers, rotating a bed
wheel that pushes against the aluminum bar.
This worked... barely. The 2x4 supporting the
bed wheel was twisting under tension, due to
some play in the screw holes. L-shaped bars
would have worked better. |
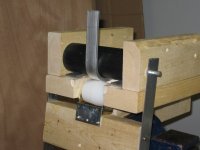
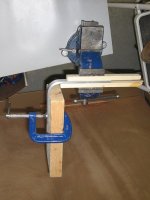 |
It is hard to
achieve a perfect 90-degree bend with the bending
jig. It is possible to do small adjustments
in a vise. |
 |
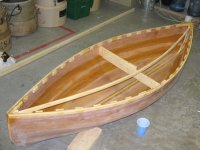
All the cross
braces are now in place. |
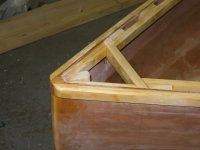 |
The breasthook
cross braces are notched, so that the breasthook
plate is supported all around. The width of
that notch is chosen so that the visible portion
of the cross brace is one-half inch thick, just
like the gunwales, for a more harmonious look.
|
 |
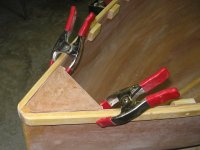
The breasthook
plate is glued in place, using spring clamps.
|
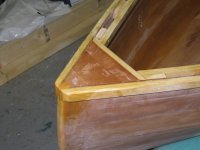 |
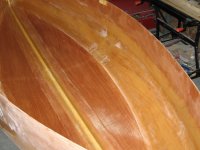
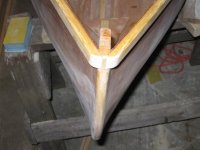
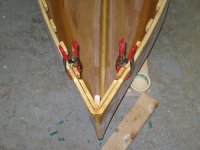
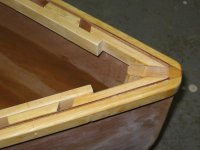
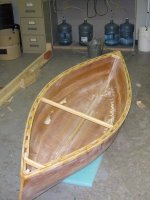
This is how the
completed bow (and stern) look. |
 |
Dry fitting the
seat frame and brackets proved a little bit
tricky. I first tried to prop everything in
place by using shimming blocks under the seat
frame. |
 |
 |
I
then built a jig, for easier testing and adjustment.
|
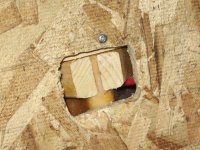
 Once
the gunwales were glued, the screws used during
assembly were removed. Now, the screw holes are
enlarged with a 3/8-inch Forstner bit. Dowel rod
will then be set in those holes, for a more decorative
look. Achieving perfect center alignment on both
sides of the gunwales would be too difficult,
if drilled through completely. Instead, I drilled
through the outwale till I reached the plywood,
then I drilled through the inwale, again stopping
at the plywood. So two sections of dowel rod are
needed to plug each pair of holes, but the result
will look as if there is only one rod going right
through. Once
the gunwales were glued, the screws used during
assembly were removed. Now, the screw holes are
enlarged with a 3/8-inch Forstner bit. Dowel rod
will then be set in those holes, for a more decorative
look. Achieving perfect center alignment on both
sides of the gunwales would be too difficult,
if drilled through completely. Instead, I drilled
through the outwale till I reached the plywood,
then I drilled through the inwale, again stopping
at the plywood. So two sections of dowel rod are
needed to plug each pair of holes, but the result
will look as if there is only one rod going right
through. |
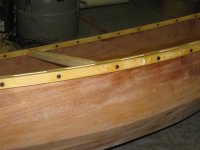 |
The dowel rods
have been cut a bit long and glued. The empty
holes are for the seat bracket bolts. |
 |
 |
A
hand saw and some masking tape allow to trim
the dowel ends as flush as possible, without
damaging the gunwales. |
Around this point, I was so fed up with sanding, I took
a long break. It was also obvious that the boat would
never be finished for Christmas. For most of December
and January, I did practically no work on the boat.
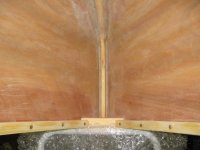 The bow and stern area (inside) proved the most
difficult part to sand smooth. I should either
have used something wider when spreading the epoxy
for these fillets, or made the stems narrower.
This would have avoided that narrow groove that
took forever to finish sanding. The inside of
the breasthook was no picnic either. I was perhaps
too perfectionist: I certainly cannot blame people
who settle for a workboat finish.
The bow and stern area (inside) proved the most
difficult part to sand smooth. I should either
have used something wider when spreading the epoxy
for these fillets, or made the stems narrower.
This would have avoided that narrow groove that
took forever to finish sanding. The inside of
the breasthook was no picnic either. I was perhaps
too perfectionist: I certainly cannot blame people
who settle for a workboat finish. |
 |
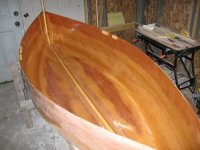
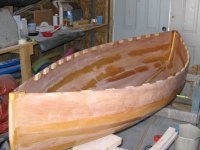
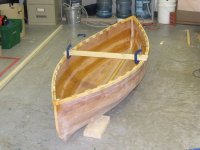
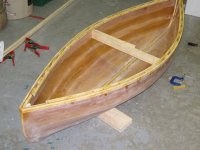
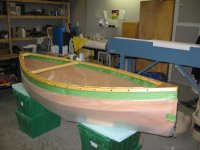
It took much
longer than expected, but now the hull is now
ready for paint and varnish. |
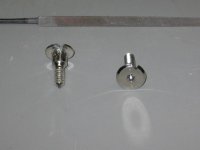 |
This is the type
of bolts used for the seat brackets: they are
called connector bolts, normally used for furniture.
Because the gunwale is curved, the holes for
these have to be recessed a bit for their large
head to rest flat. The two bolts shown here
have been gouged to become an exact fit cutting
tool. |
 |
Varnishing the
gunwales. I used a roll of wax paper to cover
the sides. |
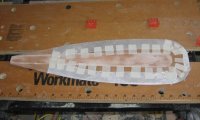 |
After the paddle
blades have been faired a first time, fiberglas
cloth is wrapped around the edge of the blade
to improve resistance to damage. Masking tape
is used to ensure the cloth stays flat against
the blade. |
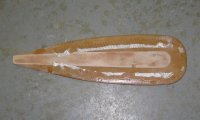 |
The fiberglas
cloth has been covered with clear epoxy. A few
wrinkles are unavoidable. |
 |
Areas of the
cloth previously covered with masking tape did
not absorb epoxy much. These have been cut off
and a rough sanding removed any excessive bump.
|
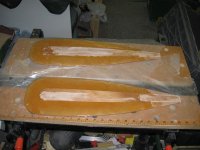 |
One coat of lightly
thickened epoxy is applied to the blades. |
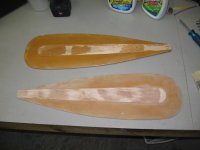 |
One blade is
now fully sanded. One more to go. |
That's it for this time. Next time the building
will be completed and the boat launched!

|
|
|
|
|
|