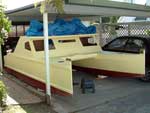
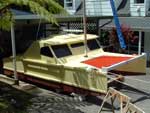
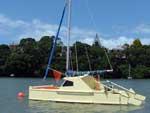
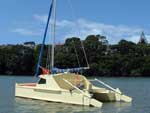
| I started building my hot Chili catamaran design
in March 06 and finished it about 9 months later,
this involved most weekends and the odd day midweek.
I actually liked the look of boat profile and and
thought it would be quick and easy to build and a
reasonable sailboat. Hot Chili has fulfilled all my
expectations. It certainly goes better than any of
my previous monohulls of similar size. The boat was
built to plan with a few minor changes to suit my
needs. Everything on the boat went together easily
and I had no real problems with the construction,
(having said that I am a 70 year old retired boatbuilder)
I think any average person could build one.
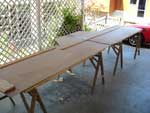
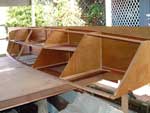
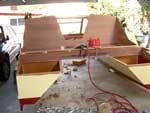
The sides were built from 6mm (1/4 inch) ply instead
of 9mm(3/8 inch). I managed to get 4 sheets of marine
ply on a special for $NZ2O per sheet - I could not
resist it. I had intended to put bunks in the hull
and I ran the the centreplate stingers the full length
of the sides to stiffen them.
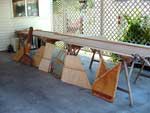
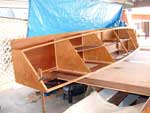
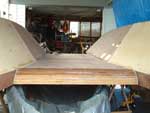
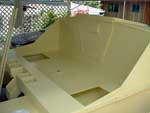
Any part of the construction that I intended to
cove with epoxy I glued with Titebond 3, the plywood
was butt joined with plywood butt straps or else fibreglassed
both sides. The bridgedeck join doweled and glued
then glassed. The whole boat hulls, cabin, cockpit
and decks were all fibreglassed.
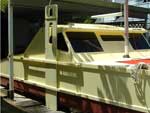
The windows are all 6mm tinted Lexan set in a butyl
rubber compound bolted through or screwed to timber
framing.
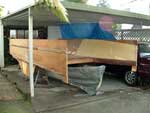
The boat is painted with an acrylic enamel (house
paint), it it does not last I will simply re-sand
and repaint. The bottoms are two layers of 6mm ply
coated with copper epoxy (mixture of copper dust or
spheres and epoxy resin) A system I have used with
success on several occasions.
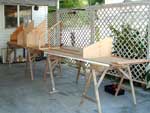
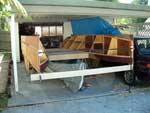
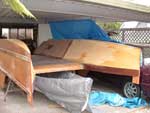
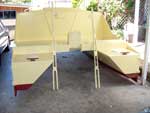
The boat was built in my carport (which has a flat
roof) when it came to turn it over I simply unbolted
the carport from the posts on one side and raised
the roof on that side with wooden posts clamped to
the carport posts, an old wooden mast was then secured
down the underside on the bridgedeck, the boat was
then lifted high enough with a small electric chain
hoist at one end of the secured mast and a wire come-along
at the other end when the boat was high enough it
was simply spun and lowered. My son and I did this
quite easily and was considerably easier than trying
to take it out the carport and needing a few bods
turn it.
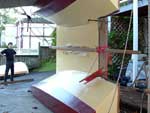
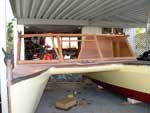
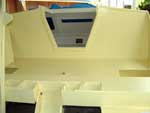
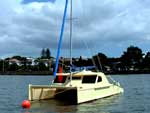
The cabin sides I raised 150mm (6 inches) as mentioned
in the building notes to give me slightly more headroom
in the cabin. The bulkheads at the aft end of the
cabin I raised 50mm (2inches) at the centreline, this
was done as the boat is moored and I wanted some fall
rather than a flat cabin top.
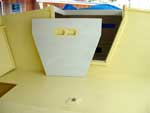
The cabin front was constructed in 3 sections with
a wooden framework rebated to take 6mm ply, which
I had on hand. The cabin centre section was brought
forward about 40mm (1-1/2inches) trying to avoid too
flat a front.
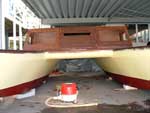
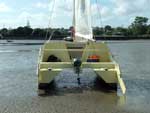
The rudder gudgeons were fabricated in fibreglass
so the rudders could be moved outboard to line up
with the outer sides (also mentioned in the builders
notes)
I originally had a forward beam for the forestay
and jib fitting, in stainless steel but it weighed
29 lbs, thinking that was too heavy I made a hollow
box section in l2mm(1/2inch) glassed with biaxial
fibreglass cloth, when finished it weighed l3lbs and
has proved satisfactory.
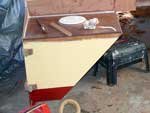
I use a 2 HP Honda air cooled outboard as an auxiliary.
Rather than lower the bridgedeck height to accommodate
it - I constructed and outboard bracket (only a box)
that can be raised and lowered, that also worked out
well.
My trampoline is crayfish netting (cost $NZ12) and
is laced as per the plans.
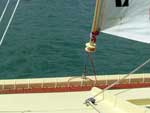
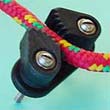
I made and fitted a simple furling gear with two
pieces of timber with two grooves, one for the forestay
and one for the jib luff, it is simply screwed from
each side onto the forestay and there is a simple
drum fitted on the bottom. The whole thing revolves
on the forestay, it rests on a simple wire clamp attached
to the forestay under the drum.
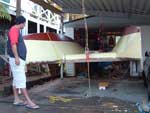
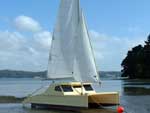
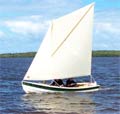
Now having launched and sailed her I am well pleased
- as for my modifications - if I was doing it again
I would not have bothered changing the cabin front
- would have left it straight. I use the bunks for
stowage and when I do come to overnight I will probably
sleep across the boat in the cabin, the extra cabin
height means I can sit comfortably on the bunks, read
or have a drink, so it has worked out well.
This is the first catamaran I have owned and apart
from sailing to odd beach cat while on holiday I have
no real experience with catamarans. On my first sail
the wind was about 10 to 15 knots, flat sea with some
gusts around the 20 knots, the boat went well and
went where I pointed her, I had trouble coming about
and had to wear the boat around a few times. In the
gusts we were doing around 8 knots, for me that was
excellent. On my second sail I experimented with placing
the centrboard in different positions, and had no
trouble coming about, although like any catamaran
she was slow in stays. She also sailed well under
main alone and came about reliably as long as I was
careful, she also sailed under jib alone (although
slowly). The more I sail her the more I am enjoying
it.
I know there have been criticism about Jeff
Gilbert’s plans and when I first
saw them I thought they were definitely different
- I am used to lines drawings and a table of offsets
- but then Hot Chili is also built very differently,
and is certainly an easy way to build. All the measurements
that are the plans have proved to have been spot on
and the construction method is great.
Some people have asked me what it cost. Unfortunately
I cannot really help there, she cost me $Nz2537.30
including trailer for for launching but I did not
have to buy one piece of timber, only plywood, I had
the mast, boom, rigging, sails, fastenings, resin
etc and when I started to build I decided I would
use whatever I had.

More about Hot Chili
|