| I was inspired to build a King Canvasback Kayak
after reading the article
on Duckworks Magazine by Tim Lehman. I own two recreational
kayaks and was looking for a kayak that was longer,
so I could take it to the lake or the ocean.
I downloaded the original 6 page plans from svensons.com.
I also ordered the book Wood
and Canvas Kayak Building by George
Putz.
The book gave many details on how to build a skin
on frame kayak. I purchased a sheet of ¾ inch
exterior plywood and 4-2x4x14 foot very clear 2x4
lumber from Home Depot. I did this so that I would
not have to scarf any wood together. Two of them were
completely free of any knots and two only had two
small knots. Wal-Mart sells poster board that has
graph lines already drawn on it. I purchased 2 sheets
and set out to draw the full sized plans of the kayak
from the plans I printed off from Svensons.
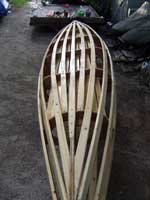
I cut out the ribs from the plywood and I ripped
the 2x4 lumber into ½ thick strips as explained
by Tom Lehman. I followed the instructions from the
King Canvasback plans. The original plans ended up
with a kayak 15ft long and 31 inches wide. I choose
to use the 14 ft lumber because it was clear of knots.
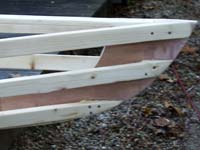
I figured out how long the kayak would end up by clamping
the ends of the gunwales and the stem timber together
and placing a rib in the middle. The kayak would end
up being 13 ft 8 inches long overall. I was surprised
how well the ½ inch thick strips bent around
the ribs of the frame. I used gorilla glue and stainless
steel screws to attach the stringers to the ribs.
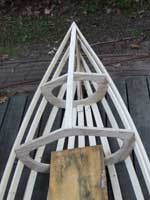
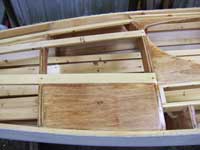
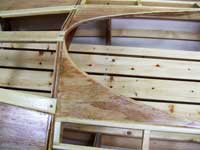
I ended up cutting in a couple of panels in the frame
from ½ inch plywood so that my toes did not
push against the deck canvas.
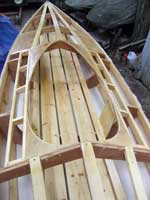
I also wanted to change the design of the cockpit
so that I could use a spray skirt. I have a spray
skirt for one of my other kayaks, so this is how I
ended up with my cockpit size, 16” x 35”,
but by doing this I ended up having to cut in some
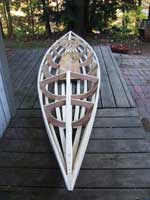
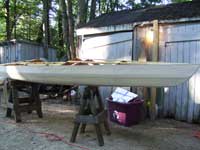
additional supports for the cockpit. Once I completed
the frame I applied 4 coats of spar varnish to the
entire frame.
For the floor, I purchased a 2x4x12’ from Home
Depot and ripped it the long way on my table saw.
I really wanted to complete the whole kayak using
just plywood and 2x4 lumbers.
I have read other articles on the internet about
the “poly test”. This is where you can
purchase a roll of clear poly, which I did at Wal-Mart,
and attach it to the frame with duct tape and it will
float. I did this so I could test the changes that
I made from the original design. It was a good thing
that I did the poly test because it showed an issue
that I had figured on. I have a size 12 shoe and I
noticed that where my feet ended up in the kayak,
I did not have enough room to place my feet straight
up and down.
 |
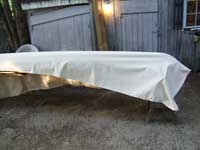
The canvas that I used was 12 oz canvas that I purchased
at a local shop that sells material mostly for furniture
upholstery. It was a little pricey, $7.50 a yard,
but I thought that is was worth it because it was
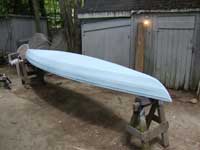
12 oz canvas and it was 5 ft wide. I was surprised
how well the canvas stretched and formed to the frame
of the kayak. I used 3/8 inch stainless steel staple
that I purchased from a boat building website. I stapled
the canvas to the top of the gunwales for the bottom
canvas. Attaching the top canvas was straight forward,
attaching it to the bottom of the gunwales.
 |
|
I really wanted to buy what I thought was the best
paint to paint the kayak with. I purchased Interlux
Brightside Polyurethane with Teflon paint from my
local marine store. I did decide to purchase this
paint due to the UV protection of this paint. In reading
the about canvas kayaks from the book Wood
and Canvas Kayak Building, one of
the big factors with the canvas after a number of
years is to protect the canvas from the UV rays of
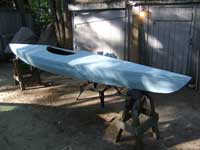
the sun. I applied 2 coats of blue paint to the outside
of the kayak and 3 coats of spar varnish after that.
Only time will tell if the extra money spent on the
specific paint is was worth the extra money verse
purchasing oil based deck paint.
 |
|
For the keel and the rub strips I purchased a 2x4x16
foot, ripped them into the same ½ inch strips
like the rest of the stringers. I steam bent the keel
as described in the Wood and Canvas Kayak Building
book by rapping a towel around the end of the keel
and continuing to pour boiling hot water over the
towel for the next 20 minutes. The wood bent around
the bow and the stern of the kayak with issue.
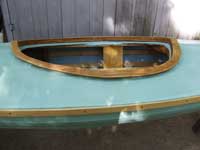
The coping is made from 2 pieces of ¾ inch
plywood and 2 pieces of ½ inch plywood. I traced
out the cockpit size on the ¾ inch plywood
and then cut out the 2 pieces about ¾ of an
inch wide. I then traced the same piece on ½
plywood and made these pieces 1 ¼ of an inch
wide. I then applied gorilla glue and a few stainless
steel screws to hold it all together.
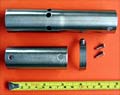
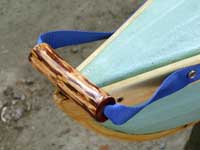
The handle is made from a branch that had been cut
down on our property. I scrapped away the bark, leaving
a little of the darker bark on for visual effect and
applied 4 coats of varnish. I drilled a hole through
the middle and fed a 1 inch wide nylon strap trough
the hole. The handle is attached to the kayak on the
rub strips by 3 stainless steel screws and stainless
finish washers.
 |
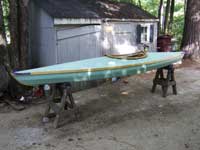
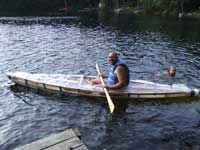
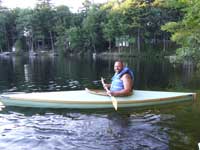
Finally launch day. After about 100 hours of work,
I could hardly wait to see how she was in the water.
Being 31 inches wide and flat bottomed; the kayak
is very stable and great fun to paddle. This has been
the greatest projects that I have made and the first
kayak that I have built. The kayak was made totally
from 2x4 lumber, plywood, canvas, paint, and varnish.
I did not use any special tools. The only power tools
that I used a table saw, jig saw, belt sander, finish
sander and electric drill. I wanted to see if I could
make a boat from just simple parts bought from a local
home improvement store. The only complaint that I
have is it does weight 73 lbs. Heavy for a 14 ft kayak
but I think that has to do with the use of the 12
oz canvas, the extra wood that I used for the cockpit
and the boards on the deck to prevent my foot from
pushing on the deck canvas.
| 
|
 |
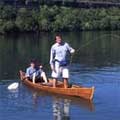
I also have been making my own paddles. Here is a
couple that I have made. One is made from a ¼
inch oak board paddle and a 1 inch ash handle. The
multi colored paddle was made from ¾ inch ash
and mahogany boards and hand planed with a block plane.
The other is a traditional paddle made from ¼
inch poplar board and 1 ¼ inch poplar handle.

More SOF Articles:
|