Some time back I decided to begin a little foray
into boatbuilding by starting on a Origami Dinghy.
The plans were available for a fair price on the net,
delivered via PDF (download now gets you that instant
gratification) and it looked like a boat that might
work well as a tender for a future larger craft.
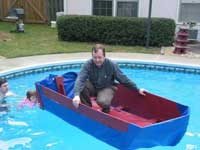 |
it looked like
a boat that might work well as a tender for
a future larger craft. |
Another nice advantage to this plan was that it would
work well as a project to build with my son, and would
result in a boat small enough for him to play around
with (supervised, of course).
I got the plans, picked up some wood, and made a
start. Then life intruded (illnesses, deaths in the
family, a new job... it all conspired against me).
Recently we were able to get back with things and
move to a point that we have a floating boat.
The Origami Dinghy design is geared around using
PVC cloth (that heavy tarp type stuff you see on the
side of some 18 wheelers here in the U.S.) as the
basis of the hull material. This gives you a folding
hull that can collapse down to just a few inches thick.
| I got the plans,
picked up some wood, and made a start. |
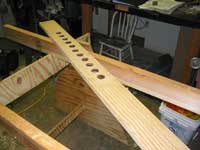
|
Plywood is used for the side panels and for the floorboards
(where you sit). Some other assorted lumber for the
keel and a few sections of piano hinge and you have
most of the required hardware and wood.
I used lumberyard grade supplies... my build is NOT
the fancy one you see on the plans
order page. I went for the "farm
boat" finish (this is worse than a workboat finish
:-)). Not a lot of sanding was done, and the paint
was some nice porch and floor paint that we already
had. This is one place that I think will be ok, since
we have some outside use of this paint on a table
that has weathered quite well.
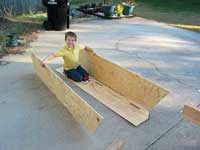 |
Plywood is used
for the side panels and for the floorboards |
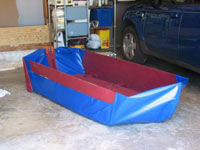
I didn't follow the plans totally, but was pleased
with the result. My main deviation was in quality
of supplies (which you probably can't see in the pictures)
and in the extension of the PVC cloth farther up the
sides. I decided to not trim the cloth but instead
let it extend up the waterline. In my viewpoint this
would make the cloth to wood seal less critical.
The downside is that this added yet more to the weight.
An 8' boat covered with this fairly heavy cloth begins
to get to be a handful. I can carry it fine by myself,
but putting it on top of a vehicle single handed is
about more than I want to do. I think the 6' would
have been a better choice for me, but little did I
know at the time :-)
| The paint was some
nice porch and floor paint that we already had. |
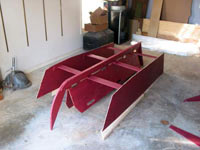
|
The plans were more in the mode of an "instruction
manual" than line drawings... you are told to
take a piece of wood 500mm x 300mm, measure 30mm from
the lower left corner and make a mark, measure from
the upper right corner and make a mark, then play
connect the dots. You then cut on the lines you have
drawn.
This method is a bit different than what I expected,
although it certainly works. I would be just as happy
with a dimensioned line drawing of each part, but
that may be just me. I would really like to have at
least one drawing or picture that showed more how
all the pieces went together, but it all worked out
in the end.
 |
Its been fun,
and I expect to use it more at the lake this
summer and give it a better trial. |
The craft proved to float quite "high on its
lines" and was amazingly stable... a friend did
a good job trying to rock it over and it wasn't interested.
The flexibility of the cloth helps here... you may
rock the keel, but the cloth flexes and helps keep
things level.
Its been fun, and I expect to use it more at the
lake this summer and give it a better trial.
A detailed blog of my construction with more pictures
can be found at:
https://www.craftacraft.com/blog/bdillahu
Another builder's pictures can be seen at:
https://www.craftacraft.com/blog/asloth
Bruce
Origami Plans are available
at:
https://www.duckworksbbs.com/plans/origami/dinghy/

|