| Hello Chuck:
I thought you might be interested in these photos,
this was in 2005. I started the boat in October 2004
and finished it in may 2005. I did not use the boat
in 2006 (4 hrs drive to the sea). I still have to
put foam somewhere on the boat just in case. I could
not get the boat to tack. I have to find out why,
maybe its my sail or the mast location or the skeg?
Or maybe my weight (270lb). I used PL premium and
copper screws for everything. I did the inner chine
log (by mistake) and used PL premium for concrete
on the outside (with a mesh) for protection.
I just bought Michalak's book
and like it very much. I want to built a bigger boat
so my wife could come with me but I do not know which
one. My heart tells me to build AF3
but my brain (i.e.capsize story & difficulty to
trimm the boat) tells me Mayfly
16 would be better. I wish mayfly would
have the same salty look as the Headland Green Island
15 (same size). I would certainly like to know what
you would suggest. I think I can fit a 16' on my trailer
& garage.
P.S. Love your work (magazine & personal boats)
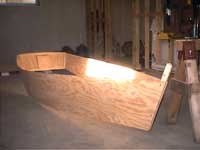 |
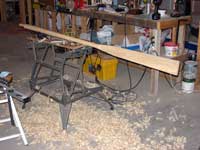
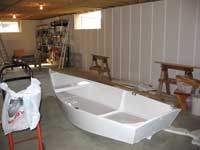
This is a picture
of the dry run (no glue) I made to ensure the
sides were properly aligned. The sides were
only attached with dry wall screws.
|
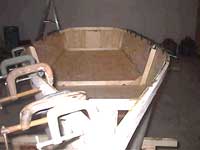 |
The chine logs
and bottom are installed. The gun whales are
being glued in place using PL Premium. |
 |
The stem is
completed, the mast partner is installed and
the tiller and rudder are almost finished. |
 |
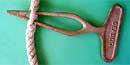
A pattern found
on the web was used to make these horn cleats
that will be attached to the mast. |
 |
This is a oar
being completed. I used Jim Michalak plan &
explanation found on the web. |
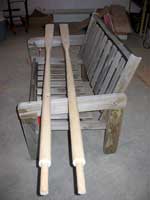 |
The two completed
oars before the paint. |
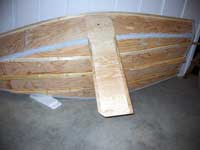 |
Installing the
leeboard. You can see the PL Premium for concrete
(Gray stuff) I used to cover the chines. I also
used a fiberglass mesh (for dry wall) under
this rubber glue. |
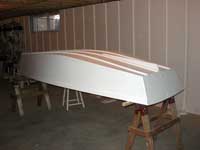 |
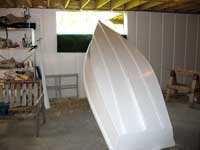
Summer Breeze
received 3 coat of latex paint (100% acrylic)
over a coat of primer. |
 |
The inside of
the boat is painted and I just installed metal
plates for the oarlocks. |
 |
Getting ready
to get the boat out of my basement. I had to
first take the window frame out of the house
foundation. I used my camping carpet at the
base of the window to protect the the boat in
the process. |
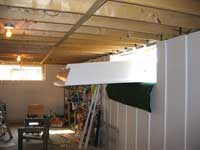 |
Wow ........
A Flying boat. Since the boat was built using
1/4 inch exterior plywood it is light easy to
lift. |
 |
The delivery
went well and the new parents are happy. The
most difficult part was re-installing the window.
My wife warn me that I would never do that again. |
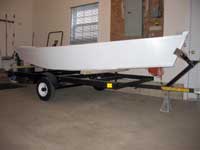 |
This is the
trailer I bought from Canadian Tire. It is a
utility trailer that could be converted for
transporting a boat. It came with a 5 feet extension
that I will use for my next boat (16'). |
 |
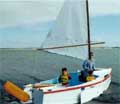
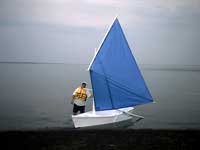
Trying the boat
on the St. John river near Fredericton, New-Brunswick.
My bench (mobile) was not in the center and
there was too much current in the river but
there were no leaks. |
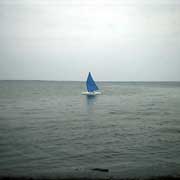 |
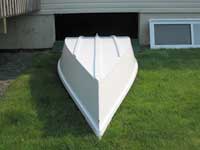
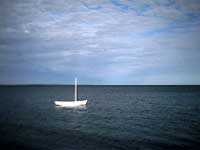
This picture
was taken on Lamèque Island in North
East New-Brunswick during one of our camping
weekend. The water you see is Baie des Chaleurs.
This was a safe place to try the boat since
there was only about 2 feet of water where I
was sailing. |
 |
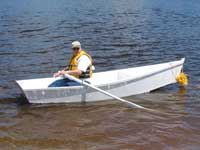
Of course when
you want to sail there is no wind. I had to
row back but the Michalak oars were perfect
for the job. |
 |
Summer Breeze
with no sail at our camping site on Lamèque
Island. We had to move from our spot last summer
because we were invaded by kyte surfers. |

More about Summer Breeze:
|