Why build an Oz Puddle Duck Racer?
That’s the question my friends and family have been asking me during most of this year. What should have taken a couple of months build time has extended to several months.
Yes I have provided plenty of time for the jibes to flow and the comments have included “What a funny looking boat what will you do with it”, “Why is it a box, don’t you know boats have a pointy end” and of course “So when are you going to build a real boat”. They are an ill mannered lot my mates.
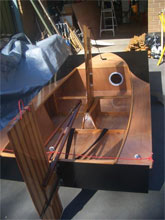 |
“Why is it a box, don’t you know boats have a pointy end?” ... “So when are you going to build a real boat?” |
Well the short answer is because I wanted a boat to mess about in. Do you remember the Wind in the Willows quote? I think of it often.
I had been boatless for a couple of years after parting with my Seawind 1000 a 33’ cruising catamaran. Moon Shadow was moored in the Whitsunday Islands Queensland a beautiful cruising ground but getting the family up to the boat from Adelaide (about 3000km) was a big task. We managed it for several years however in the end the kids have grown up and trying to co ordinate schedules was proving more and more difficult so she had to go.
Why is a boat important to me? Well I come from a long line of boaties and feel privileged to have been introduced to sailing at an early age. As a youngster Saturday during the sailing season was spent on the beach while the old man was out racing then later in the day trying not to be noticed at the club house bar listening in while the old salts told lies and bad jokes. Then finally I was old enough to crew in the junior class and I still remember the excitement of my first race the flogging sails luffing at the start, the skipper yelling abuse (skipper’s prerogative) at my mistakes and the gybe capsize at the leeward mark, great fun. What followed has been a life time of enjoyment coming from both owning and crewing on a variety of boats including off the beach dinghies and catamarans, trailer sailers and keel boats. I have also been fortunate to tag along on a few yacht deliveries one a memorable trip across the Coral Sea on 55’ Simpson Cat but that’s another story.
Now knowing about my experience with some really cool but expensive boats has also prompted acquaintances to comment “Why do you want a boat like that” well what struck a chord with me was the potential for this little boat to introduce would be sailor/boat builders to the joy of sailing. In my case it also provided a very economical return along with the opportunity to learn new skills.
| What struck a chord with me was the potential for this little boat to introduce would be sailor/boat builders to the joy of sailing. In my case it also provided a very economical return along with the opportunity to learn new skills. |
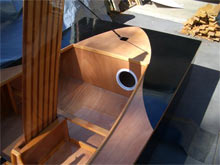 |
Michael Storer the designer and Peter Hyndman responsible for the PDR website have extensively documented the many reasons someone should consider building a PDR so I will explain how I came to build a PDR.
I took up woodworking a few years ago and much to the horror of my long suffering wife began accumulating various tools and machinery. Now with any important purchase the buyer should carry out appropriate research. How does a novice woodworker research? Well, the internet of course that’s when I came across Woodworking Australia’s Woodworking Forum otherwise known as the Ubeaut Forum. Initially my research centered on all things cabinet making but I kept tripping over Michael Storer aka Boatmik and Peter Hyndman aka Bitingmidge burning up bandwidth about this Puddle Duck thing including references to a Shorty fellow who it seems was responsible their sudden interest.
I admit for a long time I didn’t pay a lot of attention like many on first inspection a Puddle Duck looked - well, let’s just say not particularly attractive and anyway how would a boat with that dirty great blunt bow ever sail with any reasonable performance.
Then late last year the sailing pangs started to take hold and I began thinking wooden boats after all I was now a woodworker, well sort of. I read about the Oz PDR development and it was immediately apparent that these boating types Michael and Peter shared enormous enthusiasm for the concept and Michaels design had brought a certain subtle appeal to what is fundamentally a box.
Much study on the forum ensued along with a trip to a local boat show that Michael was attending accompanied by an Oz PDR. So after a bit of a chat with the designer and getting close up and personal with a Puddle Duck, I thought - well, I could build that.
Oh no I was hooked.
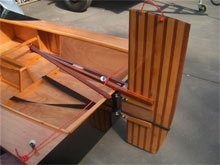 |
After a bit of a chat with the designer and getting close up and personal with a Puddle Duck, I thought - well, I could build that. |
Michael has incorporated a straight forward, read easy method of construction in his design so anyone will have little difficulty in producing a boat. A couple of things jumped out at me though when looking at the boat. The top edge of the rear buoyancy tanks are exposed along the coaming and the top of the rear transom seemed to need something as it looked unfinished, pardon my candor Michael. Straight away the woodworker in me decided those two things would need an extra bit of fiddling during the build.
Building commenced and like many a wooden boat builder I couldn’t help showing off my handy work on the forum, here are a few posts.
April 08
 Oz PDR build in Adelaide Oz PDR build in Adelaide
or how to really complicate a great set of plans.
Hi thought I'd better post some pics of my progress as I didn’t make the Ubeaut Squadron SA Division sail day. I was distracted all day thinking about you blokes bobbing around at West Lakes.
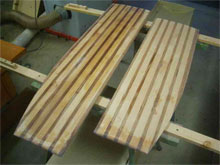
So got my plans off Ted at Duck Flat at the end of January ordered some epoxied Gaboon and the fittings kit, really glad I did as the time saved and the finish they do is well worth it. I have decided to have a lug rig and as I have limited space and had to wait for the ply. I started with the foils - the pic shows them with the tips glassed and ready for final coatings pic2. is the spars also waiting for a coating still need to do a bit more sanding round the top of the mast a drill the hole for the step. Next weekend maybe.
| I started with the foils - the pic shows them with the tips glassed and ready for final coatings pic2. |
 |
The ply arrived in time for some progress over Easter although many interruptions meant I only got the panels cut chine logs laminated and fitted.
Now to the complicating of Miks plans, he'll probably chuckle when he sees this and advise me that my total lack of consideration for stresses will result in disaster. Oh well for me the journey is as important as the destination. Anyway I was cutting out the pieces for the 2nd frame and trying to get the grain to line up, those of you who have built an Oz will know what I'm talking about but I found my measuring stick somehow had lost about 20mm. Oh no! What to do? No spare ply so staring at the short bit I think why not curve the bouyancy tank side slightly that would solve the problem but then I thought why not rebate the cleat while I'm at it. Pic4 shows the glue up I have had to do it in 3 stages to get all the bits to stay in place.
 |
Pic4 shows the glue up I have had to do it in 3 stages to get all the bits to stay in place. |
Onwards to today I got to 3D pic5. Bewdy.
I'll continue to explain some other mods I'm doing just make life a little more difficult but that’s part of the fun I recon.
| Onwards to today I got to 3D pic5. Bewdy. |
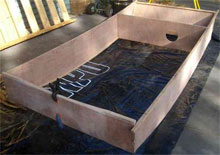 |
BTW I have decided on a name "A Ducks Transom" as when I have finished I will have used up a Kings Ransom in Brownie points for all the shed time.
Cheers for now
Mike
April 08
Hello All,
I have made a little progress it has been slow going as I play around with some mods, the pics show a couple of changes to Miks plans.
1. Finally fitting the frames after gluing a bit here and there. First problem I had was finding some decent clear lengths of Oregon from my salvage pile; I ended up laminating a few pieces.
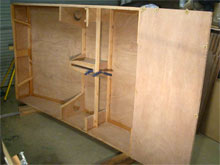 |
1. Finally fitting the frames after gluing a bit here and there. |
2. The #2 frame is curved and rebated for the ply a bit of mucking around but hopefully worth it. While I was experimenting I first shaped a curve that looked good then copied onto a second section glued to create the rebate.
| 2. The #2 frame is curved and rebated for the ply a bit of mucking around but hopefully worth it. |
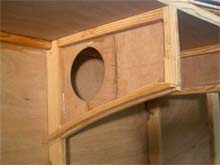 |
3. After getting the front tank curve sorted I cut the rear cleat in one piece and cut the rebate with a router using the curved offcut as a fence. Cutting the angled housing for the transom cleat was a little tricky just marked the cut then eye balled it on the table saw sled using some wedges to set the angle. The challenge now will be fitting the ply.
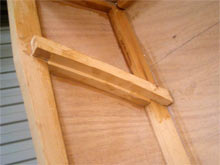 |
3. After getting the front tank curve sorted I cut the rear cleat in one piece and cut the rebate with a router using the curved offcut as a fence. |
4. Centre case seems to fit OK again played with some shaped top cleats think they work.
| 4. Centre case seems to fit OK again played with some shaped top cleats think they work. |
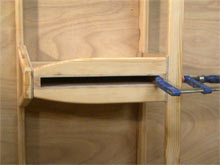 |
Question: How to mark out the foil cut out, I have penciled the inside of the case and plan to drill a small hole at each corner to get the case layout on the outside then make a pattern and orientate to the drill holes. Is there an easier way?
Cheers for now
Mike Claridge
*****
|

