 |
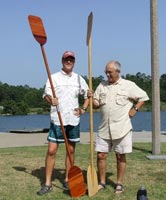
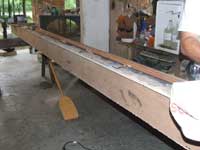
The picture on the left shows Jeff Jouett with his new two pound mahogany double blade with s.s. ferrule from Duckworks next to yours truly and my old pound and a half double blade made from Quam, a Central American wood with a density somewhere between Western Red Cedar and Balsa. The paddle may be light but it’s tough enough to have seen me through close to a thousand river/creek miles so far and the paddle’s probably in better shape than the paddler.
Click images for larger views |
These paddles are about the 4th generation of wood/epoxy/fiberglass double blade paddles that started out as a way to use of the leftover materials from building a stripper canoe. The design has evolved to the point I don’t see anything I’d change if I started buildi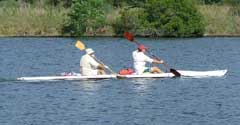 ng a new paddle tomorrow. Such a simple thing, a round shaft with a wide spot at each end, but there are subtle symmetries afoot, every curve and shape has a purpose perhaps not evident at first glance. The dihedral of the blades and location of shaft centerline on the blade help keep the force of the stroke centered on the shaft so there is no torque to strain your forearms after a long paddle. The slight cup of the blades allows the blades to slide into the water with minimum fuss. The tilted forward blades move the effective portion of the stroke forward much like a bent shaft single blade (the asymmetrical cousin). An unexpected side benefit of freeing the upper end of the blade from the shaft is the shaft stays dryer than expected and I’ve never felt the need for drip rings even though I favor a fairly vertical stroke. ng a new paddle tomorrow. Such a simple thing, a round shaft with a wide spot at each end, but there are subtle symmetries afoot, every curve and shape has a purpose perhaps not evident at first glance. The dihedral of the blades and location of shaft centerline on the blade help keep the force of the stroke centered on the shaft so there is no torque to strain your forearms after a long paddle. The slight cup of the blades allows the blades to slide into the water with minimum fuss. The tilted forward blades move the effective portion of the stroke forward much like a bent shaft single blade (the asymmetrical cousin). An unexpected side benefit of freeing the upper end of the blade from the shaft is the shaft stays dryer than expected and I’ve never felt the need for drip rings even though I favor a fairly vertical stroke. |
On to building a paddle. First a disclaimer, please use whatever techniques and tools you’re most comfortable with and have at hand but do follow prudent practices around sharp rotating machinery as well as keeping you skin isolated from uncured epoxy hardener. |
The paddle is essentially a shaft with a blade at each end so lets start with the blades, as there’s a few more steps involved. The blades are just like a stripper canoe a wood core with a fiberglass skin on each side. The wood core can be 3/16” thick and the skin can be 4 or 6 oz glass, 4 oz preferred but either will do. First cut out 36 or so strips about 8” long with about a 15 degree taper on cut. Then tape together in two panels make sure they are mirror images of each other. You can carefully match strips in various patterns/colors if you wish depending on how far you’ve descended into this particular addiction (I’ve been known to double bookmatch decks in the past). It is prudent to use a harder strip on the tip, I’ve used mahogany and maple in the past.
Making the Blade
|
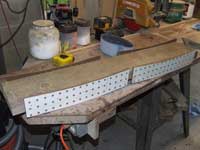 |
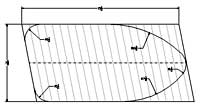
The blade form is made from a section of 2x6 with 4 pieces of ¼” material fastened as shown, note the skewed angle and mirror imaging. |
 |
With each blade blank taped together run a bead of glue, titebondII works well, in the joints. |
 |
Draping the strips over the edge of workbench as I go works well for me. |
 |
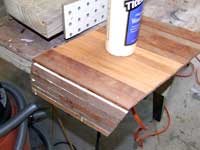
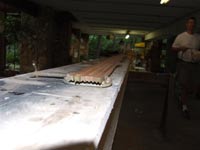
Put the still taped and glued blanks on forms and weight down. |
 |
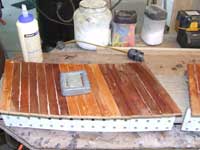
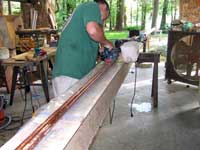
After glue has dried, sand concave side of blanks smooth, then fiberglass. |
Next step should be done fairly quickly, wood with glass on one side has a tendency to wander a bit depending on temperature and humidity, even mahogany.
 |
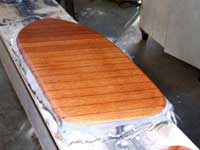
Use the paddle pattern as a guideline, far more important to have sides match, but mirrored, than have this exact size/shape blade. |
It is important to have the slope in the tip. Length isn’t too critical though I doubt that much shorter would be in your best interest. Width could easily be 1/4”-1/2” narrower, go wider at your own risk. Once the outline is cut, making both a left and a right, sand the outside of blade smooth, tapering the perimeter down to the face of the blade. Glass second face and set aside while making shaft.
Making the Shaft:
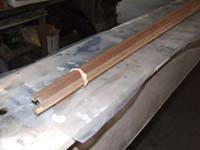
| Take 8 – 7’ long strips of typical stripper material, ¼” X ¾” and make v-grove in one ¼” face of each strip. Here I’ll digress, many will use a table saw for this operation, others will use a router/table setup. I use a shaper bit in a drillpress, feeding the strips through a jig clamped to the drillpress table. Reason being I don’t have a table saw and routers are at the far end of my “Gee I really like this tool” spectrum. |
 |
| However the v-grove is done, then rip the strips to 9/16” wide, this will finish out to a shaft 1-3/8” diameter, so if you want a thinner shaft go maybe 1/32” narrower, a little bit goes a long ways here. The next step requires a seven to eight foot long flat space, a good 2x4 or 2x6 will work. Clamp all eight strips together, v-groves down getting strips aligned as best you can. Taper both ends down to 5/16” or a little less, leaving the middle 32” or so parallel, a power plane is handy here. Then lightly sand planed area to open the grain. |
 |
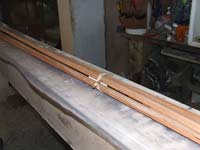
| Assemble. Always do a trial run before mixing glue. This can be a real invitation to frustration if you try it freehand, here’s what has worked best for me. First mark all the strips in the middle on what will be the outside. Then strap the strips together over a 3-4” long piece of 1” pvc pipe or similar. I use a home made bungey with a large rubber band and a piece of dowel. |
 |
| With the strips held in reasonable proximity to each other you can get the strips interlocked at each end and start ‘zipping’ strips together towards the center, pull the piece of pipe out of center before you go very far. |
 |
| Once you’ve got the assembly down, its time to actually glue stuff together. |
 |
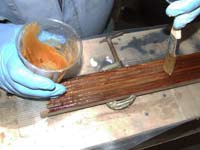
| Lightly reclamp strips together v-groves up and mix epoxy. First spread a coat of neat epoxy in grooves followed by epoxy thickened with wood flour to the consistency of thick syrup. |
 |
| Assemble for real, it is actually easier with the epoxy lubricating the joints. |
 |
| Clamp every 8” or so with cable ties or equivalent. Eyeball down the length of shaft to make sure its straight, easy to adjust at this point. If you prefer you can pre make some jigs to hold everything in line, but eyeball adjustment seems to work for me. |
 |
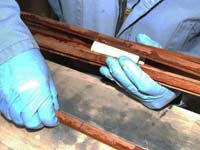
| Next day after the epoxy’s set, it’s time to shape down the shaft. Clip and remove cable ties. Once again a power plane is useful to knock off edges and go from 8 sided to 16 sided. From here sandpaper round. I often use a really old ½” industrial drill (600 rpm load or no load) clamped in a vise to rotate shaft. |
 |
Mating the Blades to the Shaft:
Mating blades to shaft takes a little thought, particularly feather angle. First decide on feather angle, anything from zero to ninety degrees. If angle is anything besides zero degrees you have to decide whether to use left or right hand control. The vast majority of paddlers use right hand control (even us old lefties). Some of the earlier iterations of my double blades were automatically of the ninety-degree variety and they still feel fine for a short paddle but I now set my blade angle at about 75 degrees. Incorporating a ferrule in the middle of the shaft allows you to set the feather angle whereever you want by drilling an extra hole for the lock button.
 |
To trim the shaft ends for blades I cut an eight to one taper at the end of the shaft and sand the cut face to match the curve of the paddle blade. Mark the location of the shaft on the blade and then gather up 4 pieces of 1x2 or so and some clamps. |
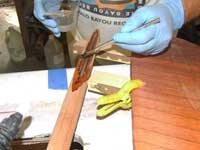 |
Mix epoxy, once again precoat end grain before applying thickened epoxy. |
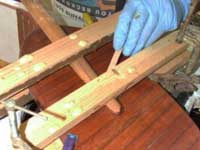 |
Clamp and let cure. |
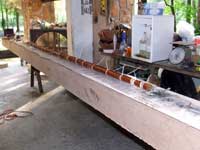
Only thing left is to coat shaft with a coat or two of epoxy before varnishing, then go out and have some fun.
***** |