
 Custom Search
|
|
| sails |
| plans |
| epoxy |
| rope/line |
| hardware |
| canoe/Kayak |
| sailmaking |
| materials |
| models |
| media |
| tools |
| gear |
 |
 |
| join |
| home |
| indexes |
| classifieds |
| calendar |
| archives |
| about |
| links |
| Join Duckworks Get free newsletter Comment on articles CLICK HERE |
|
|
| June Treasure Chest |
Send
items to chuck.leinweber@gmail.com for inclusion here next month. |
ScarfingIf you are scarfing timber, make sure the grain runs the same all the way through the length when scarfing and gluing. Planing should then go well. Safety with power boards. If you use a powerboard don't have an empty point that can gather dust. Cover it with a child's power dummy plug. Fire can result if dust in the powerboard catches and it happened to a friend of mine. Mike John P.S In case you have not seen it before the The Rudder, up to 1922, is full text here https://catalog.hathitrust.org/Record/000599702. An index is here: https://library.mysticseaport.org/initiative/ruddertype.htm I found it best to search by boat type. There is also lots of great reading here https://openlibrary.org/ An Extra P.S I just found that Sketchup is handy for measuring lines. https://www.flickr.com/photos/27867753@N05/7151470973/ You import the image of the lines and scale it to the correct size. Then you can measure anywhere in the drawing with the Sketchup tape measure and get an accurate measurement. This is now a public domain drawing from The Rudder, V31, 1915. DeckMy wood working took a side turn a couple years back and I spent the last couple years turning out wood turnings for a yarn shop in Providence. Boats ended up taking a side seat, which is perhaps good. In the back of my mind has been sending the proof of the pudding regarding the canvas decking job I wrote about. I had today an occasion to send a link to the article when restoration of an odd Beetle Cat came up. Since I just this past weekend uncovered the blue jay I though some pictures might be in order.
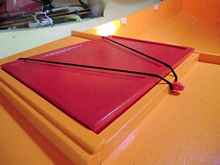
Bit of background, the boat has been outside on its trailer for two seasons with only a green tarp to keep things dry. When I uncovered her there was only sun-baked tarp dust and some wind blown dirt on the deck, she had no mildew or mold spots anywhere. Fifteen minutes with Simple Green and a soft brush and this is how the deck looks. Deck has not been touched up paint wise since I finished the decking job. Bob BatteriesThis is put out by a battery company but there is good info here.
Chuck. HatchesTom Mauer asked me how I made my hatches and I drafted up this drawing for him. I thought I would pass it along to you too. Shock cord and parrels bought at duckworks.
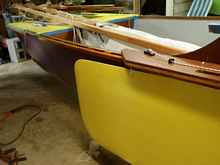
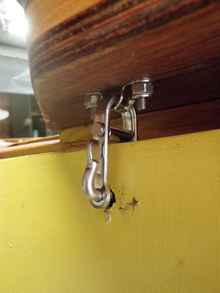
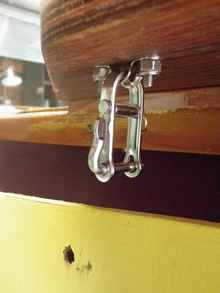
Paul Moffitt Leeboard Safety ShackleI am building my first boat that has a leeboard, a Jim Michalak, Hap's Cut and have spent a few hours looking through pictures on the web to see how others have built theirs. I was inspired by one with John Wright and his Jim Michalak, Laguna. The picture shows John, who is always smiling, next to his leeboard after it spent a few miles dragging on the pavement while towing his boat to a sailing event. OUCH! I began to think of an easy way to "tie-up" the leeboard while it was on the trailer or sitting on the beach. Well, I had my "light bulb" moment while I was bolting the upper leeboard guard onto the side of the boat. I dug into the spare parts box and found a spare halyard shackle and a small pad eye. I mounted the pad eye under the aft end of the upper guard and attached the halyard shackle. Pulled the board up and drilled a hole through the trailing edge of the board so the captive pin of the shackle can pass through the leeboard and lock into place. The leeboard is locked into place hanging from the shackle. When I am working around and moving the boat at the house or when I roll up onto a beach I can hook up the shackle and the leeboard will not grind on the sand or rocks. When traveling with the boat on it's trailer I will add an additional safety line around the leeboard and tie it to the gunnels to relieve some of the stress off the area at the shackle, just in case. So John, thanks for the inspiration and see you all on the water.
John D Goodman Removing WiresUnfortunately, on the cat I'm building now, the tack welds were not strong enough, and when I stepped in the hull after pulling the wires, the whole thing unzipped. I had to step in, because the freeboard of the hulls would not allow me to reach to the bottom from the outside. So after re-wiring the hull, I filleted and taped the inside seams, using a sort of contrived scaffolding inside, supported by outside strong points. To remove the wires, I used a car battery, a set of jumper cables, and a carbon electrode made from a D-cell battery. You unwind the twist, clip one cable to one end, pop the other end with the electrode, the wire heats up in a second, which softens the epoxy so it releases and can be yanked out with no trouble. Ray https://slidercat.com/blog/wordpress Removing Lumps
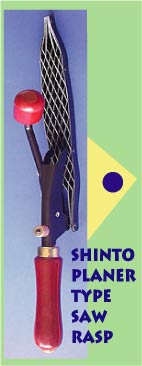
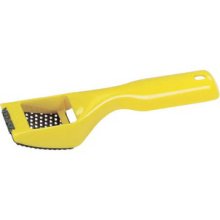
To remove lumps on FG tape edges my tool of choice es a small Stanley Surfoam Shaver Tool. Very quick and easy. Generally use it before final layer of epoxy. Here is a link. JoeT Crack in the Hull
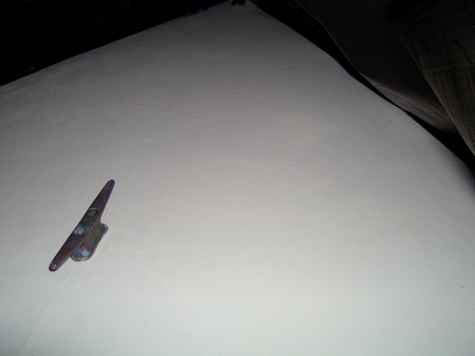
I just thought I would share that I went sailing at Elephant Butte yesterday. I managed to move around a bit, but the wind never seemed high enough to really feel like I was sailing. Anyway, when I went to launch my puddle duck, water started coming in through a crack in the hull. I've never had that problem before. I have had cracks develop in the hull before, but I always caught them and repaired them before I took the boat out. In this case the crack only looked like a slightly raised ridge of paint in one little area on the bottom of the boat. I read somewhere (probably on Duckworks) about people using duct tape on small cracks. So we took the boat out of the water, turned it on one side, dried it off good and put a strip of gorilla tape over the crack on the bottom side of the hull. I put it back in the water, and no more water came in. I sailed it that way the rest of the day with no problems. I have always carried a roll of the tape with me just in case and yesterday I had to use it. I was glad I had it. When I unloaded the boat off of the trailer back at home, it was still perfectly flat and hadn't come loose at all. Here is picture above with the patch applied. Paul Cook Edge-Wrap of Glass on Rudder Edges
I just uploaded a few photos of edge-wrapping a rudder trail-edge with glass for our 12 foot sharpie-skiff. Stacy Smith
|


To comment on Duckworks articles, please visit our forum
|