Research
Let me start with my research. A cartoon for this rowboat was drawn up by L. Francis Herreshoff, later plans were drawn by John Gardner. Jim Michalak modified Gardner's plans so it could be built using plywood and stitch and glue. Jim M's plans are what I used, adapting to skin on frame.
Lots of guidance came from Dave Gentry and his website plus I built his Whitehall before the LFH17.
I got help from some of the videos by Jeff Horton and used his new book "Fuselage Frame Boats".
Lots of useful info came from Cunningham's book: " Building the Greenland Kayak".
The Yost site, although focused on kayak's, has very good info on building techniques which can be adapted to open boats. Yost is also referred to frequently by Dave Gentry.
A Pictorial Essay
As the LHF 17 is 17' long, for the strong-back I used three 18' 2x4's on edge for the base and a 2x6 flat for a cap. All these were screwed to three saw horses which in turn were screwed to my wooden building platform. Shims were used to get it all straight and level. Then the frame brackets were positioned and screwed down. Setting all of this does take time, but when its done, the rest flies.
Using Jim Michalak's plans for LFH17, I took his form offset locations for plywood joints and changed those from ply chines to stringer locations. I used offset locating learned from Dave Gentry and the Yost site. After getting the five frames and both stems plotted, I transferred those shapes to 1/2"/ 12 mm Meranti plywood.
Using the ripping jig from "Building the Greenland Kayak", I ripped out the stringers and wales. Then set the wales up in a crude bending jig to get some sheer bend after a few days there. I built the strong- back from Yost, Gentry, and Kudzu info.
Before assembling all, I epoxy/glassed/butted two long skinny pieces of 1/4" ACX Doug. Fir ply was used as an experimental bottom/floorboard. On the Whitehall, I ended up placing the floorboards on top of the frames and would have liked them lower, hence the plywood on the bottom.
Most, but not all of the connections are lashed with artificial sinew. There's a few SS screws where needed. You'll also note "stain" in some places on the ply. That's my "pine tar soup", used for a finish. Although, I did "seal" the ply and outside edges of stringers with varnish to avoid the "soup" staining the skin.
The skin is 8 oz. polyester from George Dyson in WA. and finished/sealed with oil based varnish tinted with white pigment.
Like many of Jim M's boats this one is thwartless, so I made up one of his seat boxes and adapted for the keel stringer and center frame. Its padded with some 1/2" closed cell foam. Connected to the seat box is a loop of 1/4" line with a stretcher attached. Having inwales and outwales allowed me to make up a pair of adjustable oar socket brackets, which give about 12" of travel.
|
The model I usually build before beginning full size. |
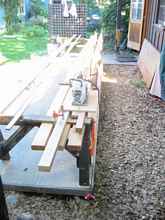
Here's my ripping set up taken from C. Cunningham's "...... Greenland Kayak" book. Last shows the cut stringer on right side of left piece. Other piece is part of the guiding set up. Lots easier than trying to run 18' 2x8's through a tablesaw.
|
Stringer ripping jig using a circular saw.
[Google Books. ed.] |
|
Wale bending jig using rocks as weights to bend the 9/16" x 1 1/2" Doug. Fir wales in the sheer curve. Very important if you don't want a flat sheer. |
|
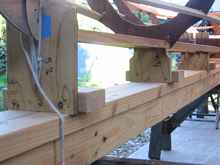
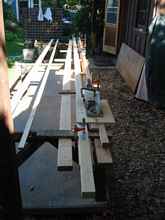
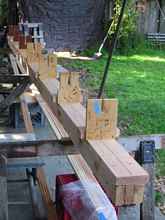
The strong back with brackets for frames and the stems attached. |
|
Frame 3 with the keel stringer inserted. Also, the frame temporarily screwed to a bracket screwed to a 2x4 block, screwed to the strong-back. |
|
The three bottom stringers lashed into one of the stems. |
|
Screwing and gluing an inwale to spacer blocks |
|
Close-up of stringer lashed into a frame.
|
|
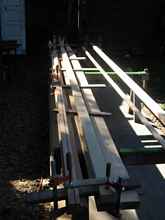
Close up of strongback with brackets, frames, stringers and cord holding all from floating away. |
|
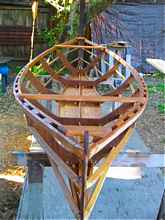
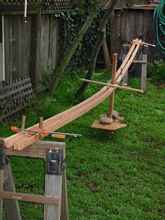
Frame off the strongback. |
|
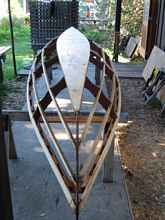
Frame w/ 1/4" ply bottom/floorboard attached. |
|
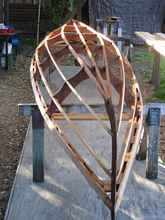
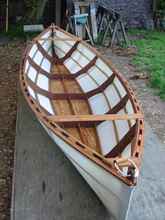
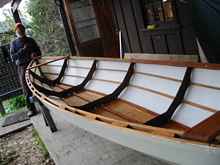
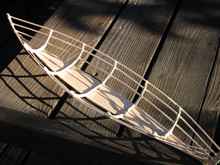
Finished frame with limber/drain holes visible in each frame. |
|
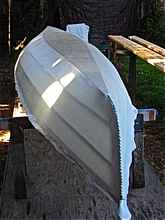
Skin stapled and bows sewn. |
|
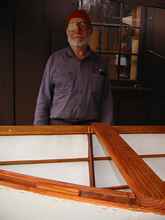
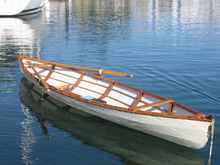
It's varnished and except for oar lock sockets ... finished. Last two pics include me and my orange hat as it was cool then. |
|
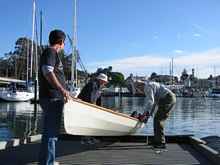
Two friends and I launching it just before Christmas 2011, in the Santa Cruz CA. Yacht Harbor. |
|
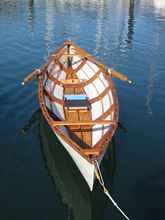
Afloat with the two piece seat box and stretcher. And, my traditional white nylon oar locks. |
|
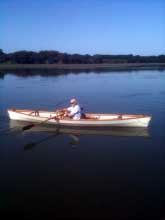
Was taken just last Saturday in Elkhorn Slough at the beginning of a TSCA row. |
***** |


-ss.JPG)
-ss.JPG)
-ss.JPG)
-ss.JPG)