
 Custom Search
|
| boat plans |
| canoe/kayak |
| electrical |
| epoxy/supplies |
| fasteners |
| gear |
| gift certificates |
| hardware |
| hatches/deckplates |
| paint/varnish |
| rope/line |
| rowing/sculling |
| sailmaking |
| sails |
| tools |


| join |
| home |
| indexes |
| classifieds |
| calendar |
| archives |
| about |
| links |
| Join Duckworks Get free newsletter CLICK HERE |
|
|
| Using Plug Cutters |
by John Welsford - Hamilton - New Zealand |
|
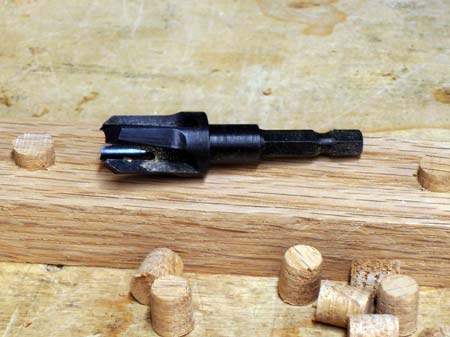
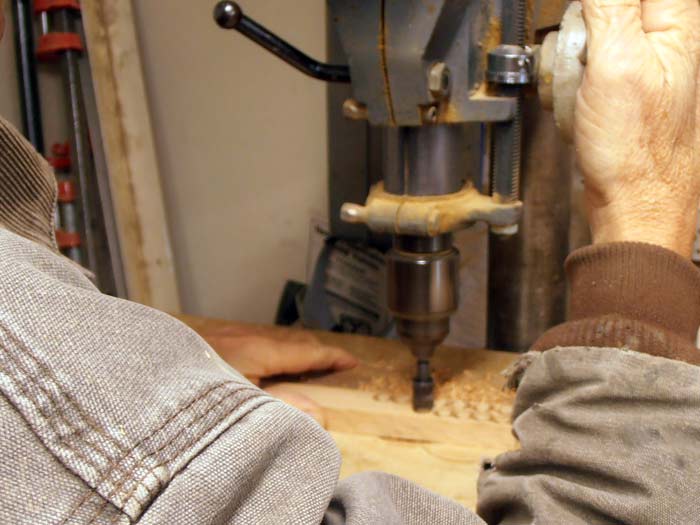
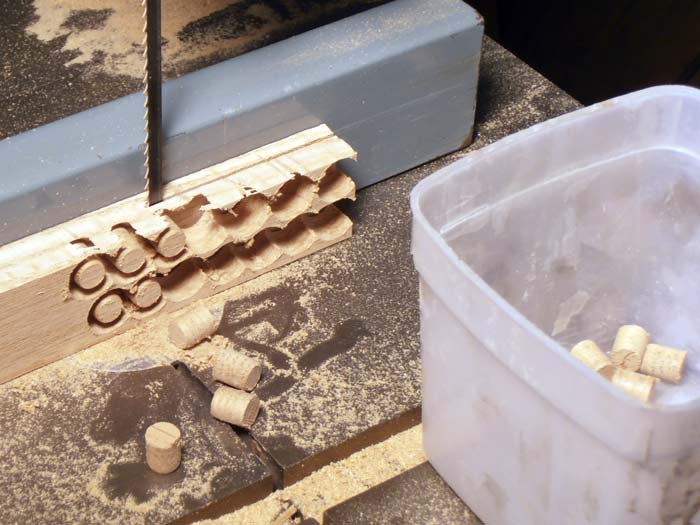
On those fancy teak and mahogany trimmed millionaire boats you see at boat shows and on the covers of the glossy magazines, there is not a screw head to be seen. Vast expanses of varnished and oiled wood and not a blemish. You KNOW that there must be fastenings in there, but nothing shows. Its only when you look closely that you see tiny circles regularly spaced along the trim, faint but fitting perfectly and so much a part of the beautifully fitted woodwork that they look almost as though they have grown there. Plugs, or bungs. Here is the story of how you make and fit them. First, they must be sharp. Buying new they will be ready to use, but teak and some other woods will take the edge off very quickly. Somewhere near you there will be a service that sharpens saws, router bits, engineering mill bits and such. If you cant find them phone a company that makes kitchen cabinetwork and ask who services their tools. Given a sharp plug cutter, the second thing you need to know, is that you must use a drill press, you cannot use a hand held drill, the cuts must be precise and perfectly clean and you wont get that with a hand held drill. Select an offcut of wood from the wood that you will be fastening, take care to match the colour and the grain. Note that the grain needs to be as close as you can get to the workpiece in every respect, angle to the surface, the orientation, and the appearance. That piece can be anywhere from an inch wide to maybe three inches according to the saw that you will use to “free” the plugs. It should be about twice as thick as the depth of the plugs you are planning to cut. For most work, I cut my plugs from a 1in x 2in piece. Set the depth gauge on the drill press to slightly more than the diameter of the plug that you will cut. If the tool has no depth gauge then get a sharpie marker and put a black line around it, this will show up clearly when the drill press is running. Ensure that the depth that you are cutting to leaves a clear space above the plug surface, you don’t want it to jam in there. Set the drill press speed on medium slow, maybe 400 rpm for half inch plugs, 600 rpm for 3/8in. It helps if you have a drill press vice, but if you have a long piece it can be held with care. I have a piece of steel angle I’ve drilled so I can bolt it to the drill press table set so that the wood that you are going to cut can slide along nicely so you can drill a series of plugs one after the other. This “fence” can be moved to suit the width of the wood and where you are going to place the next line of plugs. Drill those holes, one after the other. Note that the plug STAYS IN THE WOOD. It DOES NOT come out until the next process. Make multiple rows of holes, as many rows as the width of the wood allows. Always cut some spares, you can bet on some wastage. I make about 20% more than I think I’ll need. Got enough cut? Plus spares? Take the piece over to your table saw, or bandsaw. Set the fence to give you a width where the cut will just clip the bottom of the plug as you rip along the length of the wood piece, this cut cleanly frees the plugs from the wood piece. It will though spit the detatched plug out sideways away from the blade so have a small box sitting alongside the cut to collect them. Some plug cutters, when cutting at the correct depth will produce a slight taper on the end of the plug, when you go to use them that is of course the end that you push in first. Next, the holes. Drill bits come in many different configurations, the one you want for this is a true woodworking bit that has a “scriber” or “wing” on the outer edge of each cutting edge and a spike in the middle. Use a drill with a depth gauge or mark the depth with masking tape or a sharpie, that depth should have about 2/3 of the plug diameter in there above the surface of the screw head. That may take a couple of experimental holes to get right. Note that the brad point drill is only used to make the part of the hole that takes the plug, when that’s drilled you then need to drill the pilot hole and countersink the bottom of that hole. Take care doing this, a conventional wood screw has a shank that is the same diameter of the outside of the thread at its largest. So the pilot hole should be two diameters, one for the shank, one for the thread. Aside a little, these are intended to allow the two pieces to pull together and still very positively locate both pieces relative to each other, something that a screw that is threaded right up to the head may not do. Some plug cutter sets are sold with matching drill bits, and this is the ideal way to do it, but if not, the drill should produce a hole that is a firm press fit for the plug. Not too tight, and not, too sloppy. With glue applied and the wood in place, the screw driven and everything in place, the plugs can be left until all the glue is set. Do though make sure that there is not glue crept up into the holes for the plugs, once set its near impossible to get that cleaned out without messing up the hole. Whatever kind of glue you choose, it should be clear when set.
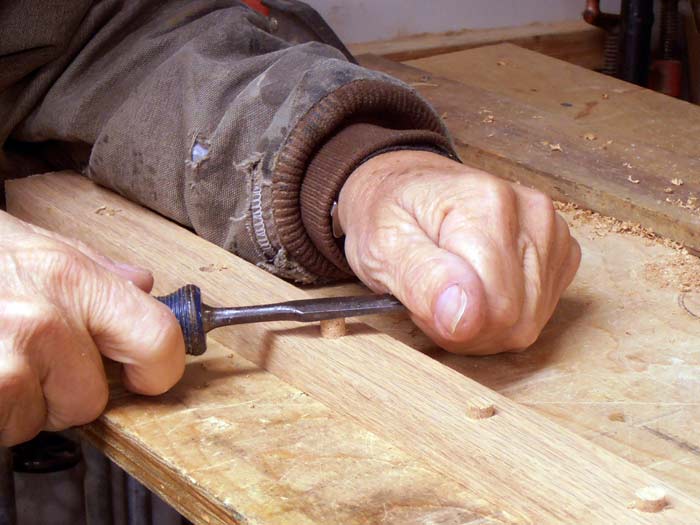
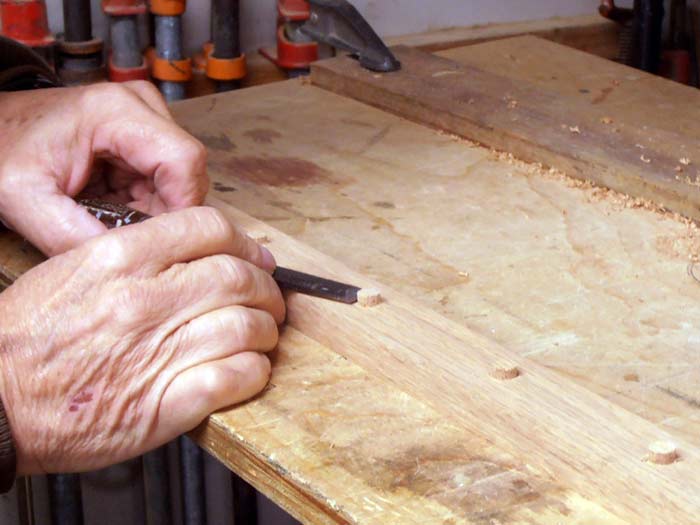
Teak is a problem, it’s a very oily wood and ideally should be degreased with mekp or acetone just before glueing. But almost all of the other wood species should glue easily. I use epoxy for most plugs, sometimes a transparent Aliphatic pva of which there are many brands. One of the better known is Titebond III, but most manufacturers of adhesives make something similar. It is easy to put too much glue in the hole, I prefer to coat the sides of the plug, not the bottom, then press the plug in firmly. The screw head will be left clean in case of a need to undo it in future, plus there is no glue in the bottom to prevent the plug from going in full depth, excess glue will be squeezed out. When driving the plug, the grain orientation is a consideration. In structural bungs such as below the waterline in a carvel planked boat the grain should be at right angles to the grain of the plank. That’s to reduce the chance of the plug expanding across its grain splitting the plank. But for decorative work the grain of the plug should be lined up with the grain of the wood being plugged. Back to the setup on the drill press. Its not easy to line the grain up when dealing with such small pieces, so if this is going to be an issue it will help to put a fine line along the wood centred on the line of plugs to be cut. This line is used to indicate the grain direction when fitting. Back to driving the plug in. Don’t hit it with a hammer, that compresses the plug of wood, I press it in with the back of a chisel blade, just firm hand pressure. It will seat with the plug top clear of the surface of the wood being plugged. Let it set off then shave it down close to the surface but still a fraction proud with a very sharp chisel with a low angle bevel. Take care not to chip it below the surface of the wood, that’s easily done. The final levelling off can be done with a fine sander and then if you are really looking for perfection a cabinet scraper will give it the final finish. All this sounds like a long and tedious process, and for one or two it is, but for a line of a couple of dozen its quite quick, and the result on a bright finished surface is both professional and good looking. John Welsford |
|

