
 Custom Search
|
| boat plans |
| canoe/kayak |
| electrical |
| epoxy/supplies |
| fasteners |
| gear |
| gift certificates |
| hardware |
| hatches/deckplates |
| media |
| paint/varnish |
| rope/line |
| rowing/sculling |
| sailmaking |
| sails |
| tools |

| join |
| home |
| indexes |
| classifieds |
| calendar |
| archives |
| about |
| links |
| Join Duckworks Get free newsletter CLICK HERE |
|
|
| Make a Plane, Why Don't You? |
by Robert Jacobs - Fresno, California - USA |
Dang it, I was pretty sure I would never do any kind of how to in my life, mostly because I don't feel qualified to give anyone advice about anything, but also because I feel like a big mouth know it all blabbing on about what all you should do. First, I didn't invent this process, nor did I figure it out on my own. I read some books, but mostly was inspired by a magazine article written by the late, great Robb White. Really, more than anyone, I feel I'm suffering through this for him, in return for all the pages of pleasure he chose to share with the world. This, Robb, is my pale candle, and my homage to the little planes you set me to making those years ago. All those years ago I was building some strip/glass canoes, and wanted to try the bead and cove rage, but didn't want to buy expensive router bits to try it. Then, comes into my hand a magazine I used to read with an article about how to make little cove and bead planes. My buddy, who I worked with building other stuff for money, and fiddled about some on boats with, told me I could never make little planes that worked. So, 156,987 years later, I made another little plane, the latest in a series of things made for jobs, fun, gifts, or coin. I took a bunch of pictures of the steps I took in laying out and making the plane. This is really a very simple little guy made from scrap wood I had lying around the scrap heap (you don't throw stuff away, do you?!), and a little blade blank I had lying around, too. Actually, I stole it from another little plane I made. Blades can be made from all kinds of little chunks of steel, the scope of which is too wide for this little treatise, here. I really don't want to cop out, but there are too many ways to get a blade. If you don't know metal working stuff, get some blade stock, or a planer blade. If you do know metal working stuff, the sky is the limit.
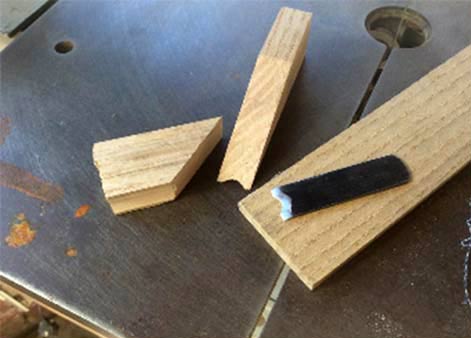
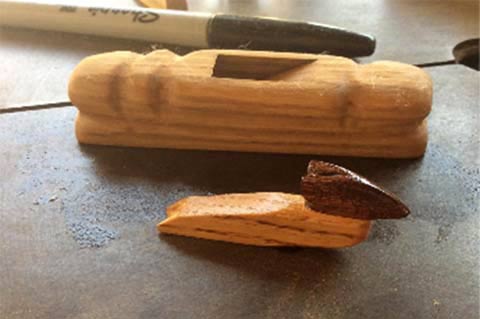
This is to be a simple little molding plane to be used for rounding over the edges of kayak stringers, but the basic construction methods apply to any type or size of plane, really. This plane will have a made body, glued up from pieces of wood, rather than having the throat and bed, I don't know, the hole, carved out. Also, I didn't use any specific measurements on the plane, but just progressed by eye with what was on hand. The sides of the plane are leftover slats from the duck boards in my sailing canoe, and the center block is glued up lifts that were once to be kayak coaming lips.
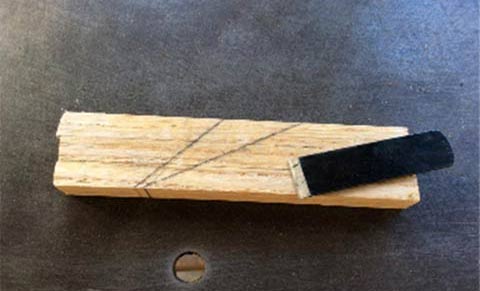
Since this plane is intended to round over parts, I needed to put a cove in the sole to allow the plane to cut a rounded edge instead of a flat one. Now, this can be pretty complicated if you are after some kind of fancy profile, but for this simple shallow curve, I simply used a handy paint marker wrapped in progressively finer sandpaper, after a bit of a go with the old rat tail file. For this plane, I left the groove a little shallow and shy of the edges to protect the feather edges a fully cut groove would leave. I decided to cut the wedge out and glue up the whole plane body before I finished the groove. It worked! After the groove was roughed out, I had to cut the throat. Well, really, I cut a wedge shaped piece out of the center block, then I will make the actual throat when I make the plane. There are some good rules to follow concerning the angle of the throat, but I ain't putting it all out there like I'm some type of expert. I eventually decided on an angle that wasn't too shallow, nor too steep, and one that suited the length of both blade and plane stock. Then I drew a steeper line a little bit ahead of that, to be the top, or front of the throat.
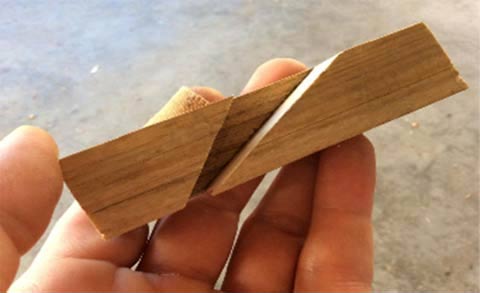
After I marked the angles and cut the cove, I cut the wedge out of the the middle block, and set it aside as a pattern for the eventual actual blade wedge, which needs the grain oriented in a different way than what was just removed.
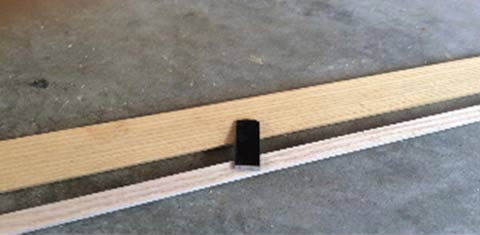
There are now two separate parts of the center block. These pieces can be temporarily clamped to one of the side pieces to get a feel for the layout. This is also a good time to begin roughing out the blade shape, or at least to mark it so you can work on it while the next few steps dry. To mark the blade for shaping, clamp the center wedges into place on one of the side pieces. The exact placement and width of throat aren't crucial for this step. Slip the blade into the temporary throat, and scribe along the bottom of the plane on both sides of the blade. I scribed with a black felt marker. These lines will give the bevel and shape of the blade, regardless of the sole shape. Some file work will be in order to get this bevel and shape roughed out. Now we can begin assembling the plane. I glue the center block to one side piece a half at a time, then glue on the second side piece, because I feel it gives me better control of the throat size, and it is way easier to mess up when you are juggling a bunch of slippery fiddly bits that need to be carefully aligned. The throat size isn't all that crucial for dippy little planes like this, and it is kind of a judgement call based on a lot of variables. My philosophy is to fudge on the small side, because it is easier to cut some off than to cut some on, generally. By doing half the plane at a time, though, you can carefully check the throat with wedge and blade in place. Leave it open enough to not get really clogged up, but narrow enough to not suck up everything.
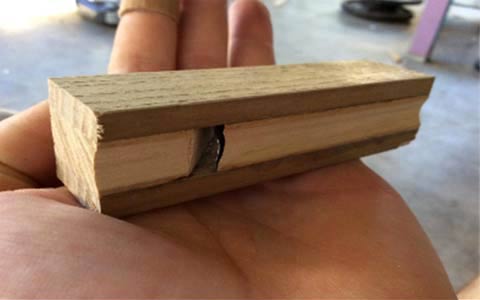
Once the front part of the center body is glued on (geez, this sounds about like a mouthful of dumb, don't it? The thing, the whatzit, and the hoohaw are all attached), you have about what looks like half a plane. In fact, if you need a rabbet plane in a hurry, you can just wedge a chisel into the open sided contraption what you just made, and cut right to the edge! So, really, this whole deal is a twofer. Rabbet plane was just a bonus, and, of course, was also an idea I liberated from the intellectual ether.
Moving on, though, because this is getting serious, and we are in danger of actually finishing this thing, here. Okay, so, the middle bit of the plane, the built up center block what makes the throat is glued to one side piece. Time to glue on the other side piece, and be very careful to get enough glue on, but clean up all the squeeze out. There may be a small bead of glue inside the throat when you are done, but it is fairly simple to clean it out with a little chisel. If you don't have a little chisel, put a bevel on a fat nail and use that as a little chisel to take off the glue drips. This is good practice for the blade, if you are unsure of your bevelling skills.
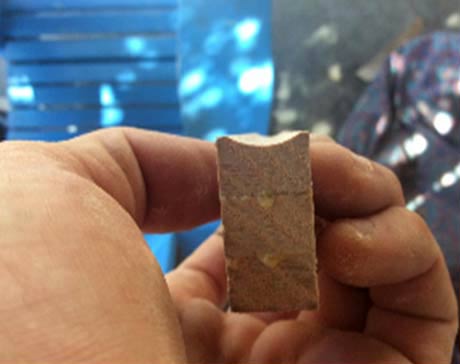
You want to be very sure the bed the blade sits on is square and flat, and totally clean and clear. Okay, now we got a plane body, a wedge, and a blade, which pretty much means we have a plane. Sweet. Mine had to have the sole finished, and the blade trimmed to fit the profile perfectly, then honed. I used the same paint marker wrapped in sandpaper to finish the groove and blade together. Another clever trick I learned by reading or listening to someone else. People is smart, y'all! Okay, now, you need that blade to be sharp for the next part, which is the futzing and tuning bit. The blade needs to be put in, the wedge set, and the little booger needs to be set to cutting. This is pure proof in the pudding tuning by eye. My best suggestion here is to shape the end of the wedge to fall a little shy of the throat, and give it a sharp angle, like a cap iron, if you will, and file a little groove in the face, both of which will help with the chips and shavings and what not. This area will need some tuning to get just right.
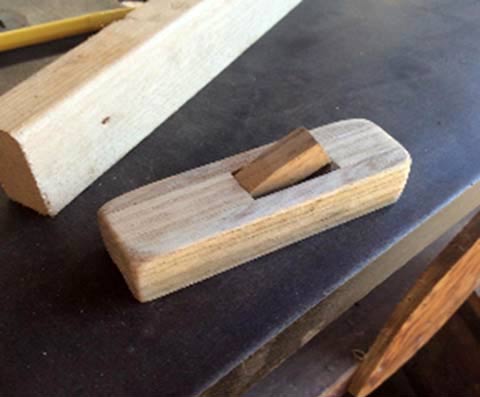
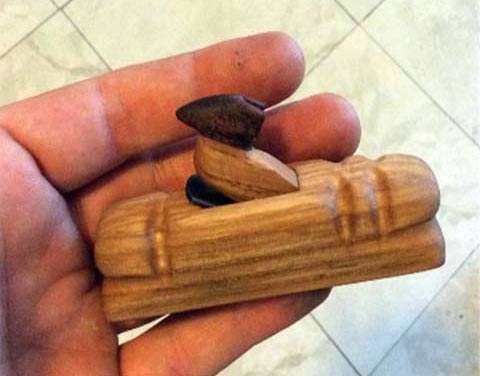
Once you get the little puppy cutting, it is pretty much a plane, done and done. Put some finish on it, or not, and maybe wax the sole a bit, or not, and your little plane is done. You can also through rivet the body, if you'd like, and it might not hurt.
Of course, if you're like me, it's not ever really done until it looks like you made it. In the case of my plane, I decided the body was a bit too tall, so I planed some off the top. Then I added a little wedge to the blade wedge that I could use as a sort of handle when adjusting blade and wedge. Hey, there ain't a whole bunch of room for fingers in there! Well. of course, after the wedge was all done, it worked well, but looked real clunky, so I carved it down to look sort of bird like. There is always a sharp knife on my person. Shaving. Sharpening tools is one of my most favorite meditations, after running and swimming. Concentration helps me quiet the chatter in my scatterbrain, see. A little fiddling and sanding and filing, and the whole thing is done. There is nothing at all expensive, difficult, or time consuming about this project. I used only hand tools, as is my general habit, and it took me a few hours, spread over a few days, the wait time to allow the glue to really cure between steps. This, in fact, is the perfect project for a weeks worth of evenings. A week of serial puttering could easily lead to a weekend of easing corners and honing your blade. Oh, something that works really well for little curved blades like are the little rod shaped fish hook hones. Super fine sandpaper is good, too, as is a little charged up strop of leather. Anyway, wear safety goggles, dust interceptor or remover and earplugs, and don't blame me if you get addicted and quit your job. |
To comment on Duckworks articles, please visit one of the following:
|


 |