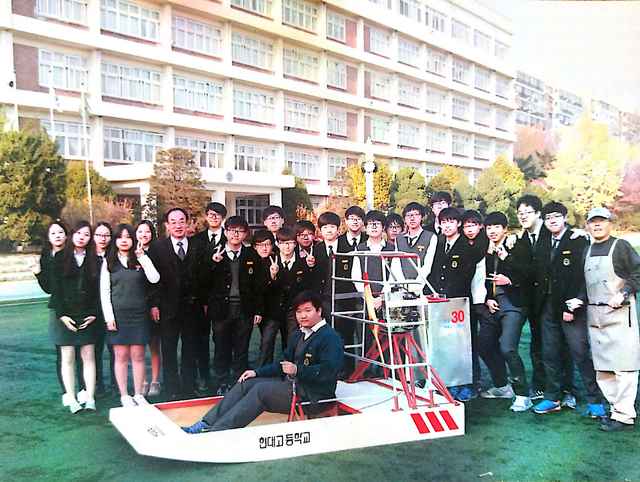
The year of 2015 was the 30th anniversary of our school. To celebrate the anniversary, our club “FETS” planned on making something special, in this case an airboat, which was not really a familiar kind of transportation to most of the students.
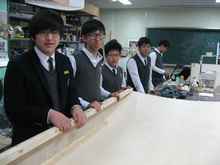
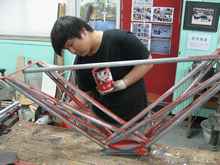
We started off with forming a basic structure of the boat, with wood. Then 7mm plywood cut in proper sizes were put on it mainly using epoxy resin and screws.
Since all the members were students, they had to do their school work and the project at the same time. Although the main body was done, there were still jobs to finish for a complete airboat, which meant more demand of time and labour. Also, former members who were then becoming second grade students, had to quit the project. That is when the new members, the freshmen, were put into the project. However, none of us had any idea of the project nor any knowledge about a boat. So we have made a small rowboat (from the previous article in 2014) getting the idea of how to use the tools, dealing with some wood and understanding the basic structure of a boat. This little project did not require much time, yet took long enough time for all us to be all experienced. Then, we moved onto what we were used to be focusing on, the airboat.
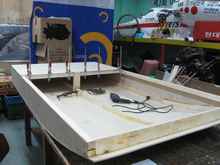
Our first task was to make an engine mount on which we could load the engine. The engine had a power of about 20HP and weighed 23 kilos. As it was not so light, a firm support was required to bear its weight and the vibration it would make while running.
Four steel pipes and a plate was used for its very basic structure. Both ends of the pipes were cut in about a degree of 45 so that there will be enough surface area to weld to the steel plates. One side to a smaller steel plate and the other to a bigger plate. Smaller ones were to be bolted to the body and the on top of the bigger one was for the engine to go up.
In addition to this basic structure, four additional steel pipes were welded in a 'X" shape to make sure it could properly hold up the weight and stay firm. As we put on the engine when done, it worked nicely and we moved on to making a safety guard around it. The driver was to sit right in front of the engine so we had to make one for his safety.
 |
-s.JPG) |
 |
-s.JPG) |
 |
-s.JPG) |
 |
-s.JPG) |
 |
 |
-s.JPG) |
-s.JPG) |
-s.JPG) |
 |
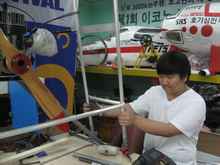
Aluminium pipes were mainly used since we did not want any heavier parts to be on the boat, as it is always better when light. Yet, some steel pipes were used to shape a basic structure and those two were riveted to one another. And another bent steel pipe sticking out at the back of the safety guard was for "rudders" to be installed later. Also, it was riveted. With this job done, we colored all steel parts with anti-corrosive paint which was a very important job to keep this boat alive for a longer time. Actually, it did its job as a paint too since we decided to leave them with its colour. It did not look bad and we could save some time colouring them again. All these were done by the start of the summer vacation. A Few students even came to school in the vacation to give a hand making rudders. Things that would be placed at the back of the engine and help us change the direction while our ride. They seemed like a miniature of airplane wings, and in fact, they work quite the same.
Aluminium plate; light and durable, was used. We cut them in a proper size and bent them into half, making sure it had a nice curve. For the "backbone" of these rudders to keep its curve, carbon fiber pipe was put in. Since we had to control these rudders with our own arms without any electrical devices, it had to be light enough. Another pipe was riveted inside the carbon fiber pipe which was used to set the rudders in place.
As we had to fix them at the boat and make them able to move smoothly, we had to think of something that would to its job right. We could not think of anything but our instructing teacher had come up with an idea. At the end, he had thought of bicycle pedals. He brought two of them and attached them onto the body, vertically. In this part, fastening the bolt was quite tiring since we had to get into the narrow space of the boat and hold onto the nuts. We were all in sweat when this was done. And fortunately, rudders fit nicely to those pedals. But that was not it. The upper side had to be fixed too. So we needed something else rather than bicycle pedals which would operate the same. The answer was a piece of plastic. About 3/4 of it was cut into a shape of cylinder to fit in to the pipe which we have put in to the rudders. The rest of the plastic piece was bolted to the safety guard. It enabled the rudder to move to control directions, with less fraction while firmly fixed.
With that done, some "practical" parts were required. A seat for a driver and a control stick to control the rudders. Funnily, on of our school chairs were used. We could not just stick it to the boat right away since it could make the boat look quite ridiculous, so we remodeled it a bit. As we cut the sides and colored it brown, it became a complete different chair.
Two rudders were first connected to each other to make it able to control them both at the same time and in a same direction. And one of them were connected with a controller next to the driver’s seat. Elastic bands were fixed to the controller and the hull to hold on to the controller in a right position with some tension in it.
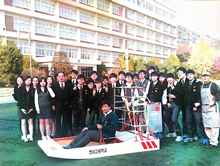
Finally, the last task was to decorate. The body was painted mainly in white and some red. These two colors were mostly used in our club for a long time. With our school's name in the front and our club name FETS on the side, our two-year conducted “Airboat Project” was finally finished.
The boat is to be on display in our school's main hall to celebrate our 30th anniversary. Gratitude to all members of FETS and special thanks to our club's guidance teacher Ki Bok Goo.
Engine mount (steel pipes)- 18kg
Engine- 23kg 20HP
Safety guard - (5kg Steel, Aluminum pipes)
Body- 35kg 7mm plywood
Etc- 5kg
Total: about 86kg
|


-l.JPG)
-l.JPG)
-l.JPG)
-l.JPG)
-l.JPG)
-l.JPG)
-l.JPG)