
 Custom Search
|
| boat plans |
| canoe/kayak |
| electrical |
| epoxy/supplies |
| fasteners |
| gear |
| gift certificates |
| hardware |
| hatches/deckplates |
| media |
| paint/varnish |
| rope/line |
| rowing/sculling |
| sailmaking |
| sails |
| tools |

| join |
| home |
| indexes |
| classifieds |
| calendar |
| archives |
| about |
| links |
| Join Duckworks Get free newsletter CLICK HERE |
|
|
| Experiments in Foam Boats - Part One |
by Josh Withe
- Merrimack River Valley, New England - USA |
Part One - Part Two - Part ThreeWay back around '85 my parents built their home by the old ice pond. The foundation had 2" foam insulation panels around the outside of it. Being a raised ranch type of house, the last 3-4 feet of foundation stuck up out of the ground, along with a few feet of pink foam insulation. Since this was ugly we broke it off at ground level, leaving me with a pile of foam to play with. I actually made my first foam boat out of one of these scraps. Close to three feet long, with a sail, rudder, centerboard, and string linking the boom to the rudder. I launched it on the ice pond, and never saw it again. I got back into foam boat building from my love of teardrop camper trailers. There is a section of the best teardrop forum in the world, devoted to foamies as they refer to them, or small teardrop campers built of foam insulation board. I had already built one teardrop out of plywood, using methods I learned on my first few mouseboats. While PLpremium construction adhesive and internal chine log construction is tough, it is also much heavier than stitch and glue, and not really a savings in money IMO. I wanted to take my whole family camping in a small camper modeled on a teardrop for easy towing, but with room for six. The only way I could imagine to do this and keep it light enough for easy towing, was to build it out of foam. Since I built a few mice and that experience got me comfortable with the methods, before dropping a couple thousand in materials on a teardrop, I once again turned to a proven plan to get familiar with foam construction. I built my 8th mouseboat out of foam insulation. All of my ¼" plywood mice were flat bottomed designs, and even over such a narrow span and even with the curve of the hull bottom, they all tended to bulge upwards in the middle of the cockpit floor (oil can) unless bracing was added. I solved this oil canning by running a strake on the bottom of the hull, from bow to stern. I didn't want to do this with the foam boat though, so I finally built an original mouseboat.
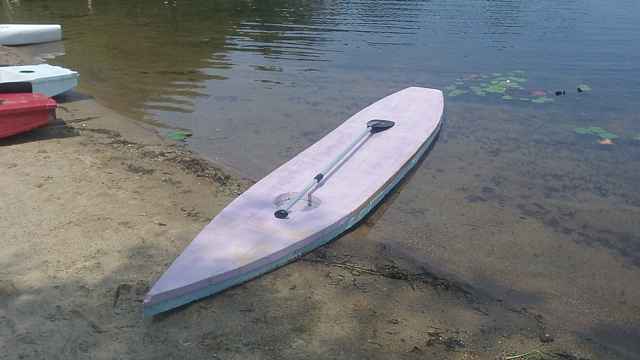
Building SeafoamThe beauty of the mouseboat is that almost all of it can come from one standard sheet of plywood. Foam insulation board is also based on the same size, 4 feet by 8 feet. However it is often actually sold as 2x8' panels. I bought three panels and traced out a mouse. Cutting it out was even easier than cutting out plywood, instead of a skill saw, I used a razor knife for straight edges, and a steak knife for curved. (Later on I found that drywall saws are my favorite foam cutting tool.) As any boat builder knows, there is an exciting moment when all those flat sections get stuck together, the 3D moment. However, the Excitement was dampened a bit when I found that the bottom panels were not wide enough to fit. After some figuring I realized that the mouse plan was drawn for ¼" material, not 1" material. I had to remove an inch from each bulkhead panel (there are four) to make it all fit. Using a process I learned on the foamies forum page, I glued the hull, minus the bottom, together with "folded great stuff". Once the hull cured, I fit the bottom panels to the hull. It was very easy to make the beveled seam that forms the keel of the mouseboat, thanks to how easy it is to cut and shave foam to shape. Once the bottom was glued on and cured, I had a complete boat hull, but one that was too weak to use. The secret of strength for most foamies, is a layer of fabric glued on over the foam. Then the fabric is filled with exterior house paint, this make the fabric inert, it will not rot, as the paint has completely filled the fibers of the fabric, and the paint will not scrape or peel, as it is locked into the fibers and weave of the fabric. (I call this PMF, poor man's fiberglass, you can read more about it on the web). Using titebond II I glued cotton fabric to the foam, making the whole boat really almost a skin on frame boat. I filled and coated the fabric with paint. The complete boat weighs about 13 lbs, less than half of the best weight I got using stitch and glue on a minimouse, 35lbs. Seafoam still isn't done, my dad put his elbow through my first attempt at a foam deck hatch, so I cut the foam decks off and made plywood decks with hatches. I hated how much they were weighing though, so I cut those off, and made foam decks with my gama seal deck hatches instead. I haven't gotten around to coating the foam decks, but Seafoam has gone on many voyages with raw pink foam. I consider her a success, but I wanted a bigger faster boat than a mouse, so I went back to the mental drawing board. For the whole experiment in building Seafoam and some pictures of her in action, follow this link. |


To comment on Duckworks articles, please visit one of the following:
|


 |