
 Custom Search
|
| boat plans |
| canoe/kayak |
| electrical |
| epoxy/supplies |
| fasteners |
| gear |
| gift certificates |
| hardware |
| hatches/deckplates |
| media |
| paint/varnish |
| rope/line |
| rowing/sculling |
| sailmaking |
| sails |
| tools |
 |
 |
| join |
| home |
| indexes |
| classifieds |
| calendar |
| archives |
| about |
| links |
| Join Duckworks Get free newsletter CLICK HERE |
|
|
| A Modified Trilars |
by Mike John
- Clifton, Queensland - Australia |
The DesignFor those who are not familiar with this design by Jim Michalak, Larsboat is the centre hull and Trilars is the trimaran stuff. I read other articles on Trilars on Duckworks and made some decisions:
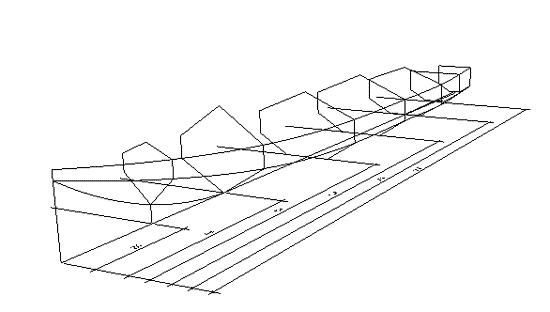
After reading only a few words of plans, I had a decision to make. Jim suggested 5mm plywood. I can get 4mm or 6mm ply at a reasonable price in Australia. So I asked the Duckworks Facebook group brains trust - "which ply do you think?" The advice was: "use 6mm on the bottom 3 panels and 4mm from the sides up". To make it easier on myself, I chose to make the hull from 6mm and the deck from 4mm. So I ordered 3 sheets of 4mm plywood for the deck and floats and 3 sheets of 6mm for the Larsboat. I should have some spare for a clock I want to make. (I run a Facebook group called Wooden Geared Clocks. Take a look, their fascinating.) If I can put a build in Hulls, I always do. It does help with the build by providing information on fresh water waterlines, etc. It may also hurry the build by providing plywood panel sizes and this sometimes negates the need for forms in the plans and makes a hull pure stitch n glue. Also, plywood is not cheap in Australia, so if I can avoid the cost of plywood for forms I will. And, to be honest, I am was too lazy to make forms. First you find a file in Hulls that is close to this design and Kattu_02 was close. And then, you put in the offsets and realise this hull will not draw well in hulls. Back to the drawing board. I turned to Rhino 3d and drew the frames. In Rhino you draw the boat in much the same way you build the boat. Draw the keel, stem and put the frames along the line. You then join the points to draw the lines of the hull. Developing the panels - well I phoned a friend on upwork.com.
It turned out I could get the larsboat hull panels out of two sheets of 1/4" plywood including the transom. Jim's plans do show a similar result. This below is the front half of the boat. I also faired the hull. Sorry, but the "puter" challenges any human eye on that score as in Rhino you just click on the line and type fair and then you a have a mathematically fair line. If it makes you feel better, it did not change it that much.
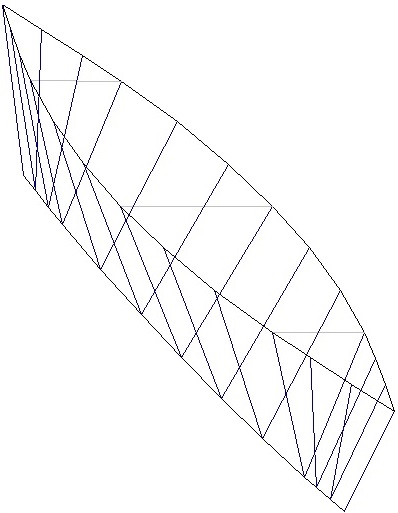
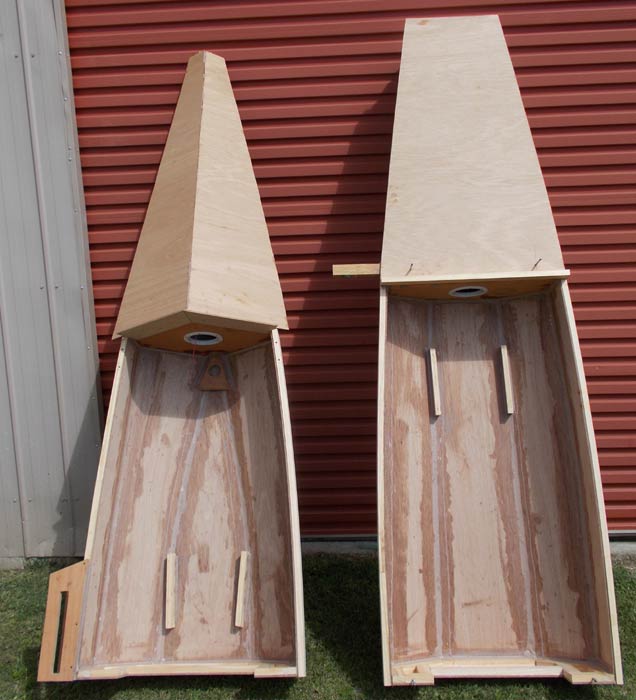
I turned my attention to the floats. I changed them to this basically. These are designed in Carlson's Hulls software.
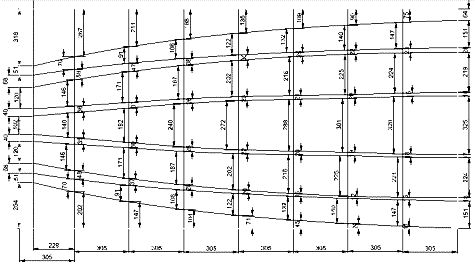
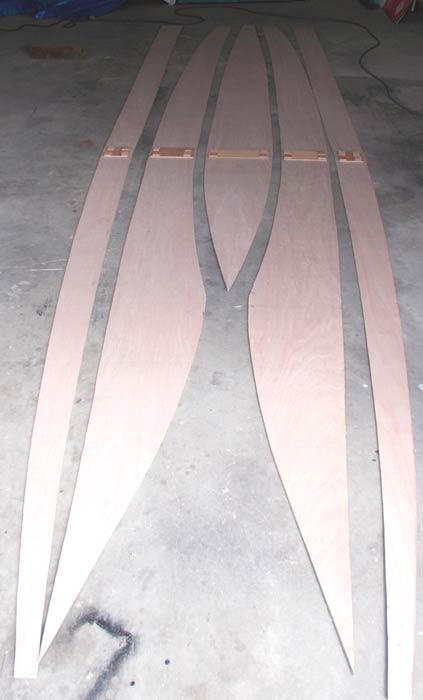
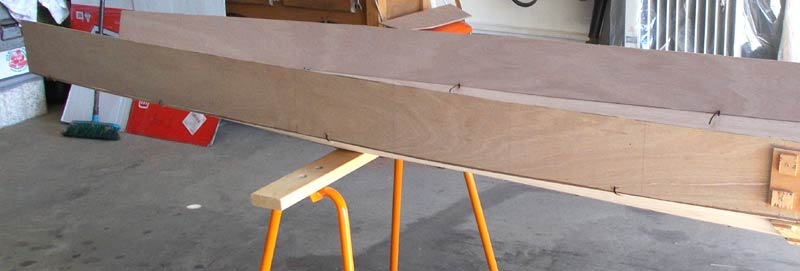
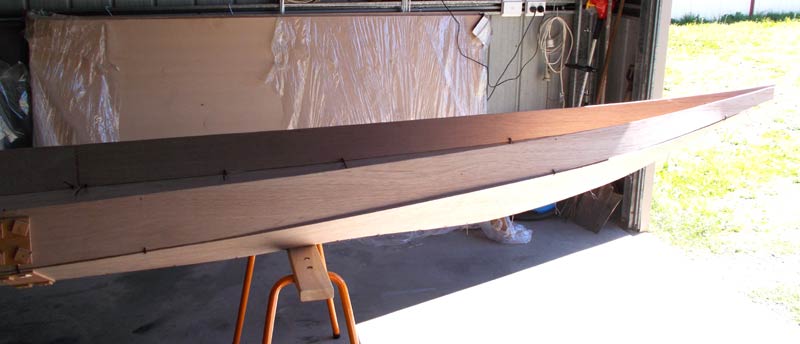
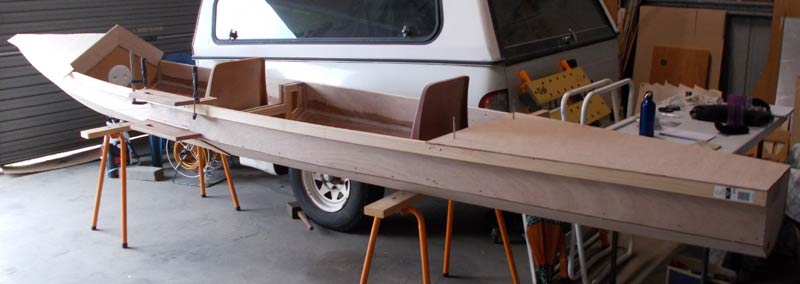
Here is a video of a rough version of this float but it will give you the idea of how it is done. You measure from the left of sheet and then up to plot the point. Here is an idea of how to plot the points which you join with curves. I used software but it is the same in the real world. This will give you a little glimpse of Rhino 3D. LarsboatI took about four hours to mark all the dimensions and draw fair curves for the centre hull. I discovered spring clamps with a big sinkers on top make good spline weights. Any mathematical perfection I gained is lost in this process as the word is "fair curves" not "perfect curves" to my mind. The panels took a couple of hours to cut with a jigsaw. You turn big sheets of plywood into small sheets of plywood with a half bucket of sawdust on the side. Use a clean cut blade. I recommend not cutting the planks to length or cutting the transom. If you start stitching the planks together at the bow, you can trim the transom end later. It is easier than cutting them short and trying to put wood back. But, I did not start at the bow. I started at the sheet joins. I applied some temporary butt blocks as this hull with be sectional in two halves. I use a mains power drill for the cable tie holes as it has more rpm and thus less tear outs. A little stool saves the knees, but it does little to help the back. When using cable ties, keep the keeper of the cable tie close to one hole and it goes easier. Cable ties can be used loosely and then adjusted, but many will need to be replaced with wire as you can only get so much tension on a cable tie.
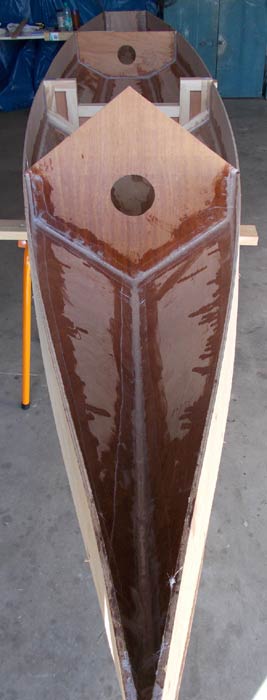
I tried a piping back which is used by cooks to ice their cakes but there was a lot of was epoxy left wasted in the bag. I used a tongue depressor to apply the epoxy and do the fillet. You can twist/flip the depressor and eventually get the goo off it and into the join. It is a fast process but messy. I can't say I enjoy this step in a stitch n glue boat.
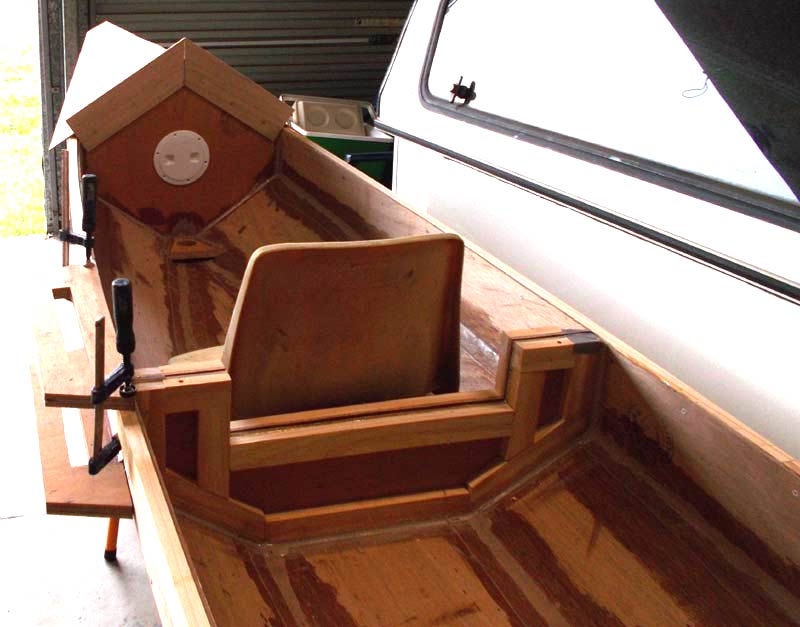
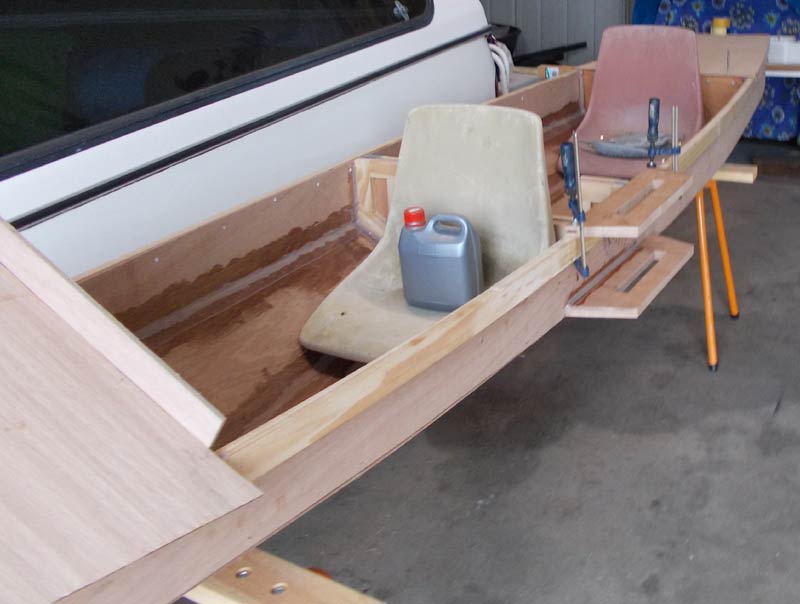
The gunnels went on easily enough, despite them being 42 x 19mm. It was cheaper than the smaller sizes, so I used it. The mast step is lower fore than aft, so the angle of the hole for the mast in the step was pure guess work but I got it close. I decided to use lag screws instead of pintles and gudgeons this time around. They are cheaper. I put some hooks, with rope on, under the rear and fore decks so I could tie little plastic containers for keys and so on. Old plastic seats from the local tip shop are screwed to simple cleats glued to the bottom panel. Another reason for opting for a dagger leeboard, rather than a pivoting leeboard, was to reduce weight when carrying the boat around. Leeboards are heavy and a pivoting leeboard is pretty much permanently attached.
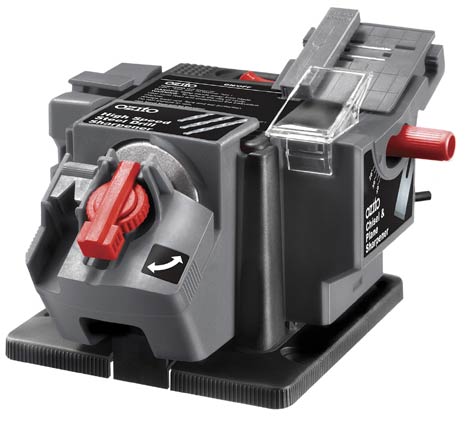
I chiselled the glass edges off the tape, using a very sharp chisel. I sharpened the chisel with this multipurpose sharpener. It worked well, but it did put a slight curve in the bevel of the chisel. Not bad though for $39.
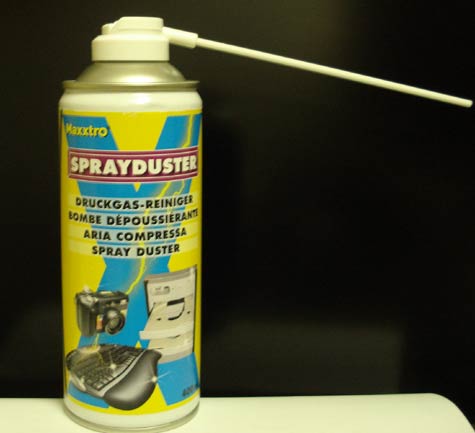
You need to blow it out to clean it and, because I don't have a air compressor, I used an air duster can. It is also good for getting dust out of your mast step.
It was the day for the great separation. The temporary butt block idea was mine, sorry if it was yours first, and I was not sure what would happen. The butt blocks fell away easily. I thought for sure they would be attached and need to be hacked off in my usual "Dr Hackenoff" style with a rusty saw. You see, I forgot to insulate them with plastic. I did put duct tape around the edges of the frames though. I had to cut through the gunnels, but I put the boat on the floor first ("it can't fall any further", I hear my departed Dad saying). I used a combination of saws (including my Dad's, Dad's Dad's saw which must be well over 150 - I apologize to all of the Dad's) to cut a bit through the 1/8" gap I left between the frames. I heard a creak, groan and plop and it was all over. Quite a success.
I sat on that little stool Dad made for me and pondered it for 5 min. More so, because it was over rather quickly and I had to plan what to do next. I decided to start cutting stock for the foils. The plan was to glass everything else at the same time thus saving on one use gloves, brushes etc. I used to soak things in vinegar, but no longer be bothered can I. The FloatsThis is where the boat really ceases to be a true Trilars. My floats are much smaller and different in shape to the plans.
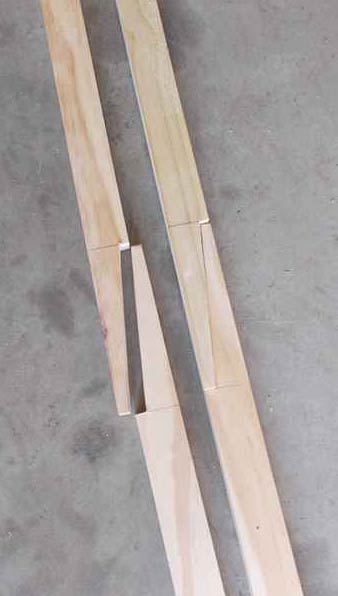
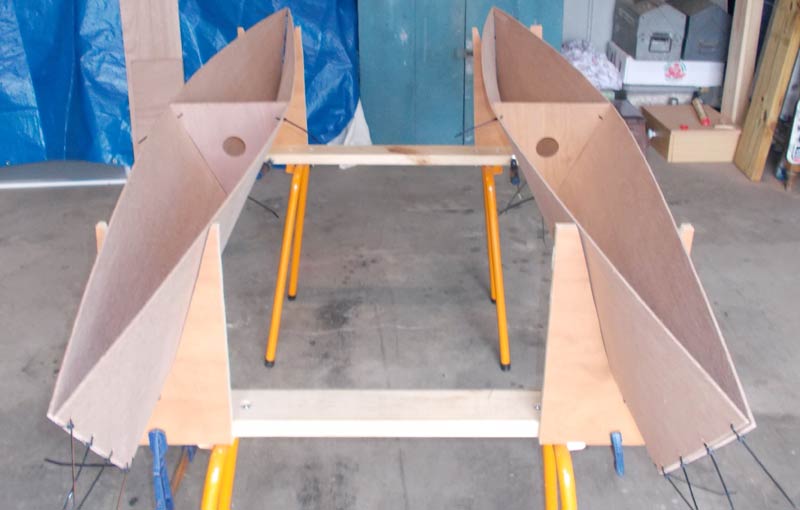
These probably gave me the least grief in the whole build. They went together perfectly. It did a lot to save time and increase enthusiasm. An aside on enthusiasm. Boat projects take a while and sometimes you loose momentum. You might see the middle frames are in. I intentionally left the other frames for the next day. I know exactly what I need to do when I get to the shed. I put the forward and aft frames in. The momentum I get from that will help with the next step. There is nothing worse going to the shed and not knowing where to start. If you suffer from lag, try this trick. It gives you a push start to the new day. I put handles in the mid point of the deck of the floats - Jim Michalak's idea, I think. I used cabinet handles from the tip shop. It makes them easy for crew to carry them around and help unload and load the boat. The FoilsFor this article to be a bit different and add something new, I decided to use my CNC Router to carve the foils. The process is well documented on the web, but you need a 3D model of the foil done in 3D CAD, you need 3D CAM software to calculate the machining tool paths for that model, and you need machining software to take those tool paths through to the stepper motors on the CNC machine. Doing a model of the foil is not easy. Thanks to a kind member of the Duckworks Facebook Group, I had a 3D model of the foil. It was easy for him. This video shows the process of creating tool paths once you have the model. This video shows the tool path entered into Mach3 and I simulate machining. Watch the model picture on the right. With the model in hand, I setup a roughing and finishing tool path. The foil section for the rudder needs to be 8" wide, 13.75" long (I made the rudder a bit longer), and for the thickness I lied to the machine. The rudder is the plans is 1/2" thick. I increased the thickness to 3/4" by laminating 3 pieces of 1/4" ply together (twice actually as the first time I did it on a table and the table buckled under my weights and the foil came out warped). I told the machine the stock for the rudder was 0.55" inches thick. This left a uncut centre piece of about 0.157" which I trimmed later. This was to protect my spoil board which is the board that protects the aluminum table and to increase the strength of the foil. I used a flat end mill to carve the foil rather than a ball nose cutter because it was faster, but of course it is a rougher finish. The roughing tool path took 6 minutes. The finishing tool path with the end mill was 30min. The ball nose cutter would take 1.5 hours. Why worry about how long it takes? There is the noise factor - you have a vacuum and router running and I try not to upset the neighbors more than necessary. The noise is not really bad but it is there.
Source: www.amanatool.com This was not meant to be a scientific bit on foil making, but it sure saved a lot of time and effort. While is was being carved, I swept the shop, had a drink, and marked out the tiller arm and rudder stock.
The cutting went reasonably well. The curved edge on the bottom of the foil, ended up on the wrong side when the foil was flipped and turned but a few tweaks with hand tools fixed that. When flipping and turning over the foil, I missed judged where to put it by 3/4" and my bit hit the nail I had holding the foil at the end where I could not work out how to clamp it. I chipped the end mill and it is now not safe to use. The cost of that Amana tool end mill 46170 from toolstoday.com was $40. I a going to try some cheap Chinese end mills from ebay. Because I lined up the foil in the flip and turn incorrectly, I have a gouge in the foil in have to fill but epoxy will fix that no worries. I have a rank beginner with CNC but, overall, it turned out better than I could do it by hand and I am happy.
CNC routing is not a cheap hobby but the pleasure it gives is enormous. For example, this can earn you a lot of points.
The SailI decided to make a poly tarp sail. Special mention to Dave from Polysail.com. He gave me a link to an article on how to make them. This is what I am going to use designed my MIK Storer. The idea is to make it out of tarp to try it and if I like it on the boat buy a sail from MIK via Duckworks.
Mike John my websites Rustic Model Boats and woodengearedclocks.com. my facebook group Wooden Geared Clocks |


To comment on Duckworks articles, please visit one of the following:
|


 |