
 Custom Search
|
|
| sails |
| plans |
| epoxy |
| rope/line |
| hardware |
| canoe/Kayak |
| sailmaking |
| materials |
| models |
| media |
| tools |
| gear |
 |
 |
| join |
| home |
| indexes |
| classifieds |
| calendar |
| archives |
| about |
| links |
| Join Duckworks Get free newsletter Comment on articles CLICK HERE |
|
|
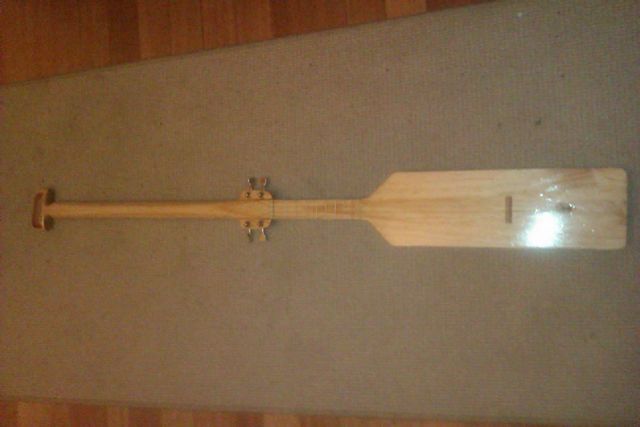
| Uke'n'paddle |
by Ian Titulaer - Canberra, ACT - Australia |
| Is it a ukulele? Is it a paddle? Why Yes! It is both! A ukulele and a paddle all in one – what more canoe ask for? All the great inventions of the world are combination items – the car boat, the shopping bag raincoat, the Swiss army knife and my personal favourite – the peanut butter and honey sandwich. So here is my effort – the Ukulele and paddle or uke'n'paddle for short. The inspiration for this was the number of times I have seen people who have home made paddles strumming at them like some mad air guitar king. Then when I was in Vanuatu I saw the locals playing their home made local variant of the tahitian ukulele. A little bit of experimentation and not a large amount of money later I was the proud owner of a large number of ukuleles made with my own hand. The collective noun for ukuleles is of course a happiness of ukuleles. (I just made that up).
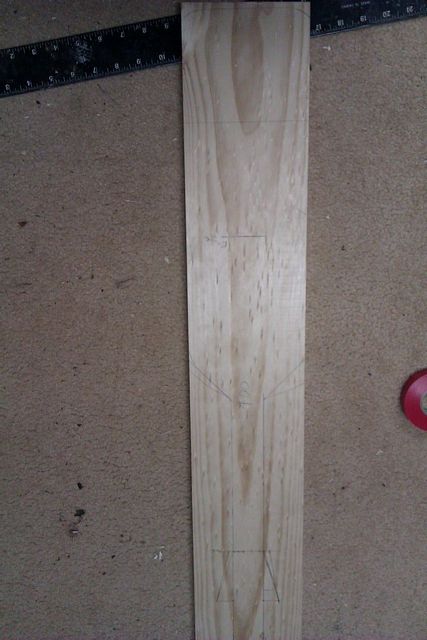
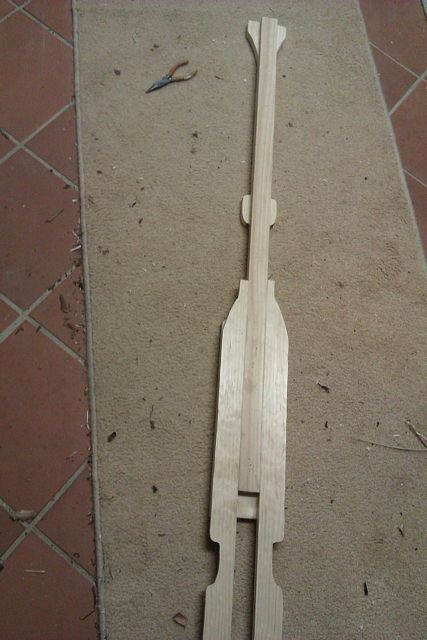
Now if you plan on cruising for more than the occasional hour using your paddle, or want to go fast then this concept is useful only as a backup paddle here are some links to some proper and not so proper paddle making sites: For a ukulele you could try one of the ukes I documented on instructables or something else: Special mention to the dude who made the Bass paddle: Back to the true path – the Uke'n'paddle - the size of the Uke'n'paddle was generated be taking a piece of knot freeish 19 by 140 pine and drawing out a paddle shape, then taking a uke and incorporating it in the blade and neck. Now I must admit that a ukulele is not normally a paddle shape and a paddle is not normally a uke shape so I have taken the liberty of taking liberties with the shape of both.
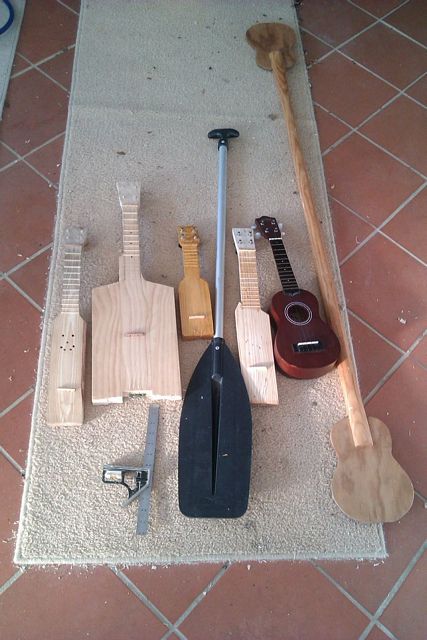
First off I decide to go single sided. Maybe next time I will have a bass uke at one end and a normal at the other. As the materials are cheap the shock to the wallet is minimal.
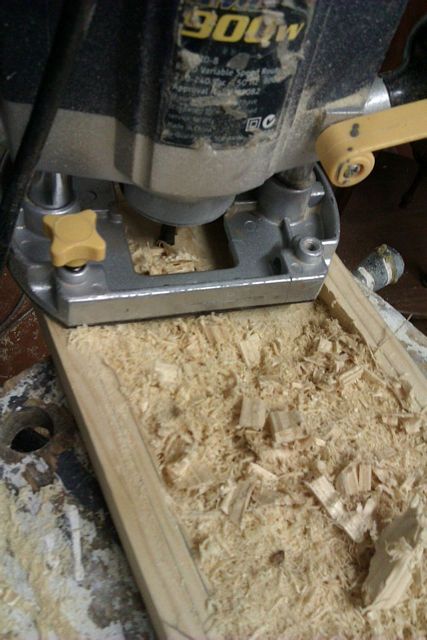
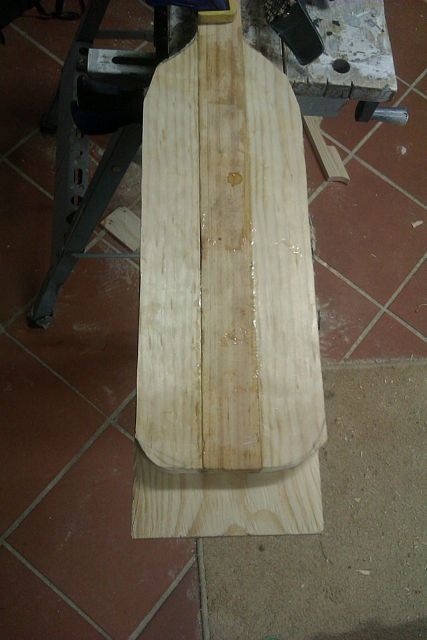
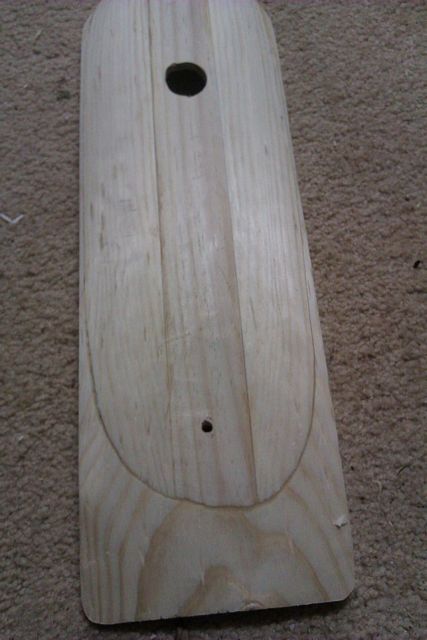
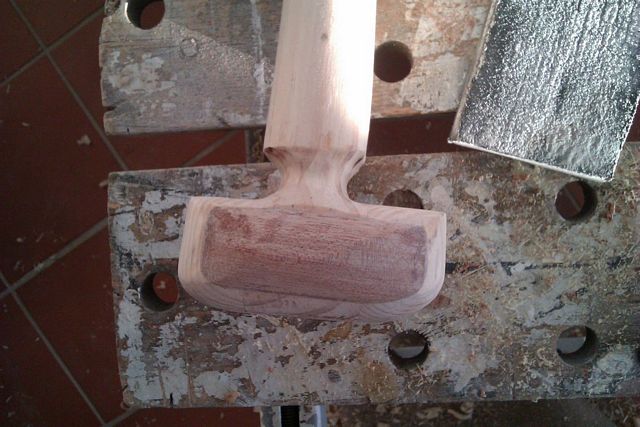
I have made this one with a 4mm top and a rounded oblong hollow. I used a router to excavated out the back of the front piece and a sander to smooth off the rough bits.
The back was not the full length of the blade so that the action end of the paddle could be made thinner.
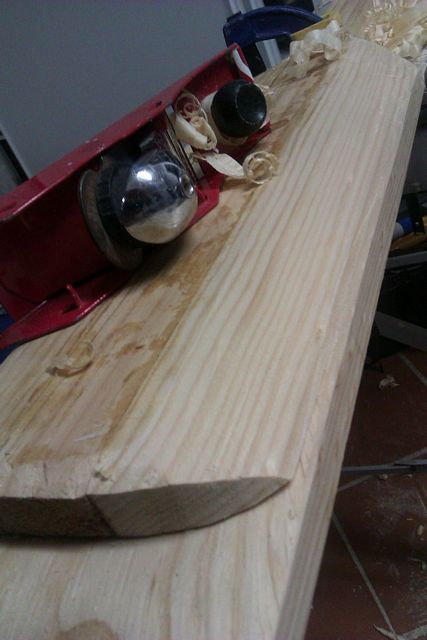
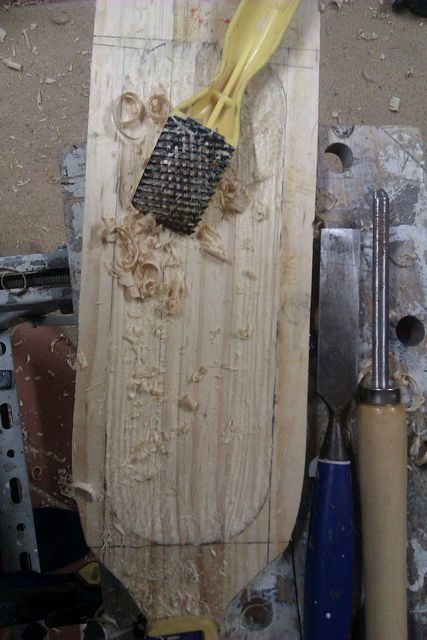
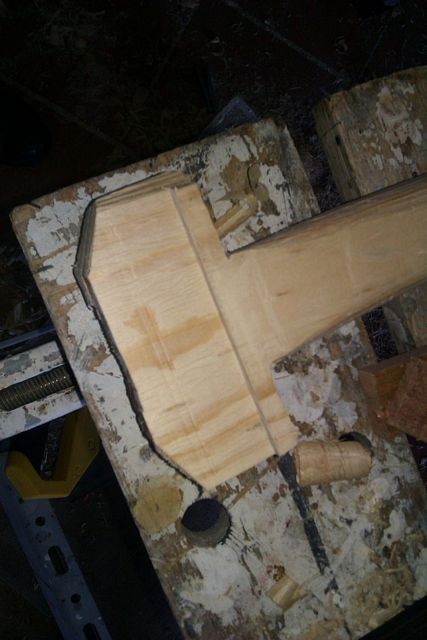
After gluing the parts of the back together the paddle was given a bit of external shape. I went fairly close to the final shape I was after in the blade but, as you may see later, it was mainly so I had a fair clue on how much to hollow out of the centre and then so I could know how much I could take off when doing the final shaping. I really should clean the sole of that plane a bit better.
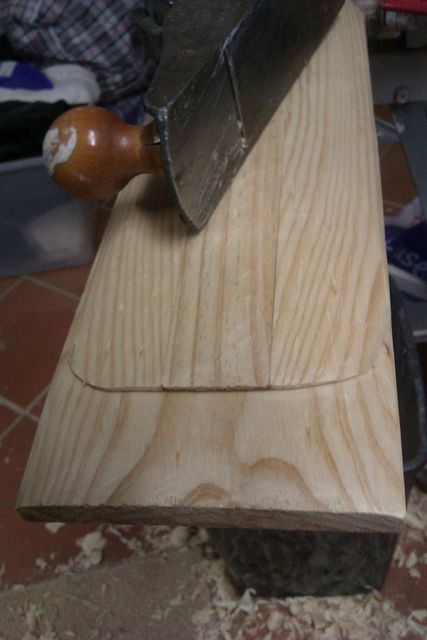
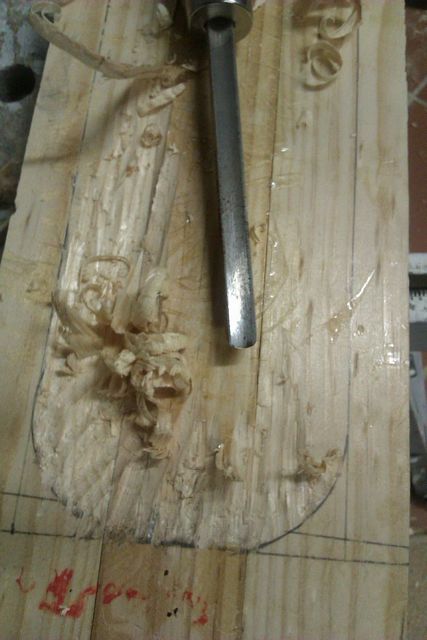
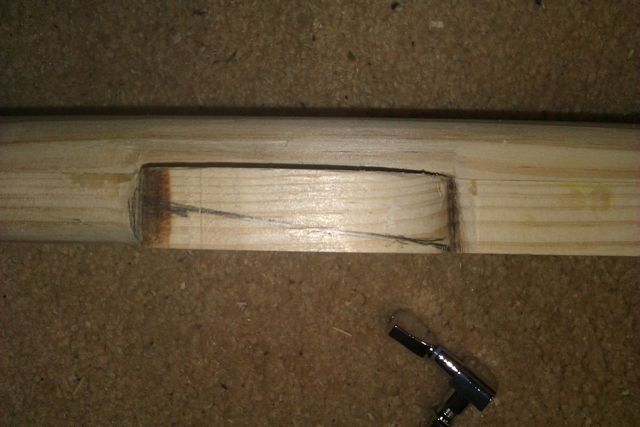
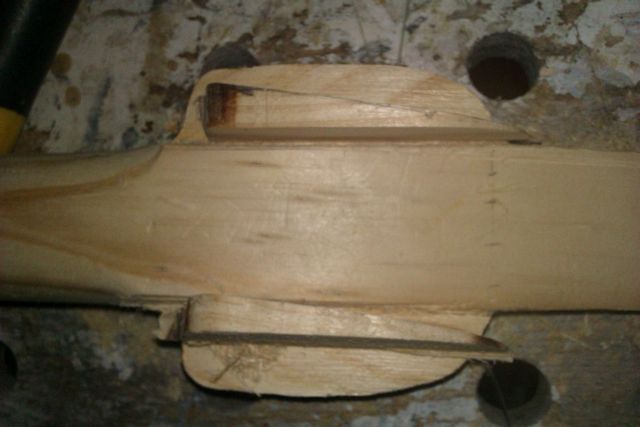
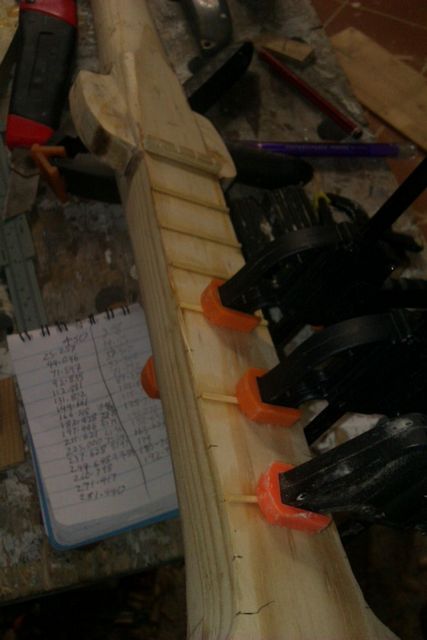
Chisels and rasps and sanders were put to good effect to hollow the back out.
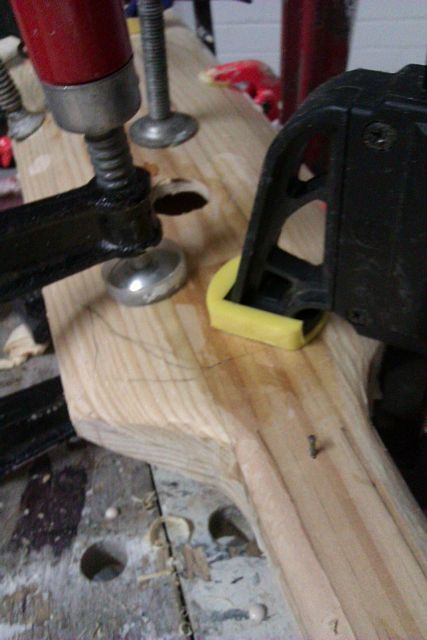
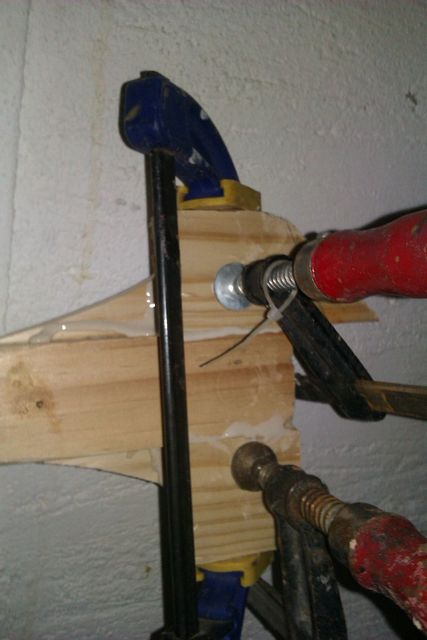
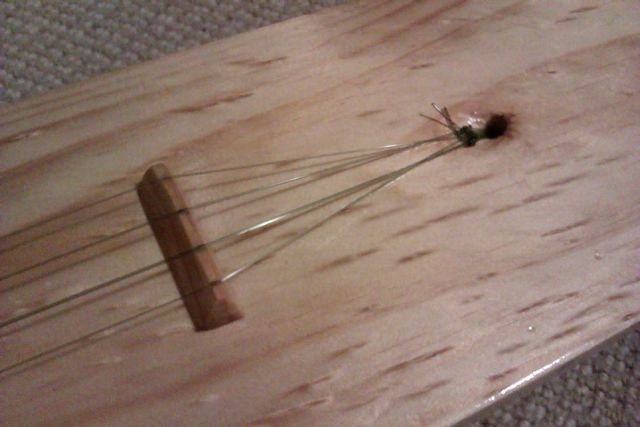
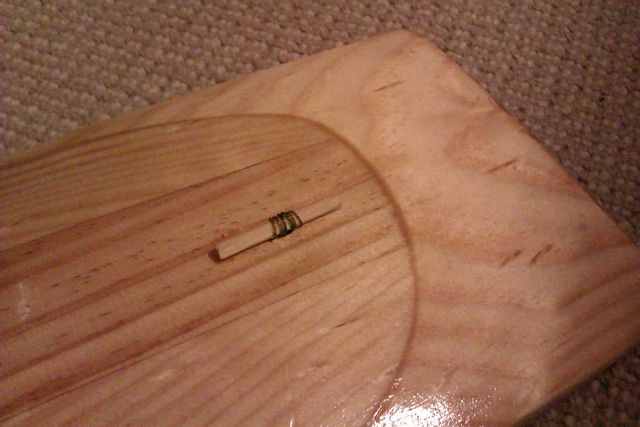
STOP. Don't glue together now like I did – remember to seal the inside surfaces of the sound chamber as getting a brush in there afterwards is nigh on impossible. Then glue together (note the nail stopping things from sliding around). After gluing together finish off the shaping of the blade. The small hole is where the strings feed through to be tied to a short piece of a thick bamboo BBQ skewer. The strings will be held in alignment on the bridge by notches.
After consulting the interwebs and weighing the paddle (which was a kilo and a half or at this stage), I decide to go with the low weight T handle option.
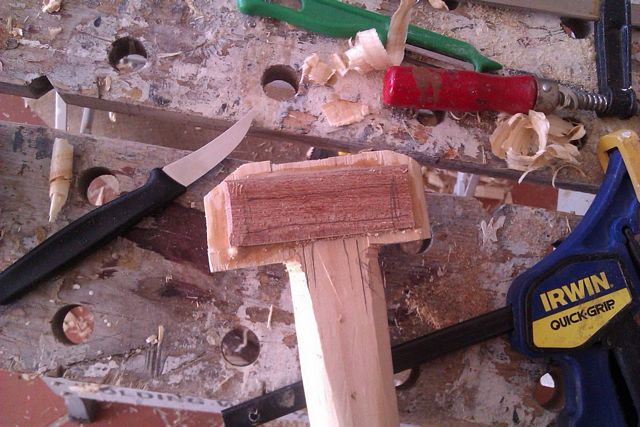
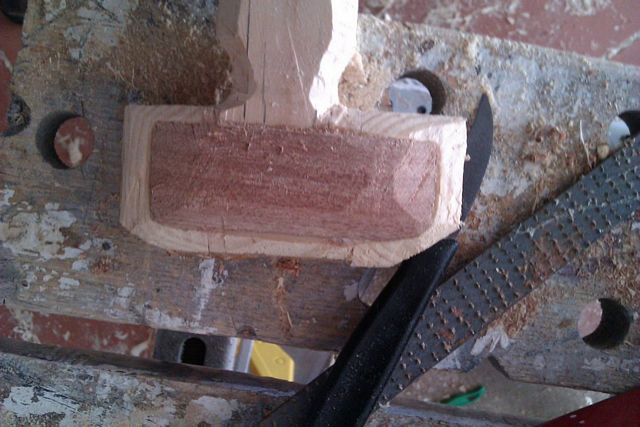
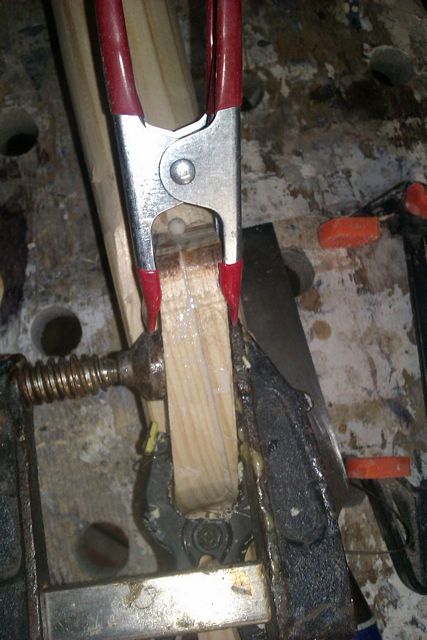
I rebate planed out some of the original wood so I could laminate in some wood in with the grain in the strong direction. Note the potato peeler that I was using as a finishing spoke shave on the shaft and the Victorinox shaping knife I bought at a kitchenware store. One of the tips I picked up about shaping is that guide lines are useful to have when trying to make things rounder – start of making them octagonaller using the guide lines and then try for rounder and smoother and you get a more regular result. Some people go for hexadocagonaller (a 16 sided polygon) after they have made it octoganaller but I am not aiming for total perfection here. If you are that way inclined google spar gauges and whittle away at accuracies of a few thousandths of an inch to your heart's content.
Now we shape the place where the tuning pegs will go. I just cut these at an angle. The tuning pegs are sealed machine heads bought on eBay from China.
I reused the off cut wedges but this is no reason a different method might not work better.
Add the nut and work out where you want the bridge to go. Now I add a nut to the front and mark out where the frets are supposed to be. Sand everything and do a “dry fit” before you varnish it to ensure everything is going to go together nicely. I did a test string up with 20 lb fishing line, giving it Tahitian style tuning to try out the sound and make sure I had not got the fret spacing wrong. This was probably a mistake as I spent the next week or so playing it rather than finishing it off.
Take off the machine heads – do a little bit more fine tuning on the shaping of the headstock area to get the fit just right and rasp and plane and sand and sand and sand. Now might be a good time to add fret markers – usually to the 3rd, 5th and 7th frets. At the moment I have some light pen marks. Next time I go down the beach I will have to look for some nice abalone shell. The white shells I had in my collection just would not have stood out against the pine very well. Add the manufacturer's recommended coats of the varnish of your choice (3 coats external 'marine' polyurethane for me). Put the machine heads (tuning pegs) back in and string it up – I used 40, 80, 60 and 40 lb fishing line for standard GCEA ukulele tuning. Make a small plug of pool noodle foam to plug the back when needed.
Strings held in place by simple loops over a small piece of bamboo.
Final weight is around 1.2kgs or 42 ounces. I may have saved more weight by hollowing out the shaft or making it thinner or trimming the end and shaping more, but I like the feeling of heft the current paddle gives me, which might come in useful come the zombie apocalypse.
As a paddle I would rate it as a more than reasonable occasional use paddle, nicer to handle than my store bought aluminium handled one with bare hands in cold weather anyway. As a ukulele it is surprisingly nice to play and as for sound I will let you judge for yourselves: In a surprise development as I was recording and posting my video this guy posted his? If you are having trouble picking the difference between me and Neil Armstrong, one of us is a national treasure and a hero to all and the other one went to the moon. |


To comment on Duckworks articles, please visit our forum
|

 |