|
I built my Bolger Light Schooner and trailer over one winter, so you can imagine that some tasks got short shrift in the details. One of those was the dumb sheaves in the mastheads. I never had trouble with the dumb sheaves on my Piccup Pram, but on the schooner I found I was constantly dragging the rig down, even though the weight of the gaffs should have brought it down fast. So I decided I needed masthead sheaves. Besides, I had some spare Duckworks sheaves begging to become effortless rope-turners on my masthead. Even if I hadn’t, at just under $2 each it’s hardly an obstacle.
 |
(click images for larger views)
|
|
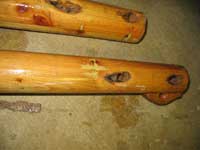
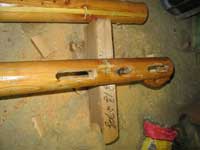
The first step was figuring out where to cut. I was a bit worried about removing so much wood right at the mastheads, so I decided to move the throat halyard sheaves a bit lower on the masts than Bolger drew them. This shouldn’t affect function at all, since the Bolger drew them higher than they need to be, and it will allow more solid wood between the sets of sheaves.
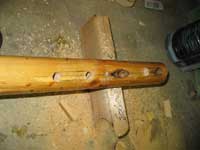
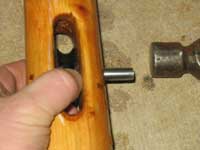
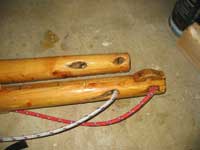
So the first step was to use the sheaves themselves to mark the mast. We don’t need to remove any more wood than is necessary. Note that the old hole corresponds to the top of the sheave, not the center.
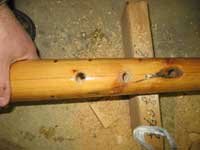
Then I draw a longitudinal centerline on both sides, based on the center of the old dumb sheaves.
The holes are bored at the intersections of the sheave lines and the centerlines. This leaves about the right clearance for the halyards. Since it’s easy to bore crooked, I first bored small pilot holes. These should come out on the same intersection on the opposite side of the masts. If not, I bore from that side and try to get the holes to meet in the middle before enlarging the holes to ½”. It might have been smarter to plan on boring from both sides to begin with.
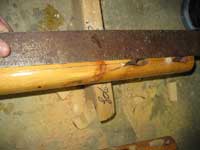
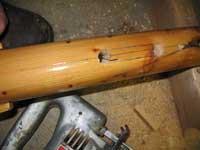
With the ½” holes bored, their edges are connected by lines.
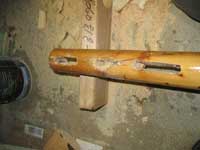
A jigsaw is perfect for cutting along these lines, but don’t try to cut straight to the opposite line. It’s too likely that you’ll cut away wood you want to keep. Cut “inside” of vertical and chisel the waste out later.
But don’t get carried away with the “inside” angle. You can go too far like I did here.
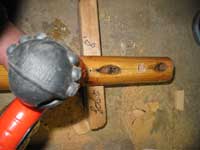
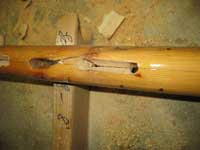
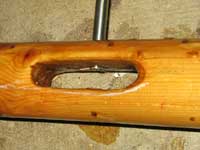
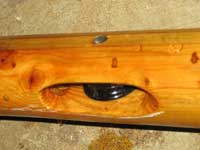
Then it’s time to chisel out the waste. Just a little at a time! This is also a good time to run the ½” drill through the now-unused dumb sheave and rough it up so it can be filled with a dowel and some sawdust/epoxy putty.
And a bit of rasping and filing makes the slots smooth.
Finally, bore the 3/8” axle holes. This is the difficult and critical part. Sight the drill in both directions when starting, while boring, and when you break through to the slot. It’s easy to drill “uphill”, which will cock the sheave sideways and jam it. Take it slow and stop frequently to look at it from a lot of angles.
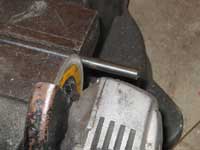
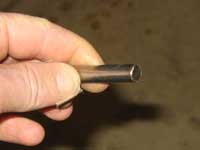
While adding three coats of varnish, I got some 3/8” stainless steel rod at the local “real hardware store”. I normally don’t mess with stainless, but in this case the rod is a bearing and any rust will lock up the sheave. Besides, it’s only $5 and some change. Measuring the proper lengths is nearly impossible with a tape measure, but we don’t need a number, just a length. So I use a barbecue skewer as a tick stick and mark the appropriate lengths. My handy 4” grinder makes short work of cutting off the rod.
It’s important to grind a chamfer into the edges. Otherwise you won’t be able to hammer the rods into the holes.
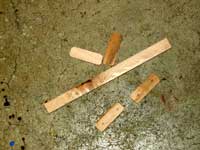
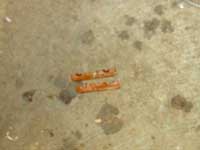
This is also a good time to make the axle caps. I ripped a 3/16” x ¾” strip from the edge of some scrap maple flooring. Those dimensions are not too critical. Thinner splits easier, and thicker gets bulkier.
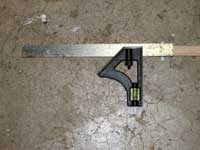
I used a combination square as a depth gauge to mark lengths as I cut the caps from the stock.
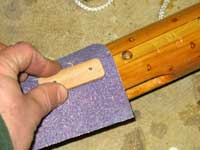
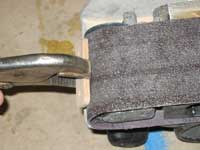
After rounding off the outside corners on sandpaper, the inside needed to be hollowed a bit so it would match the masts’ curved surfaces. The best way to do this is by lapping in place with sandpaper laid on the mast.
But I got impatient with that and decided the radius of my belt sander’s front roller was close enough.
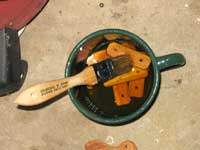
Then I soaked them in linseed oil and turpentine for a while, dried, then varnished them
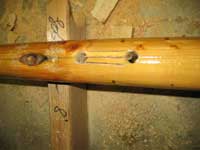
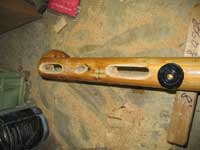
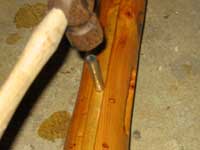
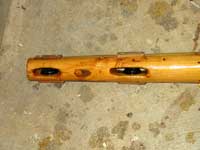
Now that the varnish was dry on the masts, it was time to install the sheaves. The varnish in the holes made the axle rods fit snugly, which is good. They needed to be tapped in with a hammer.
Once you get to this point, slip the sheave in and hang it on the slightly projecting rod. Then carefully hammer it home.
The caps can be added when ready, but there’s a trick. The disadvantage hollowing with the belt sander is that the caps tend to split when being screwed down. But it works if you only apply enough torque to “snug” them down. This should be enough since they don’t take much strain and get glued on with varnish.
All and all it’s a pretty simple modification, and now the rig comes thundering down like it’s supposed to. The lazy jacks are starting to feel needed.
Rob Rohde-Szudy
Madison, WI
robrohdeszudy@yahoo.com

Other Articles by Rob Rohde-Szudy:
|