 Custom Search
|
|
| sails |
| plans |
| epoxy |
| rope/line |
| hardware |
| canoe/Kayak |
| sailmaking |
| materials |
| models |
| media |
| tools |
| gear |
 |
 |
| join |
| home |
| indexes |
| classifieds |
| calendar |
| archives |
| about |
| links |
| Join Duckworks Get free newsletter Comment on articles CLICK HERE |
|
|
| Make and Make Do |
By Rob
Rohde-Szudy - Madison, Wisconsin - USA A Two-Sheet Pirogue - Part 2 |
 click for bio |
PolyesterYes, I do mean real Bondo. I'm not using epoxy on this project for a couple reasons. First, I wanted to try one with locally-available materials. There's something reassuring about being able to get more with a 30 minute drive if I estimated wrong. Also, I think polyester gets a bad rap sometimes. As Michalak has pointed out, many good boats were made with polyester before epoxy prices came down from the heavens. I think the key thing is understanding the material. Here are a few points to know. 1. Polyester has a shorter shelf life than epoxy. Buy it from a place that moves a lot of it, and if you're in doubt, buy fresh hardener. I read that polyester laminating resin has no wax in it, so the resin itself stays exposed to the air. This prevents a complete cure on the top surface, so the next layer can stick to it. Finishing resin has wax in it Back to Fillets and GlassIt took about 45 min to lightly sand the fillets, then about another hour to get the glass on. I first brushed on some resin thinned with acetone, then cut the glass fabric and laid it on, dabbing with resin where necessary to keep it on. Then I went back and made sure the glass was thinly wetted with resin. This took about 300 mL of resin. This is important because the next coat will need to contain enough hardener to catalyze itself as well as the resin I already applied. The resin comes with 3.5 L of resin and 44 mL of hardener, so the mix ratio by volume is 80:1. Here we need to take a chance and guess how much resin will be needed to finish off these joints. I'm thinking 150 mL, which brings our total so far to 450 mL. This equates to 5.6 mL of hardener. The hardener comes in little tubes marked at 44 and 22 mL. A quarter of 22 is about what we want, which can be measured out by eye - easier if gradations are added to the tube with a permanent marker. It ended up taking twice the 150 mL I estimated, so the inside chines might be a bit overcatalyzed. Resin takes longer to cure than Bondo, and the November "heat wave" we were having equated to 60 degrees, so I applied some heat with a couple halogen work lamps. If you use these, keep them moving! 300 watts is a lot and can really torch things.
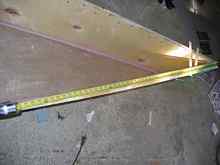
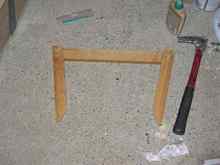
You only want it lukewarm. If you get it truly hot, you may start having trouble with air bubbles coming out of the wood. FramesWhile I was moving the lamps around, I made the final frames. I decided to put them about 40" from the top of the stems, since this is about where the bottom gets wide enough to fit one's butt with any degree of comfort.
I measured the bevel angle directly from the boat - it was 10 degrees on one end and 11 degrees on the other, since my distance from the stem wasn't exactly symmetrical, and my re-glue of the stems might not have been perfect.
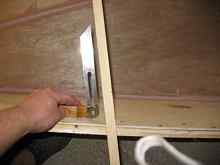
Here are the frame parts. I did it upside down from the normal rowboat method because I wanted the bottom to drain freely, and to maximize stiffness for the weight. I also wanted a rail I could use the tie the boat down to the roof rack.
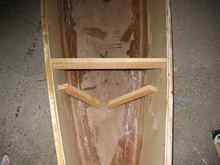
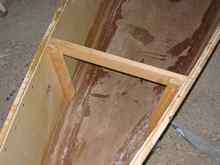
Here it is nailed and glued together. Be sure you mark all the lines you need to while you hold the parts in place on the boat.
And here it is screwed in place.
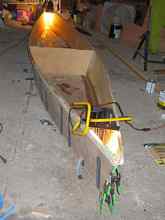
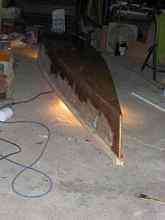
I probably could have removed the temporary frame at this point, but I decided it was safer to add the exterior glass first. ('m glad I did, because the gunwales did spring in noticeably when I removed the form.) Back to GlassingOnce I got the boat flipped and the chines sanded round, I primed the bottom and chines with 250 mL of thinned resin. Then I cut fabric and laid it on, and wet it out using 300 mL plain resin for the chines and stems, and 600 mL for the bottom. This means we have a total of 1150 mL of resin already on the bottom that needs to be catalyzed. The inside taught me that I'm likely to use about the same amount of resin for the final coat as for the wet-out coat, so I'll figure on 1150 mL of resin with a double dose of hardener. To make this manageable, it will be eight batches of 150 mL, each with 4 mL of hardener. Once the resin was on, I had planned to added packing tape to the chines to keep the fabric tight against the wood. It turned out I didn't need to. That priming coat of thinned resin works wonders. Here's the resin curing overnight with a bit of heat underneath.
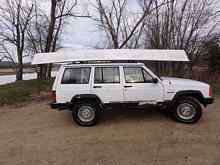
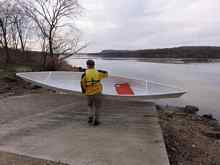
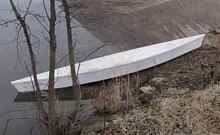
All of this fiberglassing took an entire day, around eight hours. That care paid off, however, in less sanding - only two hours. However I should be clear that all I did was knock off any uncomfortable protrusions with 40 grit on the belt sander, then give a quick scrub by hand with 100 grit to prep for paint. I did not concern myself with perfection! Another issue that came up was a few spots of uncatalyzed resin. This was easily dealt with by brushing them with some overcatalyzed thinned resin, but it is something to watch for when sanding. Probably I didn't stir thoroughly enough. The final touch was screwing and gluing the keel in place (PL premium). This is cut from the same piece as the gunwales are, also 1.5 x .75 inches. I put this over the top of the fiberglass because it is a giant pain to try to glass around those tight corners. Either way, trace it in place, drill the holes, then dry fit before you start adding glue. There's not enough time to get all that glue in place if you're trying to drill anything. Once it's screwed down you can rasp the ends into shape and sand to finish. Then all we need to do is add paint - I had some left over white industrial enamel. I'll get around to a second coat of paint, but I happened to get really lucky with another day of temperatures approaching 60 degrees in mid-November. In Wisconsin, this is good cause to drop everything and test a boat! TestingSince this boat weighs only 45 lbs, it is not hard to portage, and easy to put on top of the car.
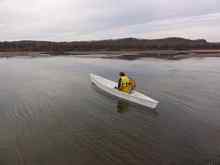
I put in at Arena on the Lower Wisconsin River for a quick test. My brother Jamie was kind enough to assist and take some photos. I'm a relative canoe novice, so here I am gingerly finding my way forward. This pirogue seems about as stable as the few canoes I've been in. (Meaning not very.)
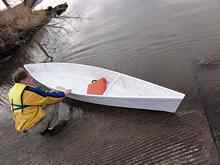
Here I've scooted forward and gotten the boat off the concrete ramp. Clearly it isn't trimmed yet.
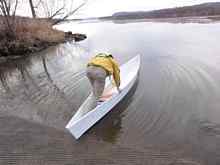
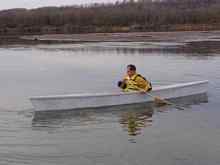
It appears to trim best in solo mode with the skipper's butt right on the fiberglass butt joint that marks the middle. This of course makes sense. With my 200 lbs in the boat, the stems are just barely immersed, which is good for top speed. (My bad "solo C" stroke is not.)
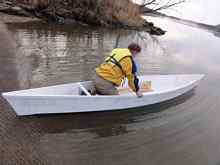
Here is the boat underway coming back to shore.
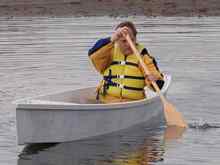
Then my brother joined me in the boat. His added weight brought our total to 450 lbs, and I don't think I'd want to go much higher in this boat, mostly due to cheap plywood and fragile construction. The hull form itself will probably take more load, since we had maybe 6" of freeboard to spare and it paddled easily enough. (Note that the polyester joints didn't complain at all!) Vital StatisticsThe final boat came in at 15'9" long, 29.5" beam (the gunwales sprung in a bit after a removed the temporary frame), and 45 lbs. Built with BCX plywood it would probably be a few pounds heavier, but a bit more rugged. Potential refinements. I may add a couple more .75 x .75" skids on the bottom halfway between the keel and the chine for a little more stiffness. Another enhancement might be some crosswise 1x2 pieces glued and screwed to the inside of the bottom to stiffen the plywood where you side and keep your butt out of the cold water that finds its way in. I think you will definitely want a backrest thwart at any point where you are likely to need to rest your back. Perhaps one more thwart near the middle can serve as backrest for a solo paddler and the forward paddler, if the boat reverses direction for these two modes. However a moveable seat with a back might be the better approach, though this hull form does seem to be rather tolerant of bad trim. Perhaps the nicest refinement will be a sister ship so the whole family can go paddling next summer! CostsIncluding all materials and consumables, the boat cost almost exactly $100. (You can't beat the price of the plans!) I lost track of the time a bit, but I think I spent around 20 hours getting it built. Let's say 24 hours to be safe, since I still need to put one more coat of paint on the inside and outside both. That is a very attainable project.
Well, what can I tell you - sometimes you just need to build a pirogue to make it through the month. Maybe I had too much Tabasco sauce. Hey, that's a good design name. Tabasco. |