
 Custom Search
|
| boat plans |
| canoe/kayak |
| electrical |
| epoxy/supplies |
| fasteners |
| gear |
| gift certificates |
| hardware |
| hatches/deckplates |
| media |
| paint/varnish |
| rope/line |
| rowing/sculling |
| sailmaking |
| sails |
| tools |
| join |
| home |
| indexes |
| classifieds |
| calendar |
| archives |
| about |
| links |
| Join Duckworks Get free newsletter CLICK HERE |
|
|
| The Portuguese Dinghy Build - Part One |
by Steve Woods
- Dallas, Texas - USA |
|
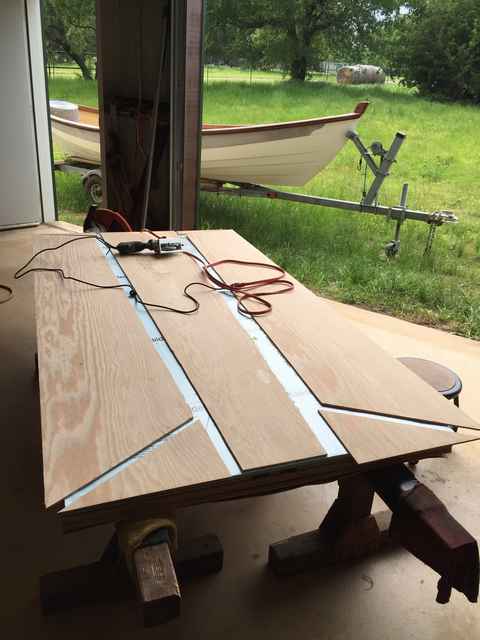
The little blue dink I towed 150± miles behind WENDY on the Texas 200. I really didn't intend to sell the dinghy I was restoring but someone wanted her worse than I did. That being said, I found myself needing another one with not much time to find/build one. There aren't many usable options in my neck of the woods, so I decided to build a simple one. Preferably one that didn't look like she bumped her nose on a concrete bulkhead. As I was searching plan options, I ran onto a thread on another forum dedicated to the plywood PORTUGUESE DINGHY. With a bit of research I found the plans/building instructions FREE for download along with a bunch of pictures of in-production & finished boats. koti.kapsi.fi/hvartial/dinghy1/simboii.htm They're cute with an upturned pointy nose and the plans specify only 2 sheets of 1/4" plywood along with a few extra pieces of lumber yard stuff. The plans call for stitch & tape and I am familiar with that process. Another feature that appealed to me was the 1100# to swamp comment in the instructions. And being a CERTIFIED LARDUSS BOTTOMUSS MAXIMUSS I was sold... I decided to opt for 3/8" for the bottom since I plan to tow her on the TEXAS 200 where it is highly likely we will encounter an oyster bar or 2 at the camp sites and it just made me feel better since fiberglassing the bottom is not intended at this time. Many years ago I built 2 8' long knee high sawhorses out of 4x4's and they are now back in service with this project. Waist high strong backs & work tables don't agree with me any more. Knee high is perfect for working while rolling around on a mechanic's stool. Add a short stack of plywood topped with a 4x8 sheet of residential insulation foam & voila the perfect work station for this old man. Laying out and cutting the sides was apple pie simple.
And on top of the foam they were easy to cut out without worrying about cutting my work surface.
The stem, called for in the plans, was a 1" square piece that seemed to be a bit on the light side and didn't offer any plywood end grain protection. HD had some straight grained 2x3x8' in their fencing section and several of them jumped up on top of the Jeep offering themselves for sacrifice. A 1.5" square piece was substituted for the specified 1" pine and shaped to my likin'.
It was then time to test the new composite nailer I got from DUCKWORKS. With straight pox painted on the bare surfaces and a generous application of the thickened stuff the 3 parts were assembled and able to stand on their own.
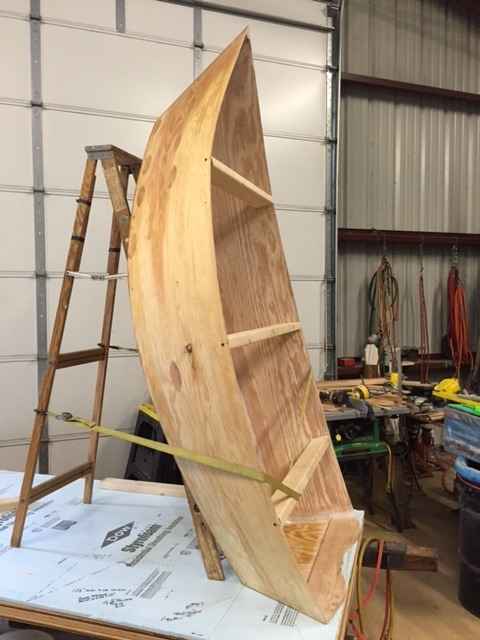
Not having used the composite nails before, it was time to let the pox cure before proceeding. With the sides fastened to the stem, it was time to screw the spreader bars in place and pull the sides in to the the transom where I opted to use zip-ties instead of the wooden block method described in the building instructions. The wooden blocks didn't allow as much adjustment for symmetry as I wanted.
The parts came together quite nicely. A screw in the top of the stem allowed me to do the diagonal measuring solo.
It only took a tiny bit of encouragement to make the hull symmetrical.
After tracing the edges of the sides onto the 3/8" sheet of plywood by rocking the sides fore & aft, I rough cut it out using a Rockwell 4-1/2" circular saw set just deep enough to penetrate the wood. The little Rockwell does a nice job of sawing the gentle curves. With the bottom rough cut and zip-tied to the sides it was easy to place thickened pox fillets between the ties. Once the fillets had cured and the zip-ties removed I finished filleting & taping the inside, before flipping the hull to start on the outside of the chines. A 1/4 round bit on my router made quick work of trimming the rough bottom edges close enough to sand the rest of the way.
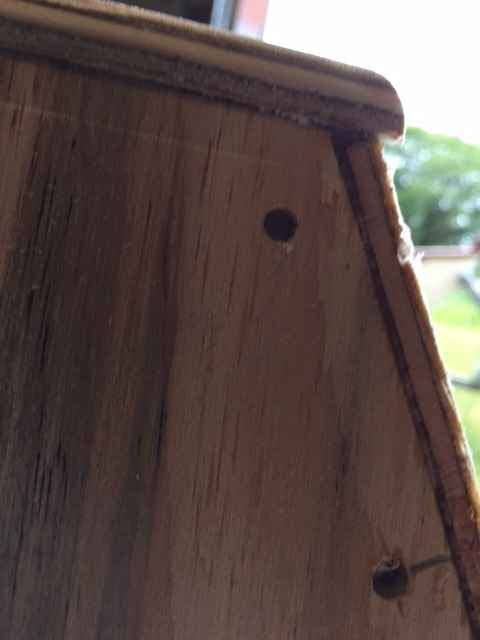
Sixty grit paper on a DA air sander finished the edges quickly, making them ready for taping. You can see in the last pic how much larger the holes have to be when using zip-ties instead of fine wire. The zip-ties were easier for me to use than the wire I used in previous builds. Zip-ties are easier to see & easier cinch in for this old man. They are also easier to remove from the pox when I get it too close to them, as seen in this pic.
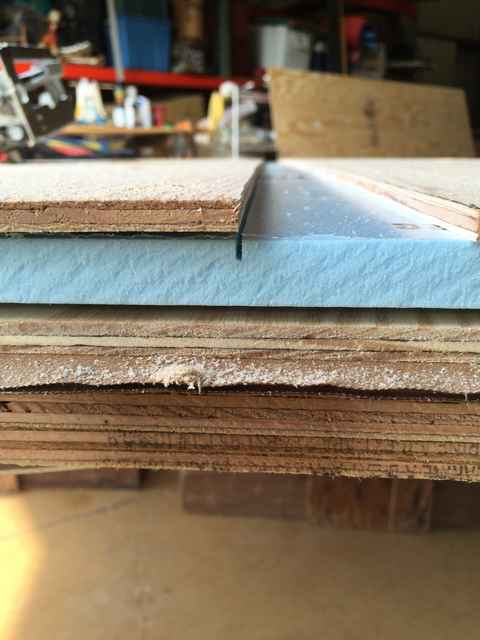
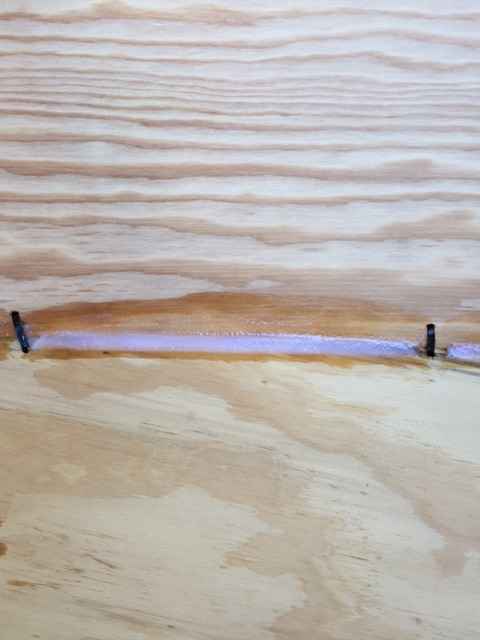
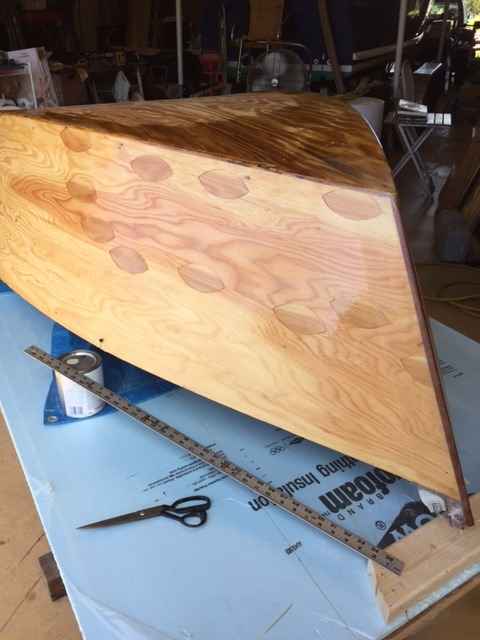
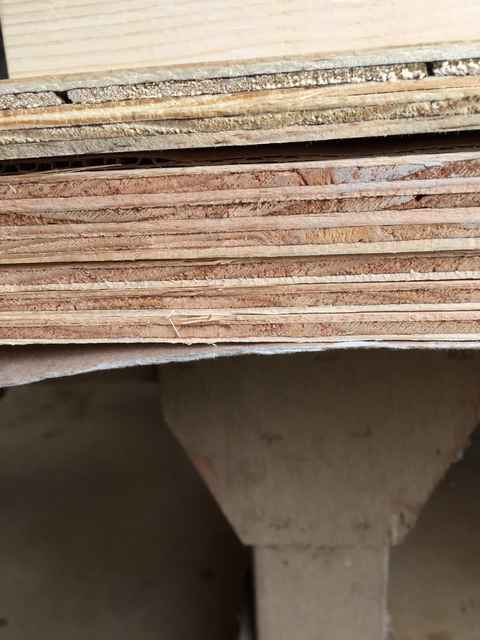
Sorry for backing up a bit butt I thought the image & experience/explanation would be helpful. Once her hull was bottom side up, I filled a couple voids in the BCXYP I am using for the bottom. During this process is when I realized my excitement in getting started caused me to grab a sheet of 1/4" AB MARINE plywood without carefully inspecting both sides prior to cutting. Had I done my due diligence and seen what was on the other side of the sheet, I would have either grabbed my other sheet or at least turned it over so the footballs would be on the inside & compressed by the bend of the panel. There are 11 footballs in the 1st 3' of the port side which I had not seen yet!!! At this time I would like to blame poor lighting & aged eyes, BUT the real culprit is my mental state and the excitement surrounding getting started. The BCXYP I am using has far fewer issues on it's surface than the AB MARINE. Who knows how many internal issues are lurking? The BCXYP void.
The 11 footballs.
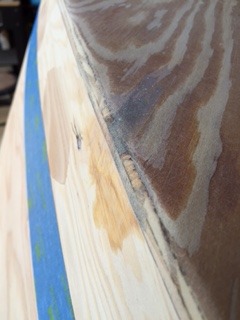
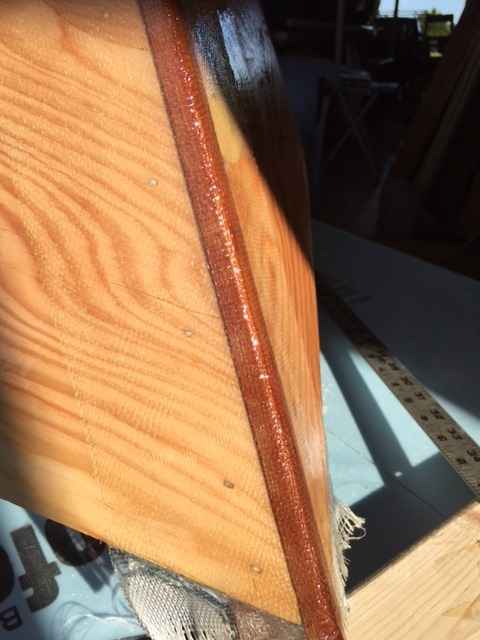
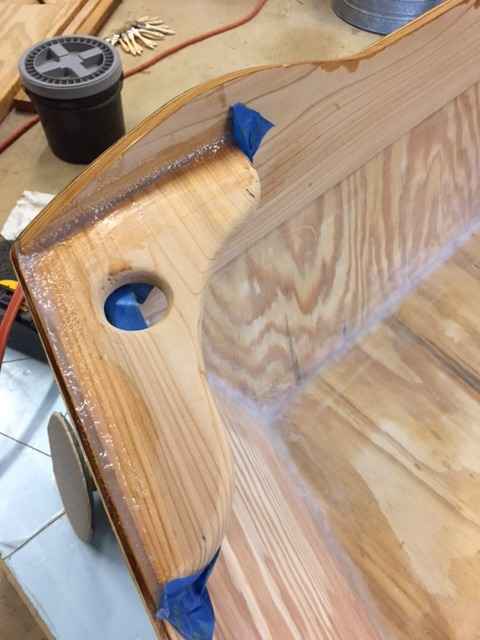
Isn't it amazing how the barrier coat of pox accentuated the footballs, specially when I opened the overhead door & had Mother Nature's spotlight illuminating the area! Filling zip-tie holes and taping the external edges went fairly well. The TROPICAL SLOW hardener I am using makes these chores much easier for this slow old man. Allz I gotz to do is hang around a bit longer, watch for any glitches and tweak 'em as the pox sets. EASY PEASY... This is when the work I did making the modified stem really validated my efforts. Too bad I will be covering this whole project with paint. Wouldn't this look cool finished natural?!
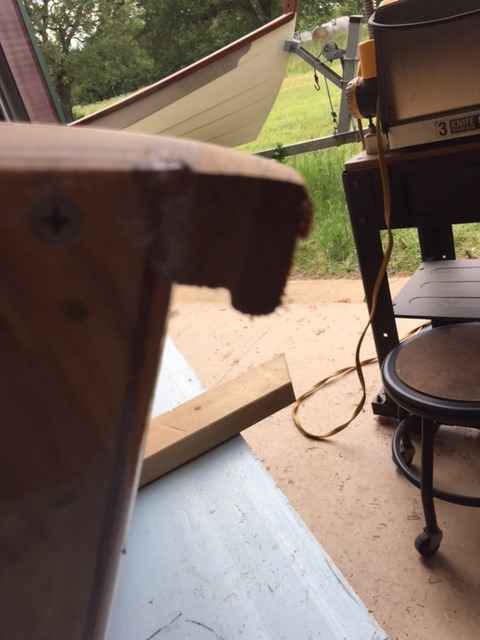
Time now to let the pox cure and see if I missed any more issues that need kneading. Two layers of glass tape over the inside of the stem & 2 layers of glass over the outside of the stem should provide a sound base for a tow eye butt I'm thinking. I will still add a plywood backing block inside for insurance. The capping of the leading edge of the plywood came out well.
Time to do some stabilizing/sanding/cleaning up on the inside. A bucket of bolts behind her did a nice job of holding her on her side while I sat on my stool & attacked the job of filling the voids and sanding the surface for painting.
There were still some issues with the inside of the transom, so a step ladder stepped up & held her upright while I attacked them.
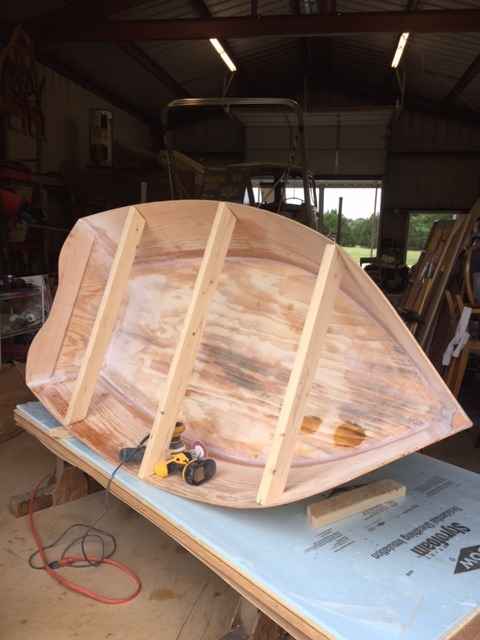
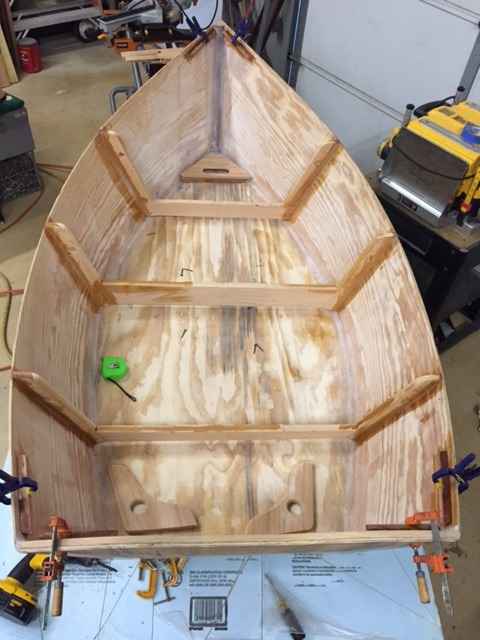
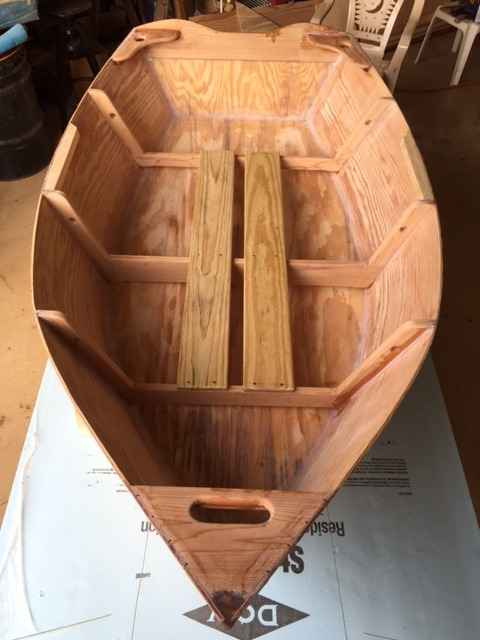
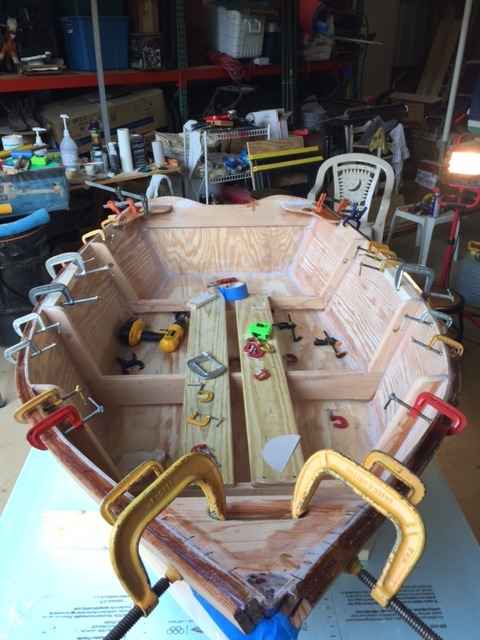
The next step in the instructions would have been to install a single center thwart/seat base designed to support a pair of longitudinal planks. Being a LARDUSS BOTTOMUSS MAXIMUSS I was not feeling too warm & fuzzy about only having one support under a 6'+ long seat so I measured and fitted two more which would be in the same approximate locations as the building spreader bars, giving me a total of 3 @ about 18"± spacing. The angles and dimensioning were a bit sporty affecting. When I got the three thwarts fitted & dry screwed in place the hull became quite solid, loosing the vast majority of any remaining flex.
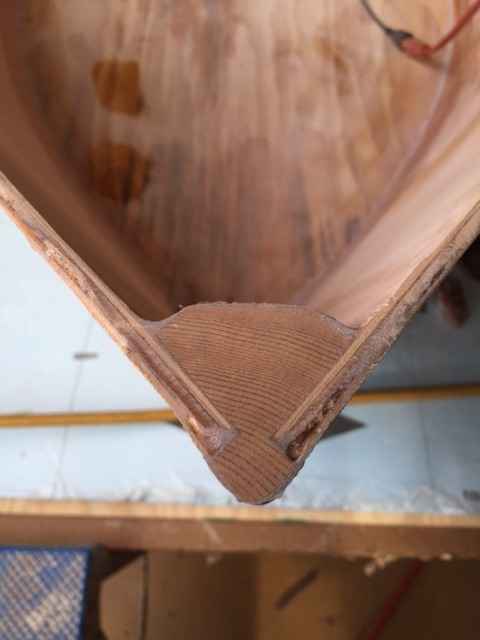
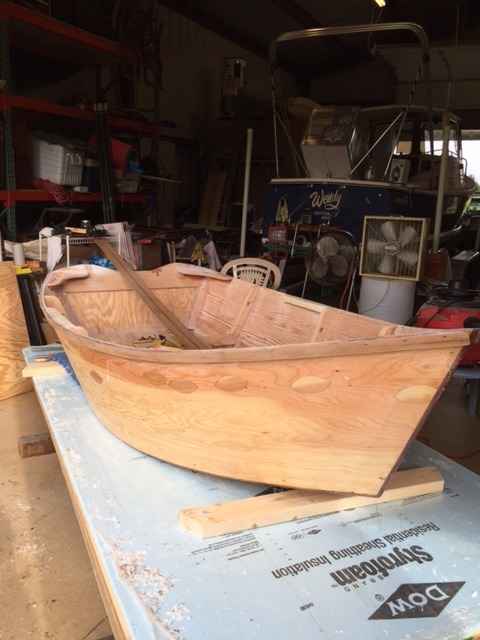
Installing the breasthook & transom knees resolved the rest of the flex making the hull very stiff.
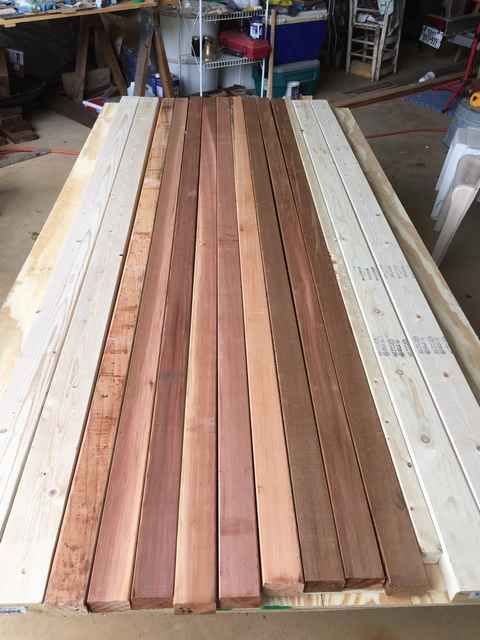
After fitting and gluing the row lock blocks on the inside of the gunn'ls, it was time to let the pox cure for a day or two. I just re-checked the date on the day I brought the wood together and it was 4-29-16. The 2 by's & the straight grained WRC.
All sitting on the plywood.
The only thing left to buy was the 4x8 sheet of foam & the sheet 3/8" BCXYP for the bottom. With the knees & breast hook heavily pox'd in place, I would have been comfortable taking her out under controlled weather conditions on inland waters. The TEXAS 200 has, many times in the past, thrown some wild weather and heavy seas at the participants which resulted in some boat failures. So I decided to go ahead and add screws to these pieces and the row lock blocks. Some may say this is overkill, but it seems like this would be easier than gathering up pieces of wreckage in the ICW.
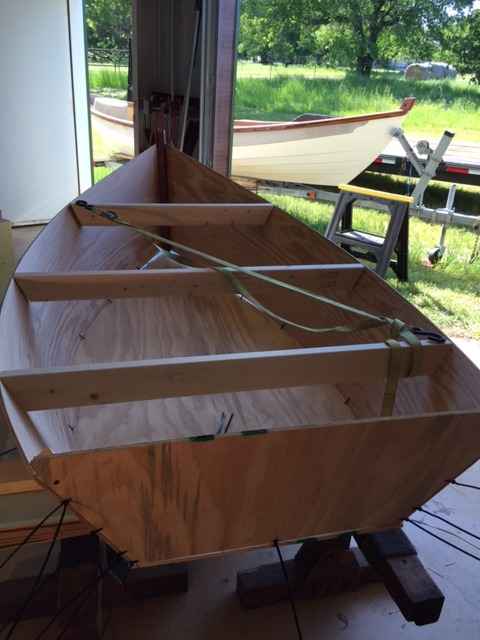
While I had the screw bit on the drill I went ahead with mounting the longitudinal seat planks. The original plans/instructions showed full length planks but lopping them off at my added frames leaves spaces where a pickle bucket will fit in the front and a milk crate will fit between the aft frame and the transom. Could come in handy ±.
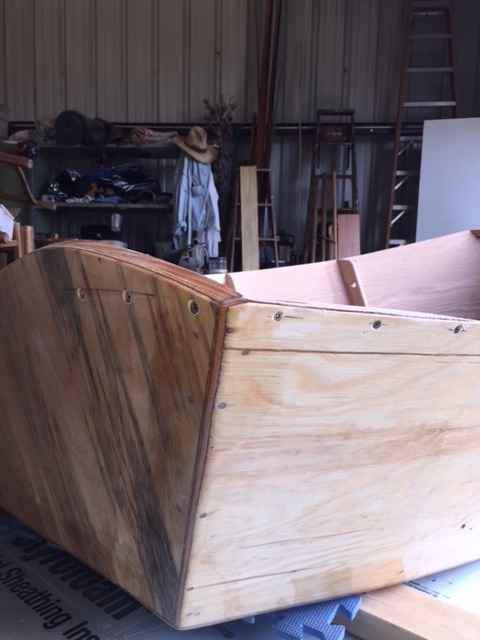
As I look at that pic allz I can say is WOW, she really does look like a boat! Brings to mind a song by Jimmy Buffett & Alan Jackson. Something about A FAIR CURVE & A NOBLE PLAN rings true in this old man's mind. The original plans call for a 1" square outwale to keep the weight down and simplify construction while providing a modicum of protection. My straight grained WRC is a bit softer than the recommended pine so my ruff guestimations predict 1"x1-1/2" might work just as well AND if I cut the parts right I can have a finger lip on the outside for lifting purposes. Cutting the desired shape is possible, but the decision was made to make the wale out of two pieces laminated together. Laminating should also add strength. The first straight edged/sharp cornered layer went on with screws from the inside and, once cured, it cleaned up nicely.
For the second layer I removed the short screws and replaced them with slightly longer ones, not long enough to poke thru, and used clamps to help force the pieces into submission. You can see I HAD ENOUGH CLAMPS, when the screws were employed ;-).
The second/outer layer was pre-routed to provide soft edges and the overhang that provides the finger lip I envisioned.
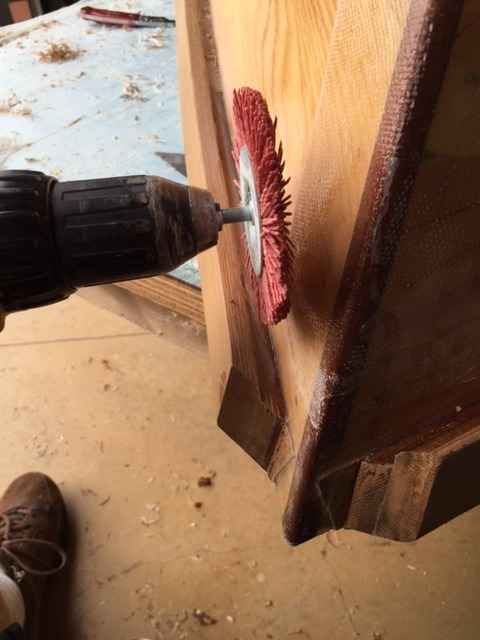
Once I flipped her over and grabbed my goto tool for cleaning up fillets, I realized I hadn't shared this tool with the readers of this thread. Some time ago when I was restoring an old axe, I needed a tool that would remove the rusty scale or employ ARMSTRONG. A drill mounted wire wheel/brush came to mind and warranted a look-see at the infamous HF, next to the Kung Fu all you can stomach buffet. My pard & I frequently use this climate controlled maze to "WALK OFF" our over-indulgence. Right next to the originally thought of brass bristled wire wheel was a rack of wheels with plastic bristles that are imbedded with grit, grit of different ferocity. Fine grit to gnarly grit. For a mere $4, WHY KNOT.
This is the second one of these wheels I've bought, with it's predecessor having dunn yeoman's duty, cleaning up pox fillets as well as removing rust scale from the axe head.
The plastic bristles can get into the tightest of places and knock the gloss/glaze off the pox while leveling out my bumpy fillets. The next step will be to re-sand the outside of her hull in preparation for adding the skids & skeg. |

To comment on Duckworks articles, please visit one of the following:
|


 |