|
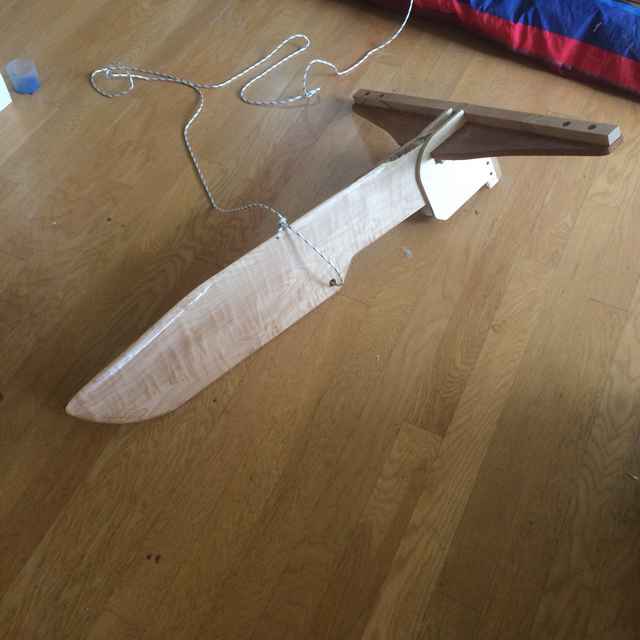
In my last report I had assembled all hull components in my back yard, and begun work on the rudder. It's curly maple, the rudder downhaul is shock cord (much like the classic "Curious Boat for Adventurous Travelers") and the uphaul is fairly simple as well, led to a fairlead on the aft deck. The rudder box is screwed and glued together from scraps leftover from other parts of the boat.
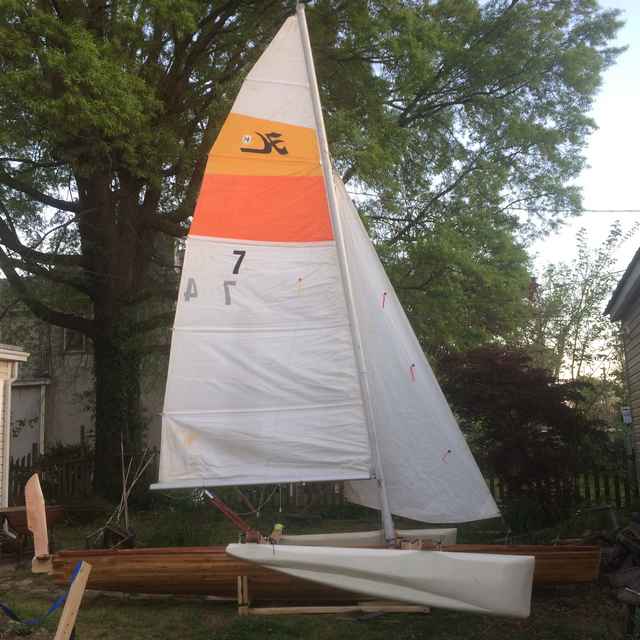
I also set the boat up in my back yard again, this time with mast and sails, to get an idea of what it would be like, and to decide how much stuff I was going to take for its initial immersion.
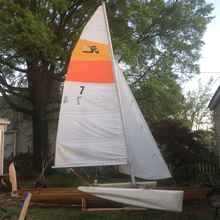 |
In the picture, looking across the outriggers at the bottom, you can see some flex. I now see why many stayed trimaran rigs feature water stays. As wind pressure builds up on the mast, in this case a starboard beam breeze in my back yard, the mast tugs towards port, lifting up the back of the starboard outrigger. The flex isn't crazy, and the box beam is fairly solid. I figured some flex would happen especially with the size of the mast and sails, so I laminated fiberglass onto the length of the aft crossbeam to help bolster it. I also plan on making platforms for the crossbeams - simple "butt boards" that a passenger can use to both hike out on, and also help weigh down the windward side of the rig. The additional weight of the passenger on the crossbeam will tug towards windward on the mast through the stay, acting sort of like the hiking cables that originally came on the Hobie 14 turbo. I was a little nervous about getting the length of the stays right, but I stayed as close to the original Hobie measurements as I could, and with a little trial and error, everything worked out. I've never owned a boat with a roller furling headsail, so to see it work right in front of me was exciting.
After setting the rig up, I felt a huge relief. Many people in my life expressed occasional doubt about whether or not I would finish, even I sometimes doubted whether or not it would happen at times. Though at this point the boat had not yet been in water, It felt very surreal and satisfying to see it completely assembled.
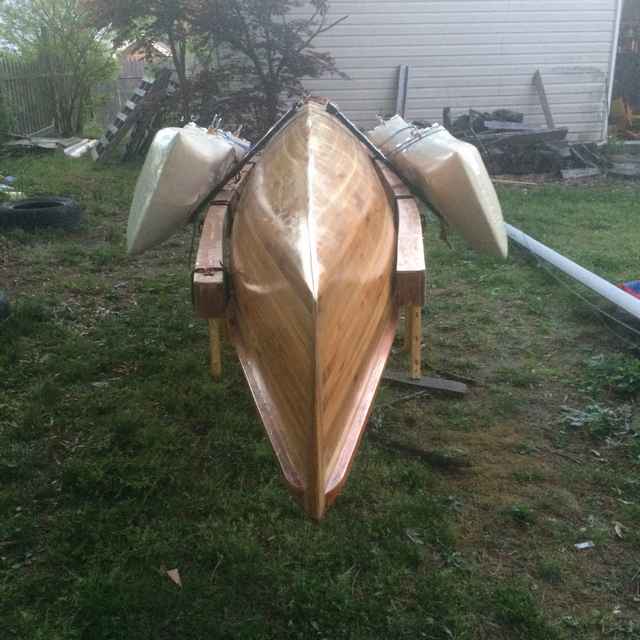
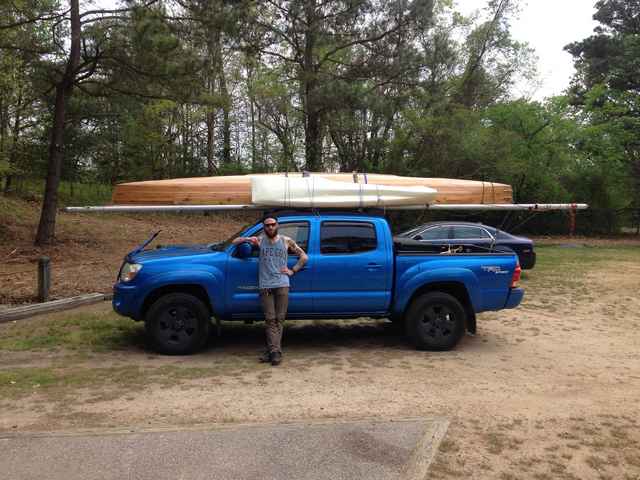
The next step, of course, was to put it first on my truck, then in the water. I didn't intend to sail it or paddle it away from shore, I just wanted to get a sense of how the truck handled with the boat on top, and how the boat sat in the water so I could determine where all the action would happen inside. I picked a day for the water, and loaded the boat on the truck the night before so I could take my time. I have a 2006 Toyota Tacoma double cab with the OEM Toyota roof rack. There are heavier duty roof racks available for this truck in the aftermarket, but they are also more expensive, and the OEM rack folds out of the way when not in use to help reduce noise and resistance from wind at speed. The boat altogether probably weighs somewhere between 140 and 160 lbs, which is right around the suggested maximum weight limit of the OEM rack's 150 lbs. In the future I might get a hitch-based T-bar rack like the Thule Goalpost to help take weight off the cab, but for its initial trip, the roof rack was superb.
 |
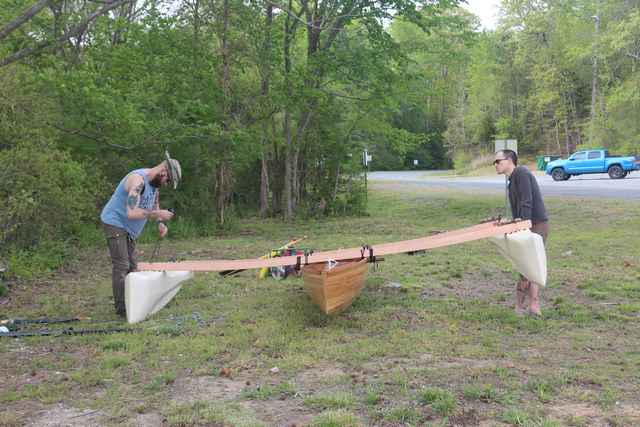
I set the boat up on sawhorses spaced apart to resemble my rack, and arranged everything as it would sit on the roof. The crossbeams fit nicely on the posts used to tie them down, and the outriggers sit on a simple saddle.
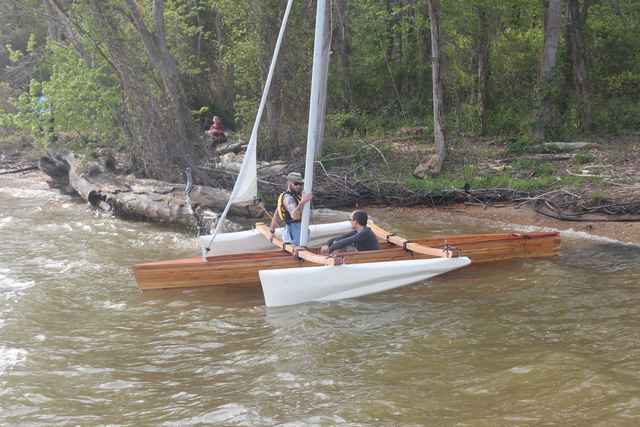
The boat is the same length as the truck, and the mast really doesn't stick out too far on either side. This was taken on the way to my chosen flotation test spot, the James River at Lawrence Louis Jr. Park in Charles City, Va, a little drive outside of Richmond, but the closest public beach I could think of.
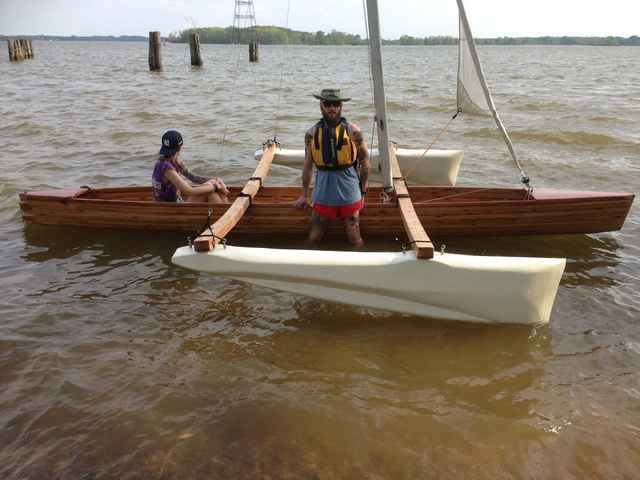
I picked a spot in front of the short beach that was wide enough for me to walk the assembled boat through to the water.
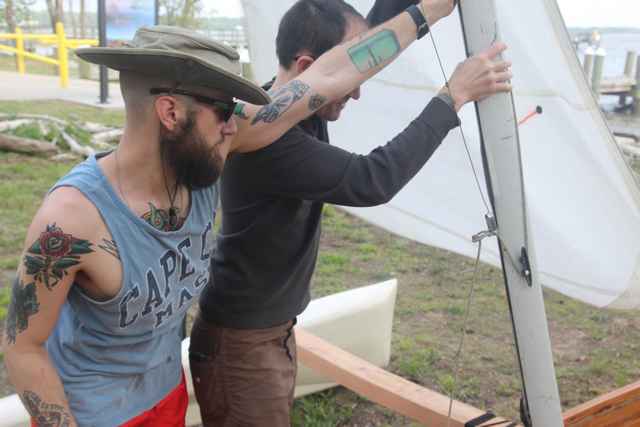
That’s me in the hat, with my friend Johnathan, who was with me on many of my original canoe trimaran adventures years ago. We took the boat to the water, and put it in.
Here my wife is sitting where the boat’s captain will sit. The boat is trimmed with a little weight in the back to account for additional load on the front under sail, and to allow for cargo and passengers.
While we were in the water, my friend Johnathan urged me a little bit to paddle out into the river, as everything was going well so far. I was perhaps too cautious, and elected to keep the boat at shore. This was, after all, merely a flotation test. I knew the boat would float, but I needed to know both where its waterline would fall and how it would ride on the truck, and this trip had satisfied both.
I can’t wait to sail this thing! At this point, I don’t think it’ll go in the water before I travel. It’s kind of crazy to haul a boat across the country that is still in its phase of testing, but I am doing the most I can given my circumstances; I would love to linger and finish the boat, but I also eagerly anticipate my school year across the country.
I’ll keep you updated, and send you some pictures on the road!
|