 Custom Search
|
| boat plans |
| canoe/kayak |
| electrical |
| epoxy/supplies |
| fasteners |
| gear |
| gift certificates |
| hardware |
| hatches/deckplates |
| media |
| paint/varnish |
| rope/line |
| rowing/sculling |
| sailmaking |
| sails |
| tools |
| join |
| home |
| indexes |
| classifieds |
| calendar |
| archives |
| about |
| links |
| Join Duckworks Get free newsletter CLICK HERE |
|
|
| Experiments in Foam Boats - Part Three |
by Josh Withe
- Merrimack River Valley, New England - USA |
Part One - Part Two - Part ThreeSawfishOnce we got back from our camping trip, I finally got to use Sawfish the way I dreamed off. She has been strapped to the roof of my car for weeks, exploring the local ponds and rivers after work. Using my GPS I've discovered that I can paddle Sawfish forever at 4 mph, and can sprint at 5.5 mph when I want to. She draws less than an inch of water, allowing me to sneak into areas most kayaks cannot. Thanks to the light hull, I can park and walk a good distance to launch her, something I find most paddlers avoid. Before I had a chance to test her stability completely, my daughter had already found that she can paddle Sawfish standing up. Since then I've tried it and found I can stand and paddle Sawfish like an SUP. This probably won't work for the average first timer, or people with only average balance, but I have one guy building a Sawfish a few inches wider so he can stand and cast. I like the ability to use the boat the way I want, while I think SUP's are good exercise, I know for a fact they are SLOW! I prefer to have the option to sit and go fast. I am going to tweak the cockpit position though, as I find the best speed comes when I slide my seat forward until my feet are resting against the forward bulkhead. Carrying a child or dog forward would also trim the boat correctly. Looking at "real" kayaks, I see the paddler's body should be located just aft of the center of the boat.
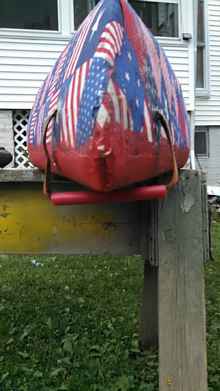
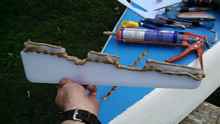
I had never found a comfortable paddling seat, stadium chairs didn't cut it, neither did the $40 motor boat padded chairs. I finally found a folding seat that I can paddle an hour or two on without my rear going numb or aching. Searching around on the web I've found this seat sold as the Oniva seat on many websites. It isn't waterproof, and I don't know if it will act as flotation, but it is the only thing that works. I found it sold in a local discount chain that can only be found in the northeast US, however the name Oniva wasn't on it anywhere. Many paddling sites recommend a seat called the "sit backer", I'm too cheap to pay what those go for. I get my seats for $15. While I made this boat to be the "perfect" boat for my parents and older kids, once I told my dad about Sawfish, he was sure he wouldn't want it. I finally had to tell him to wait and see once he had a chance to paddle both boats side by side. Columbus day weekend my family got together over a few days. On monday we all got out on the ice pond behind my parents house. I brought my stack of mouse boats, Sawfish, and a plastic kayak I found by the highway. The older kids took off in 4 boats right off, when I caught up with them in my parents canoe, they were at the upper end of the pond, carrying both boats up to the next pond. One pair had the foam mouse, Seafoam, and one had Sawfish. (I wonder why they chose the foam and not plastic or plywood?) Thanks to the lightweight hulls, four of those kids got to explore the next pond up in the chain, somewhere I've never been. After they returned (the upper pond has many downed trees in it) I got my dad into Sawfish, turns out he loved it! As I planned the hull is wide enough for him to feel stable in, and the length makes it easy to drive, and gives it much better speed. After that I got my mom out in Sawfish. She wasn't so sure about the strength of foam, after getting in and paddling a short way, she was convinced. With my dad in Seafoam, we spent the next 45 min or so cruising from one end of the pond to the other, enjoying the late fall foliage, and warm sunshine. The kind of day you never want to forget. My mom said she found the boat very easy to paddle, thanks to the late fall and lack of rain, the pond was almost a foot low, this meant we were pushing through water weeds on almost the whole pond. Thanks to the flat bottom, Sawfish pushed right over the weeds without feeling any real drag. Seafoam, and the plastic kayak being V hulled dug in much more. My parents never noticed the big gouges my J-bars wore into the hull. (I'll not be using the J-bars again.) To me this is one great part of a foam hull, in spite of the fabric being split, and the foam being dented, the hull was still watertight, EPS is waterproof all by itself. Once again, I, the builder, knew there was a defect, one that would have put any plywood boat out of commission. But nobody else noticed, and no water found a way in, no plywood delaminated. When I get around to it this winter, I'll fill those gouges with foam, then glue a new patch of cheap fabric over it, when the glue and paint are dry, I'll sand it smooth (ish), and call it good. Smaller dents and grooves tend to pop back out over time. Heating dents with a steam iron causes the foam to "heat activate" and smooth right out. Try that with any fiberglass skinned foam kayak! So far I have the second hull glued up in layers, but not sanded to shape yet, I'm rethinking the cockpit position on it. I plan on having my parents new foam kayaks ready to launch for next summer. You can see/follow the builds of these two Sawfish kayaks, and any other designs or ideas I have cooking on my facebook page. Sawfish has her own album. I called the album where I designed Sawfish “foam boat #3” as it was my third foam boat, if you don’t count that chunk I set adrift on the ice pond. And an Instructable. I entered the Instructable in two contests and won second place both times. Based on the number of pageviews and comments I see, there should be a good fleet of these hitting the water in the coming year. I am also mentally designing at least two more foam kayak designs. a much shorter boat for kids, and a longer (faster?) V bottom design that may be a flop, or not. I also want to get back to my SUP idea, I know my kids want their own, and I'm not made of money. I also have an idea to make a foam pulling boat. Stay tuned. Where did this start?As I stated in part one, I made my first foam boat to learn more about building with foam so I would be comfortable building a teardrop in foam. On the teardrop site tnttt.com there had been a few teardrops built with foam, but it seems everyone does it their own way. I remembered a builder many years ago in MAIB (Mississippi Bob?) building a dingy made of foam. As I recall he used a good bit of fiberglass and epoxy to make the panels as strong as plywood, the boat was strong, and rot proof, but he said it was heavy. The fiberglass added too much weight. On tnttt.com I found a guy who built a foam Puddle Duck Racer, from what he said, the foam was fine until he sailed it onto rocks, he put a plywood bottom on after that. Searching the web found a few more builders, but everyone uses a bunch of epoxy and fiberglass to skin the hull and make the seams. As far as I could find I was the first one to build a boat of foam skinned with regular old fabric. The experiment worked fine, with Seafoam having done many trips without an issue. When I shared the idea on a big wooden boat blog it got trashed, but the fact Seafoam and now Sawfish are still going strong, prove otherwise. I did find out that fabric skin as a hull coating goes back to ancient Egyptian boatbuilding, and probably before that. About the time I was finally convinced Seafoam was a useful boat, and began to let other people know about it, I saw the first of Dave Lucas's mentions of a foam kayak. Reading his building method for the first "too narrow" design gave me the idea for Sawfish. A foam layer cake. While his boats use cheaper foam and expensive coating, I use more expensive foam and a much cheaper coating. I built Sawfish for $110 the best I can figure. Why Sawfish?Way back when I was short, I got a bunch of old records my dad had as a kid. One of the 78 RPM ones had a story about Bozo the clown going deep sea diving. At the end he is trapped underwater and a sawfish cuts a hole to let him out of the shipwreck. Right after that my parents took me to the New England Aquarium and they had a real live sawfish, I was fascinated. Using a drywall saw to cut the hull out of the foam board gave me the name. |
To comment on Duckworks articles, please visit one of the following:
|
 |


